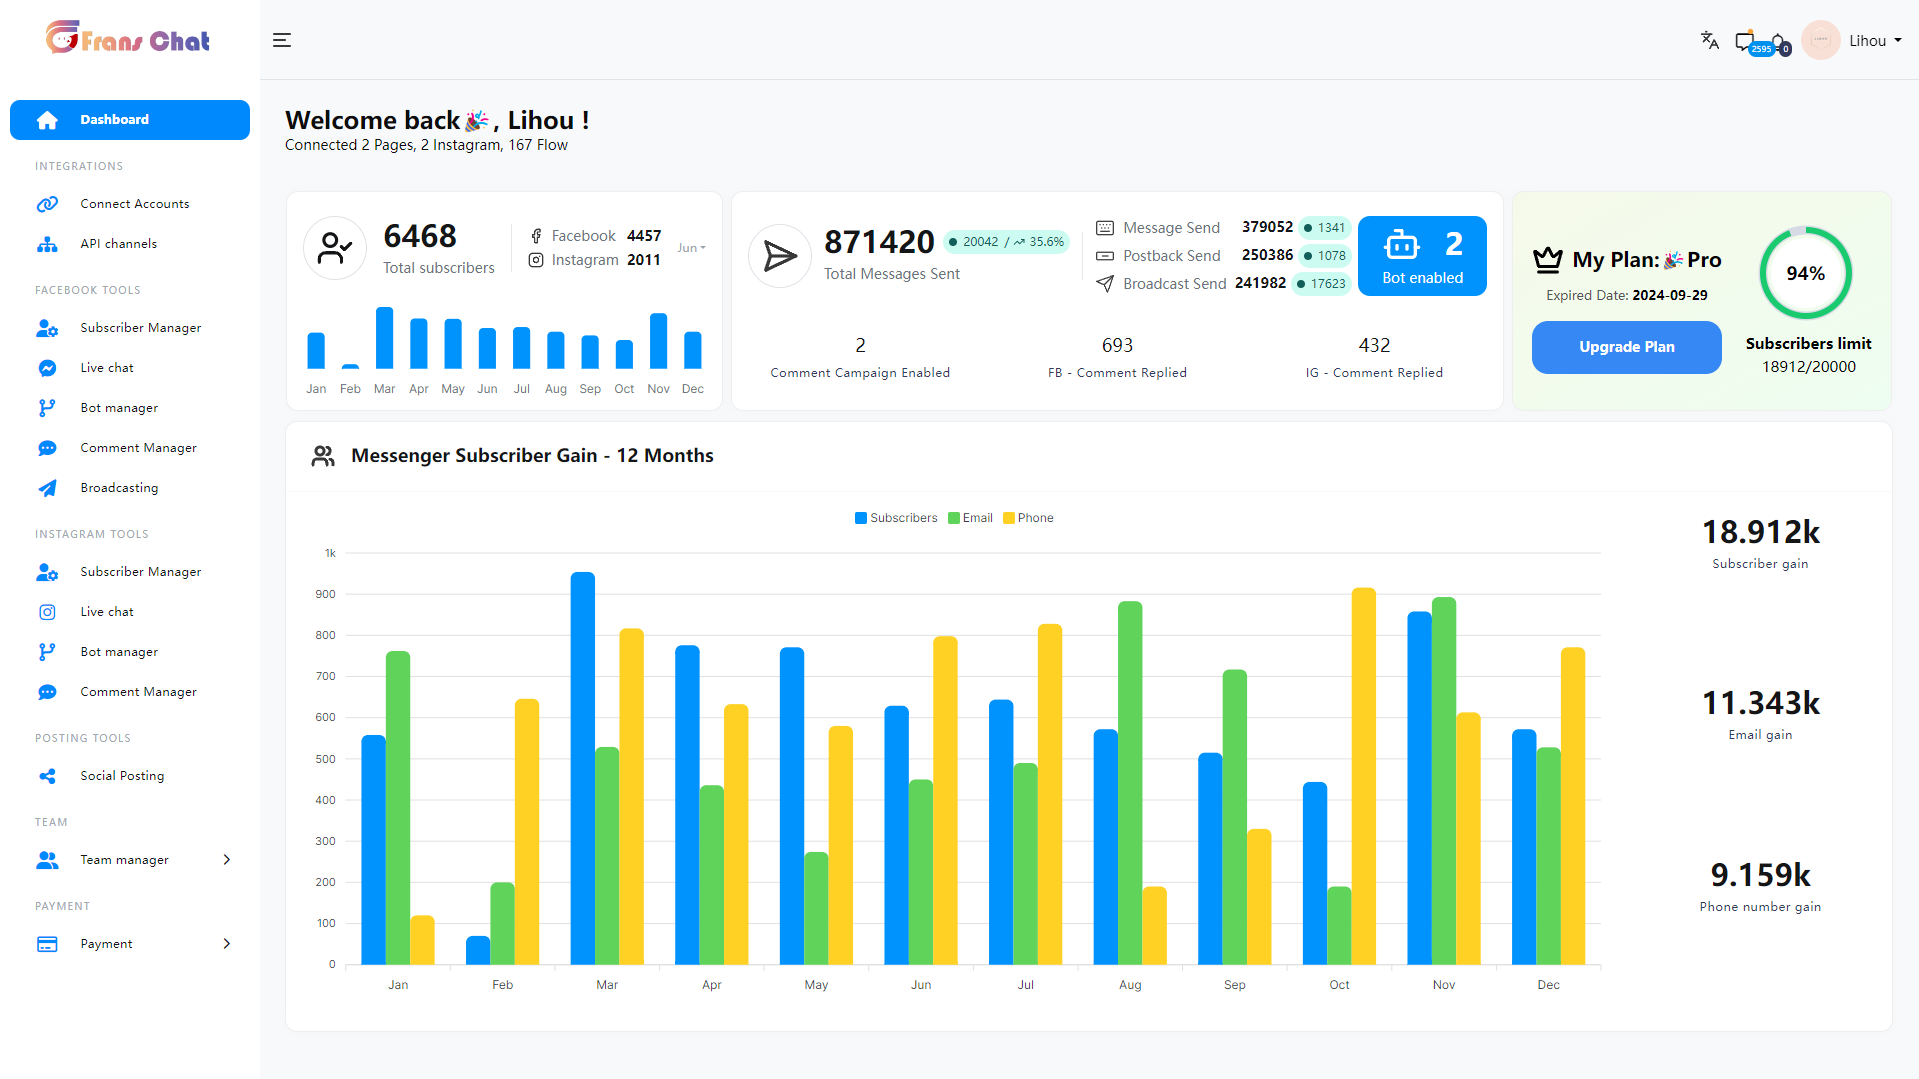
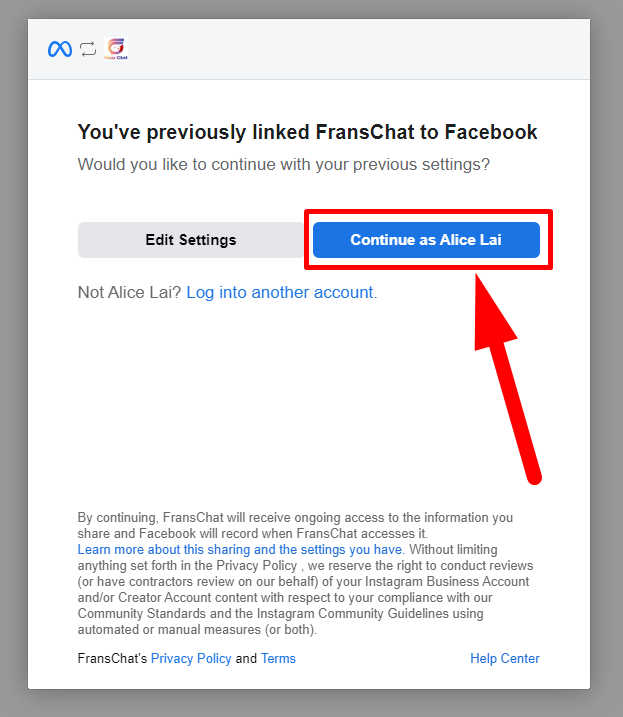
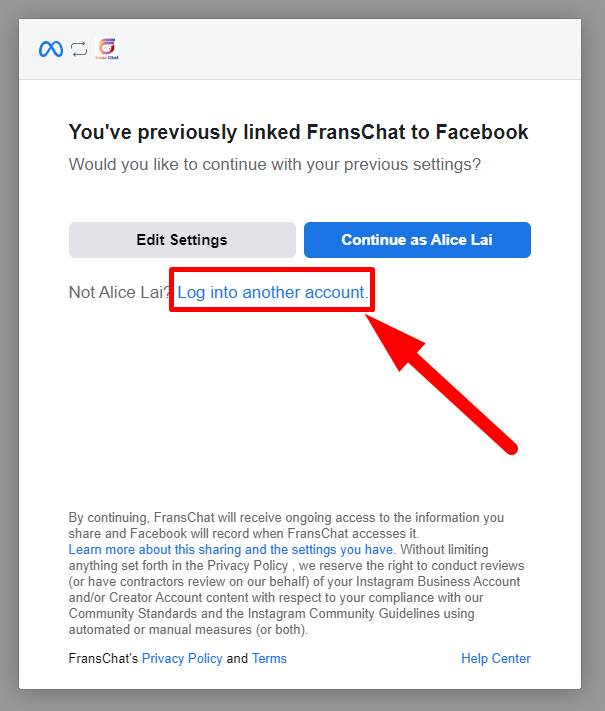
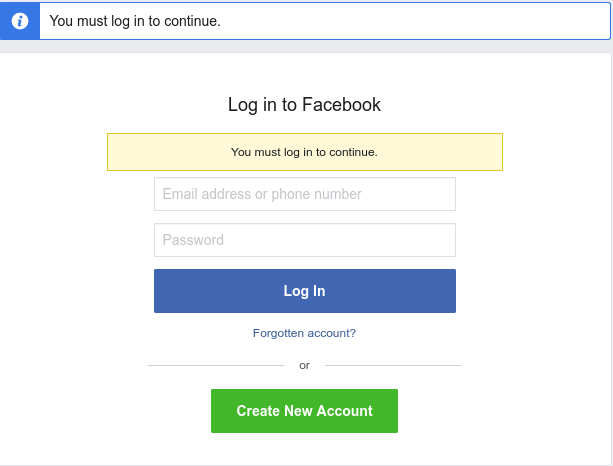
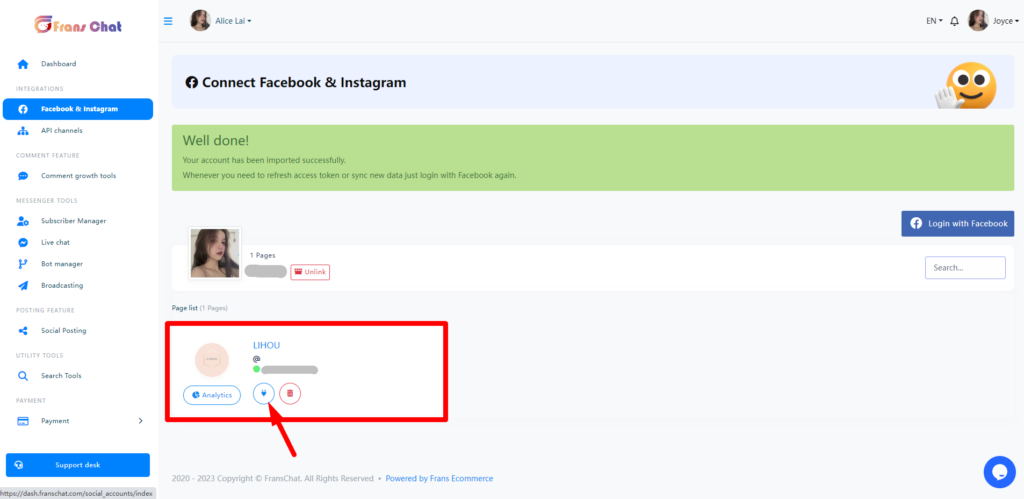
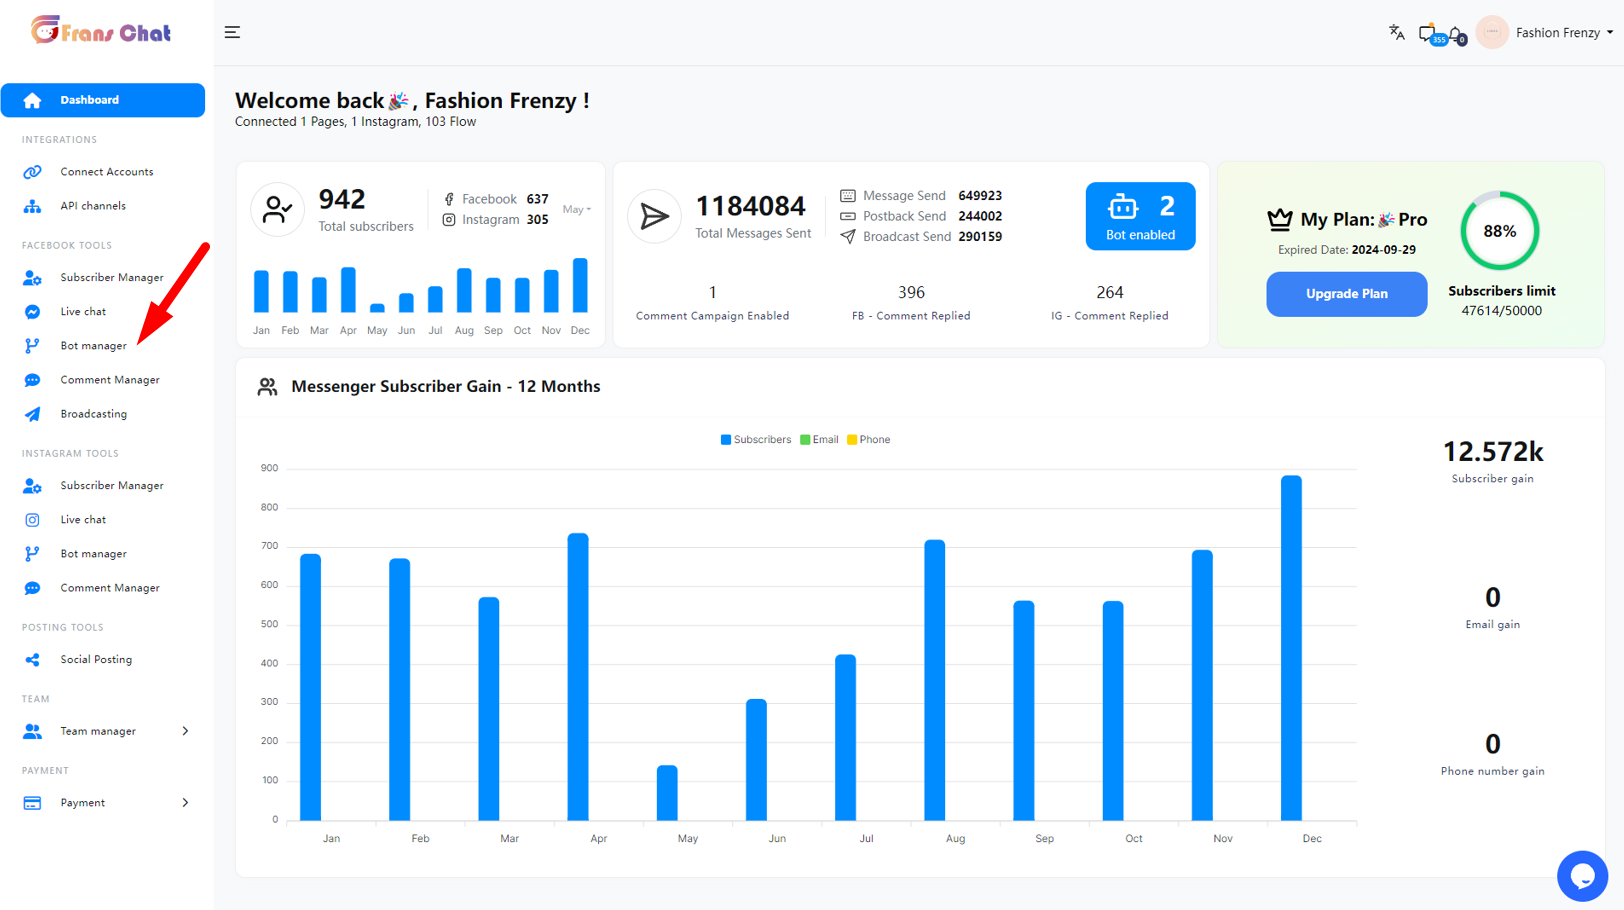
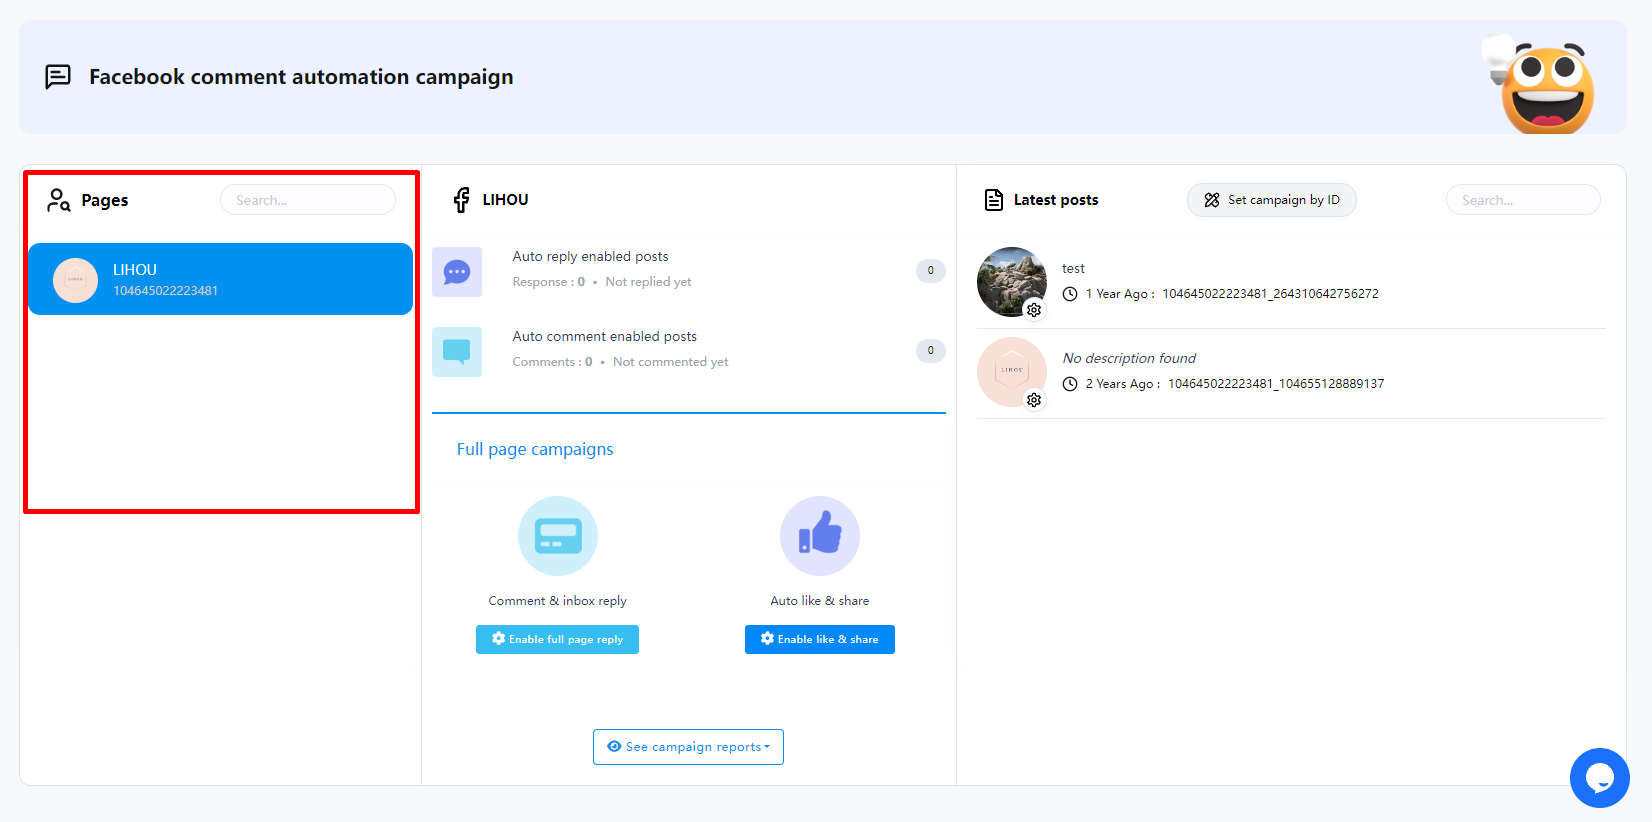
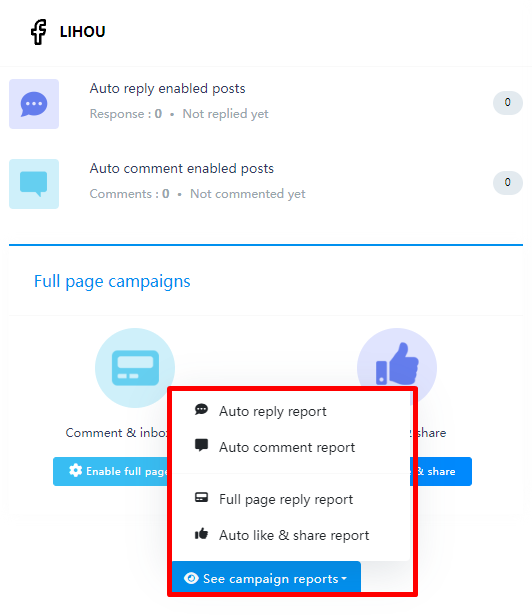
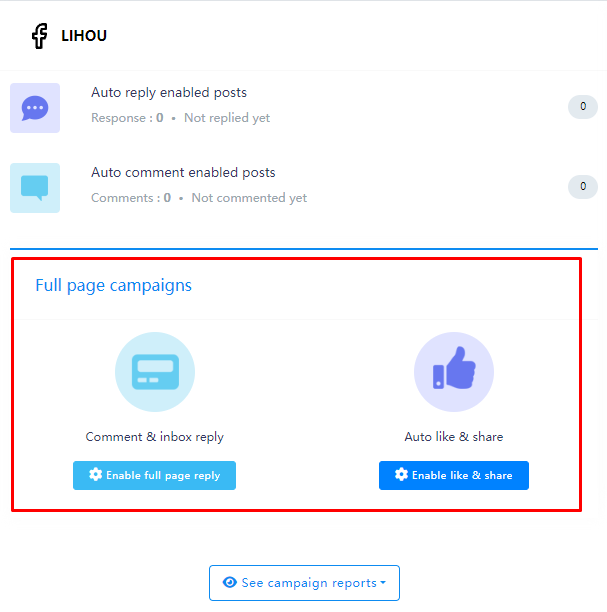
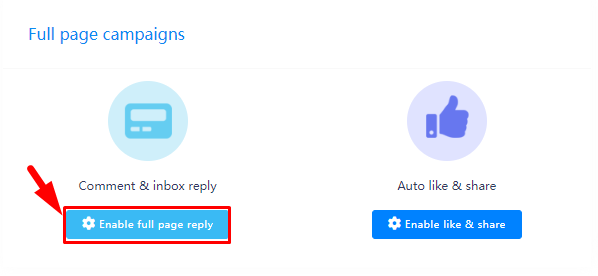
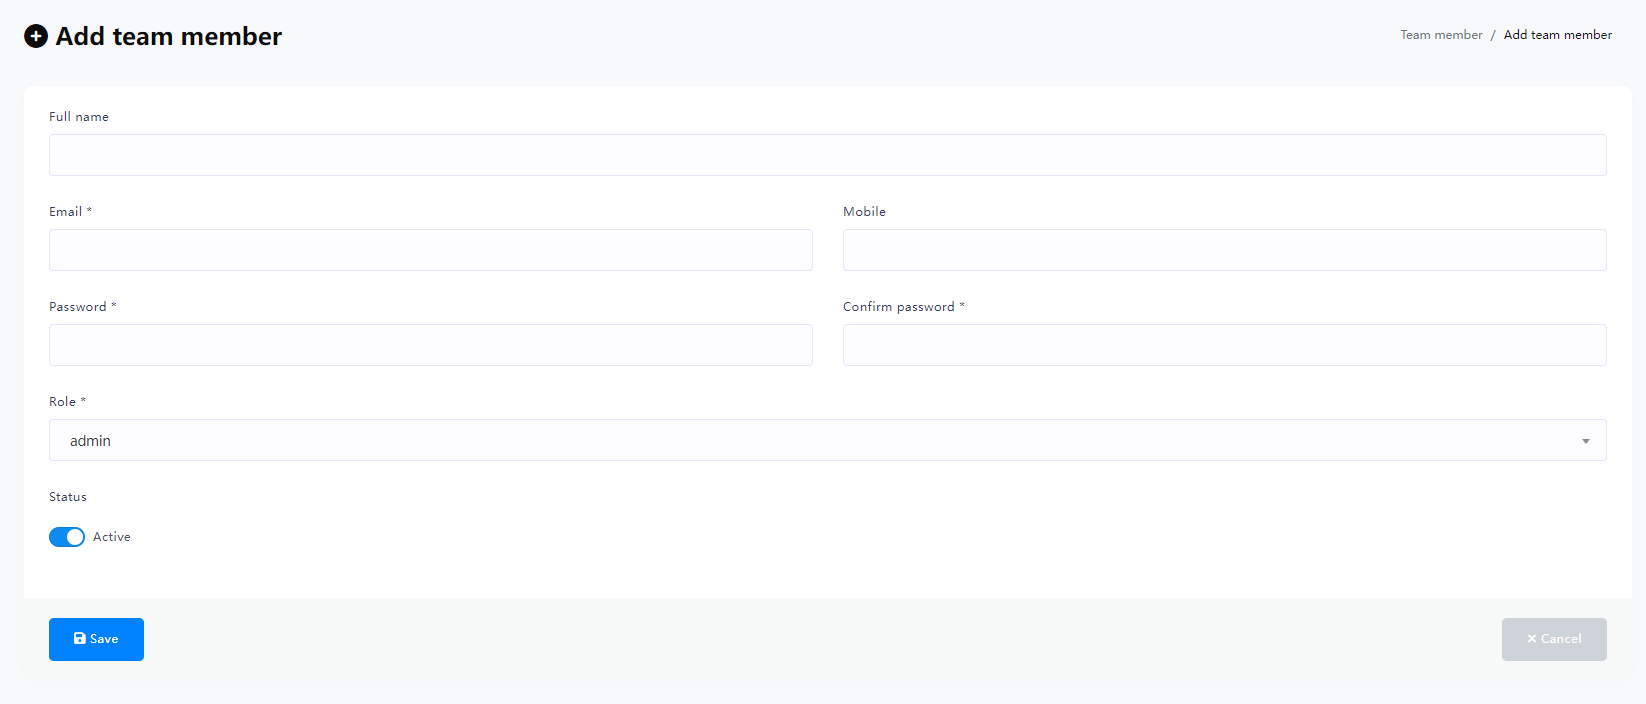
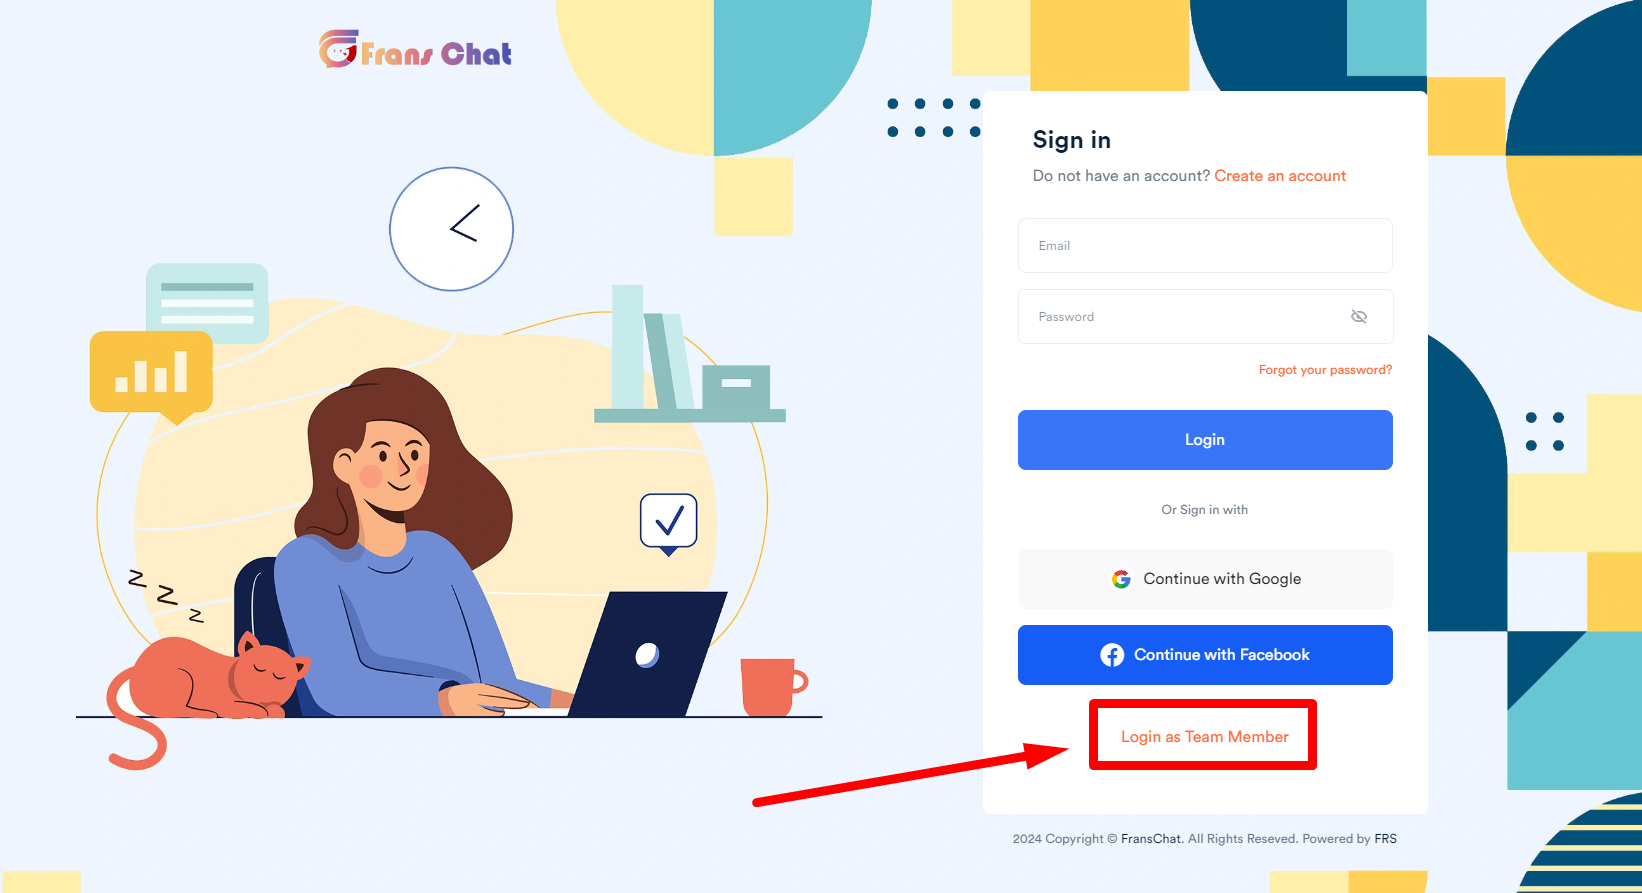
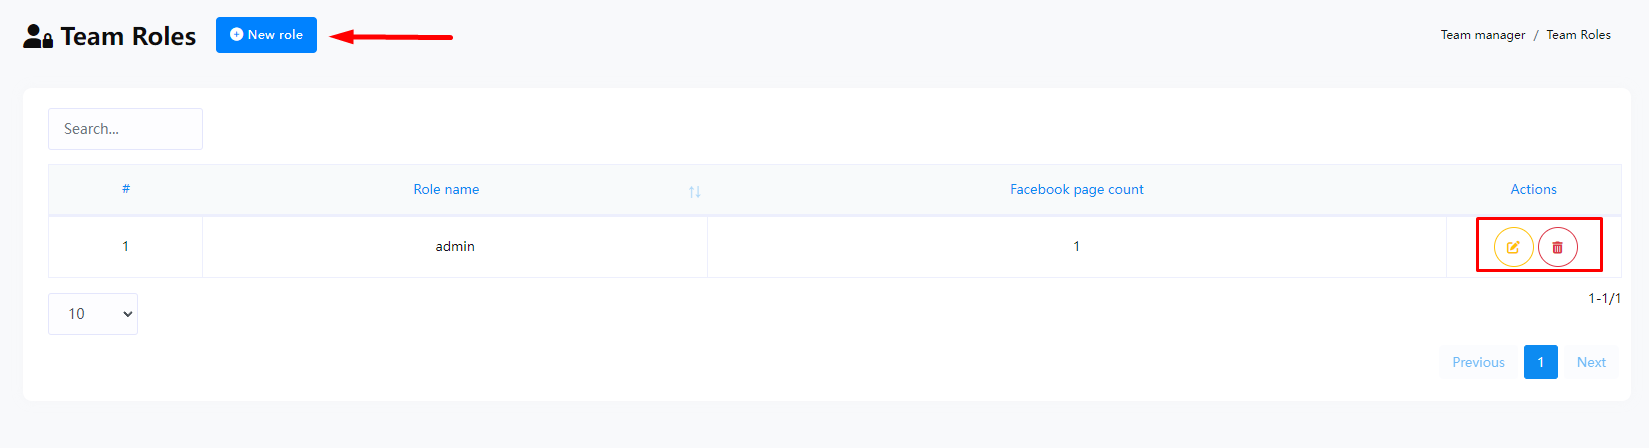
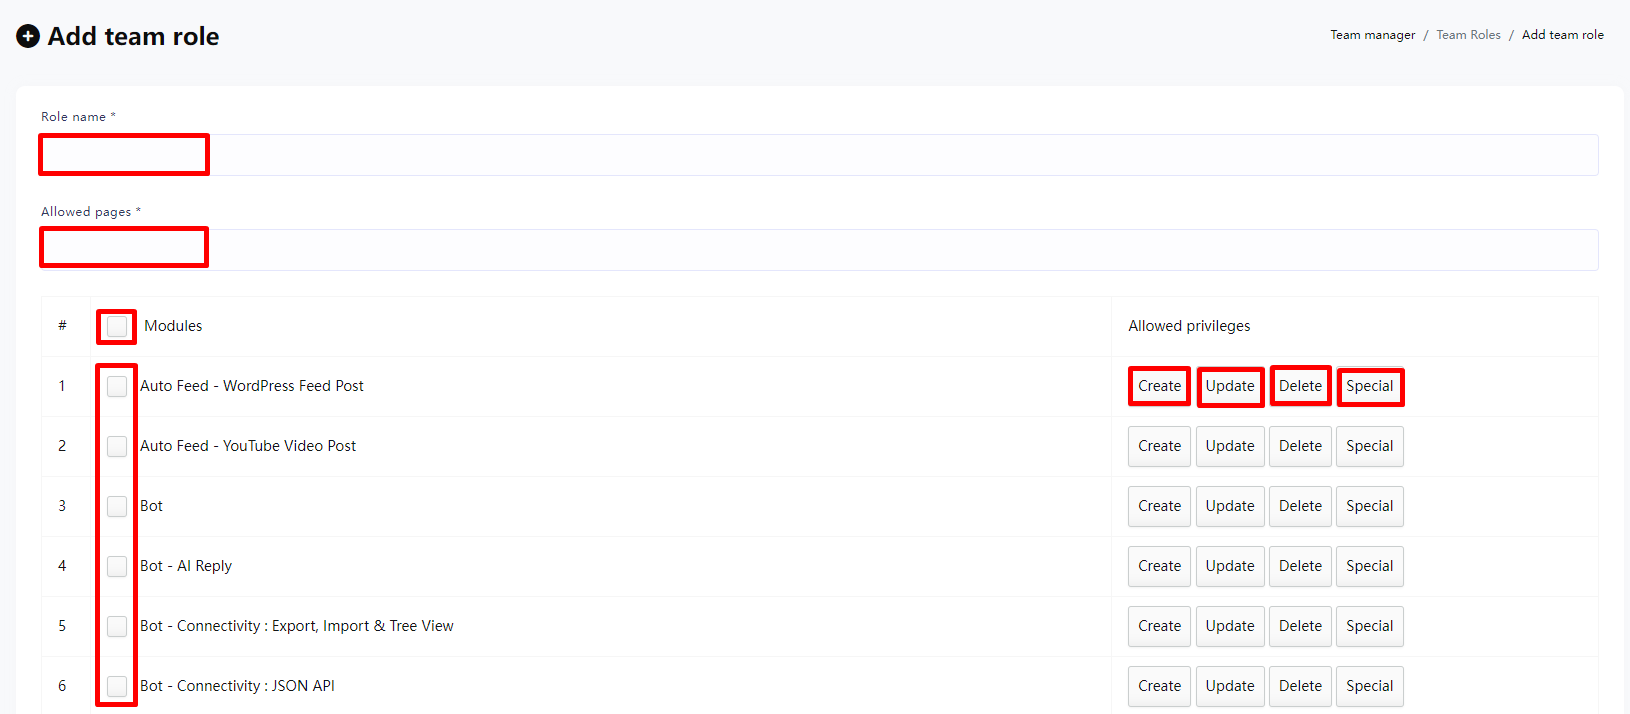
Dashboard


Updates
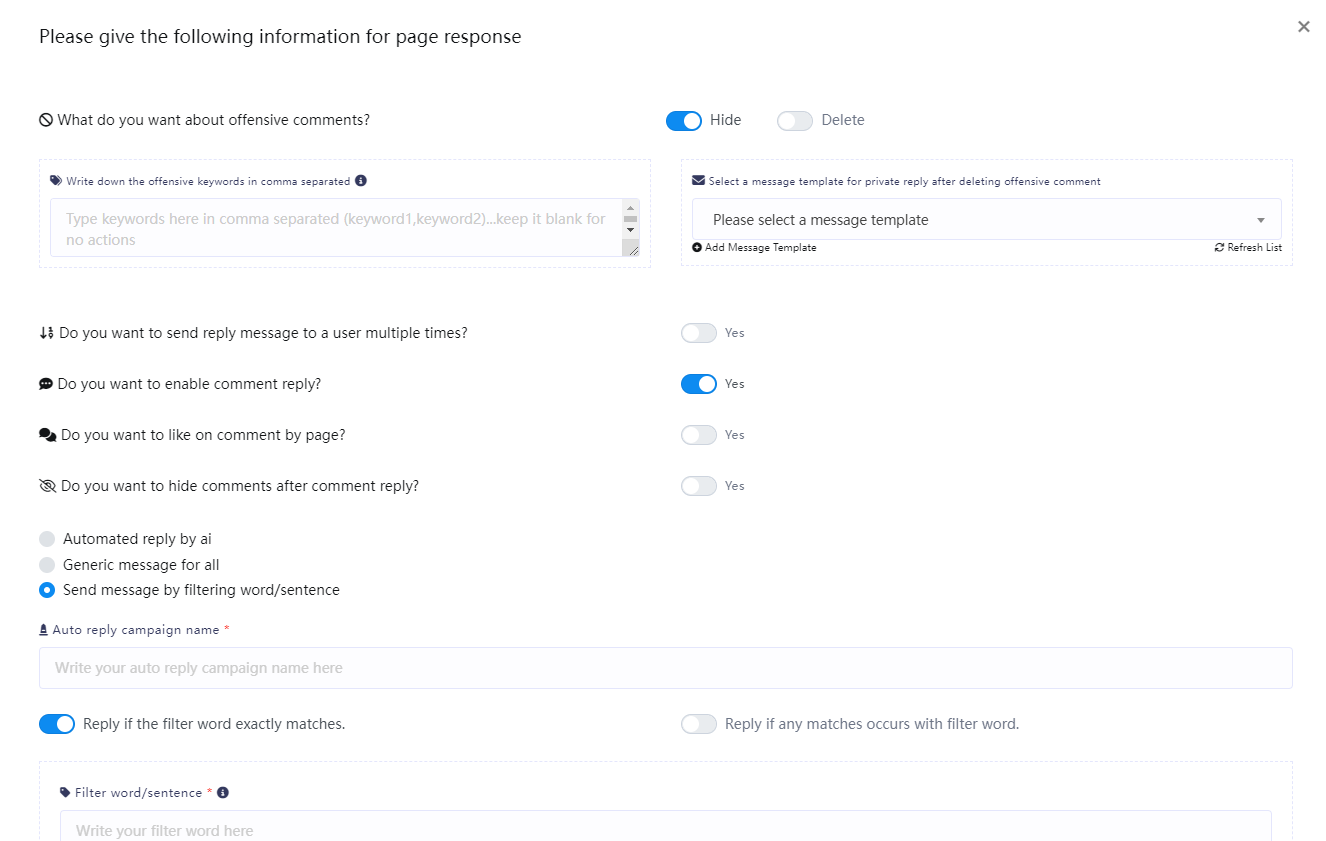
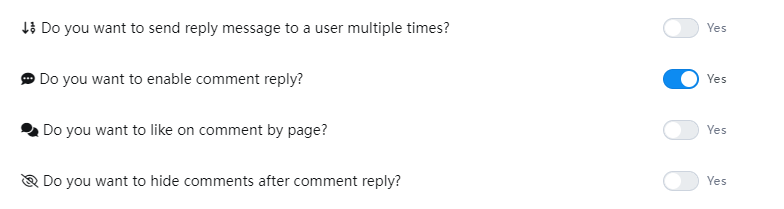
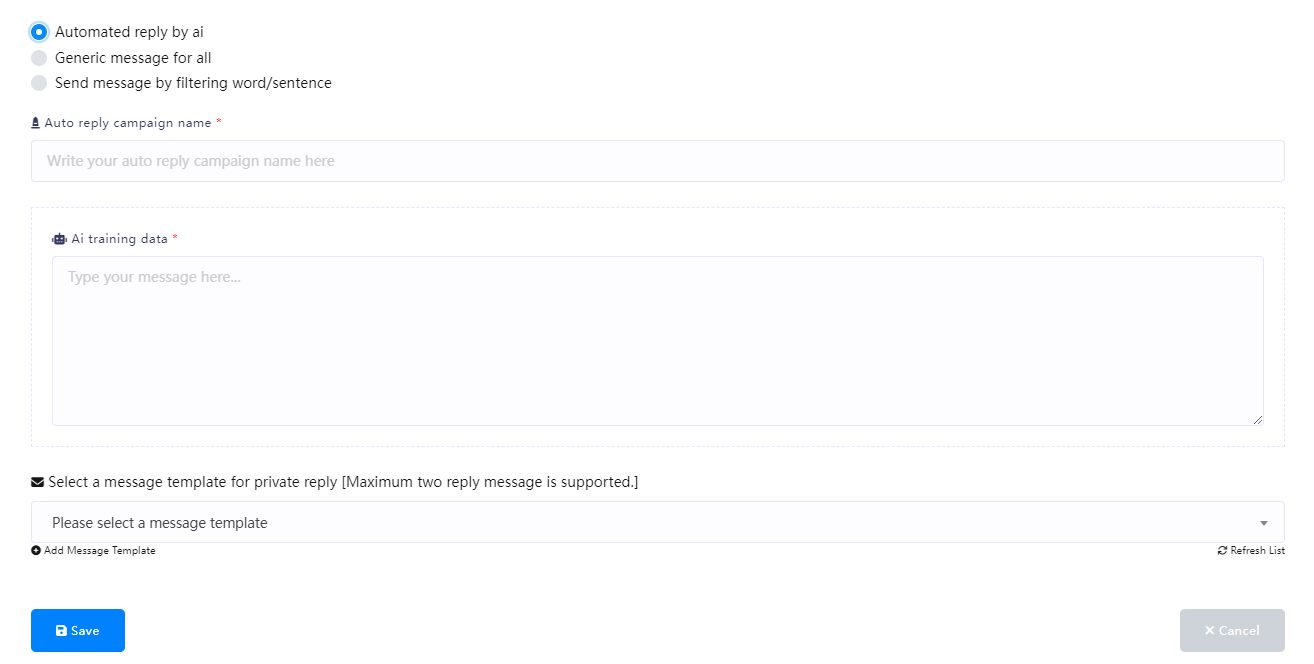
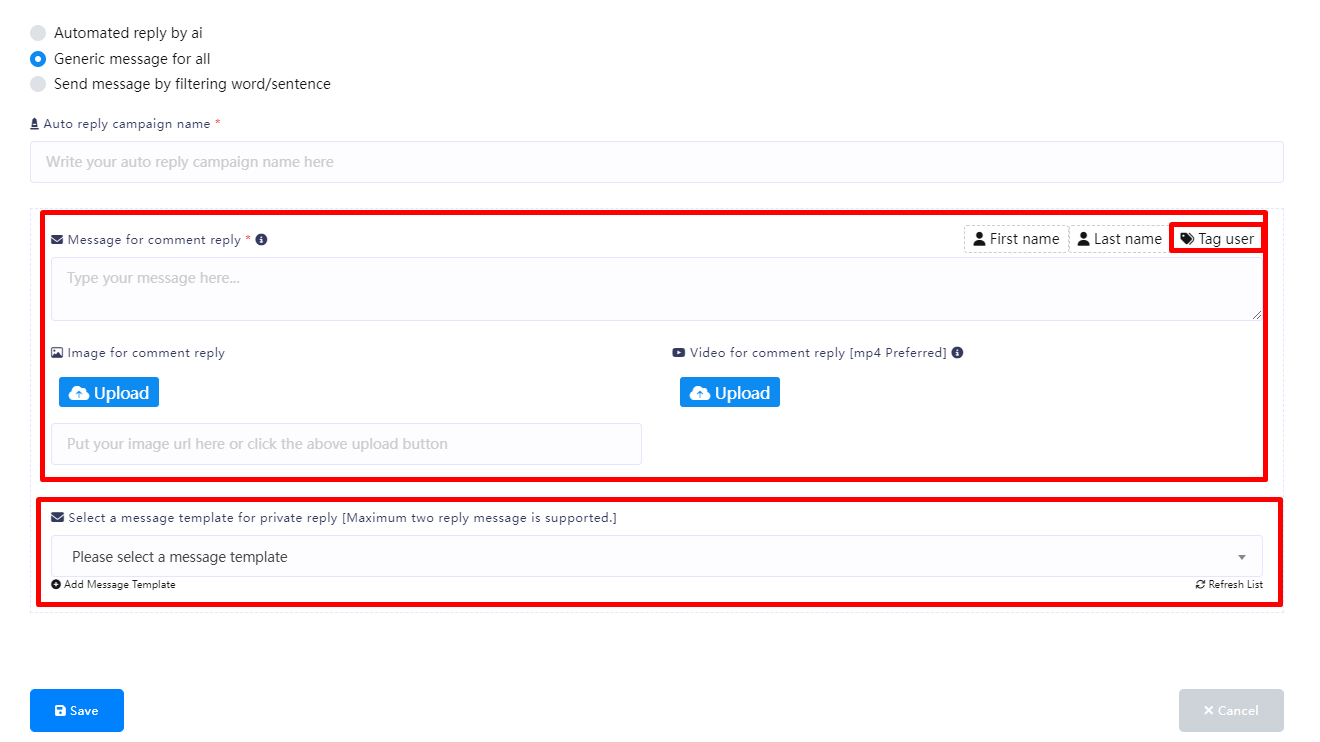
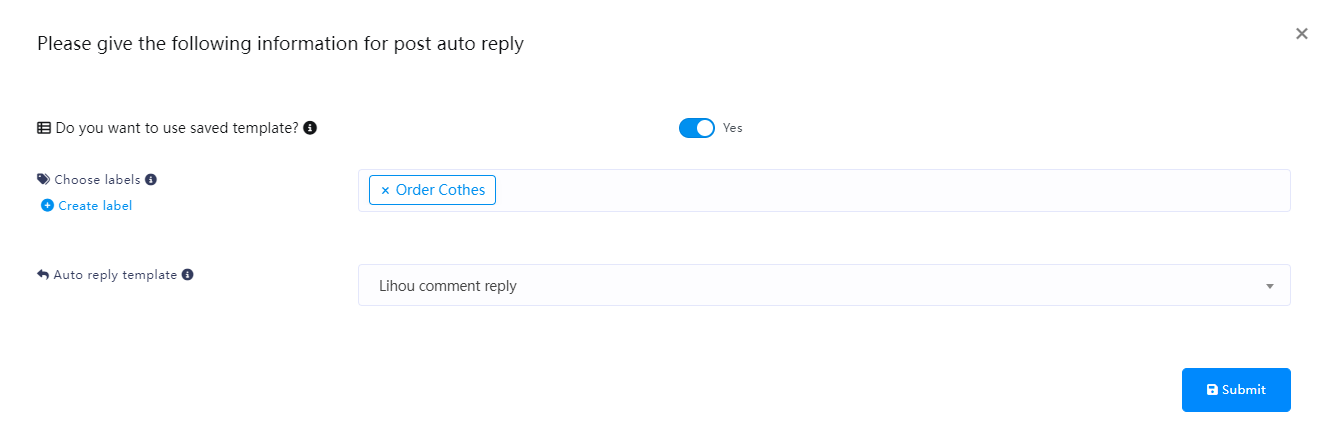
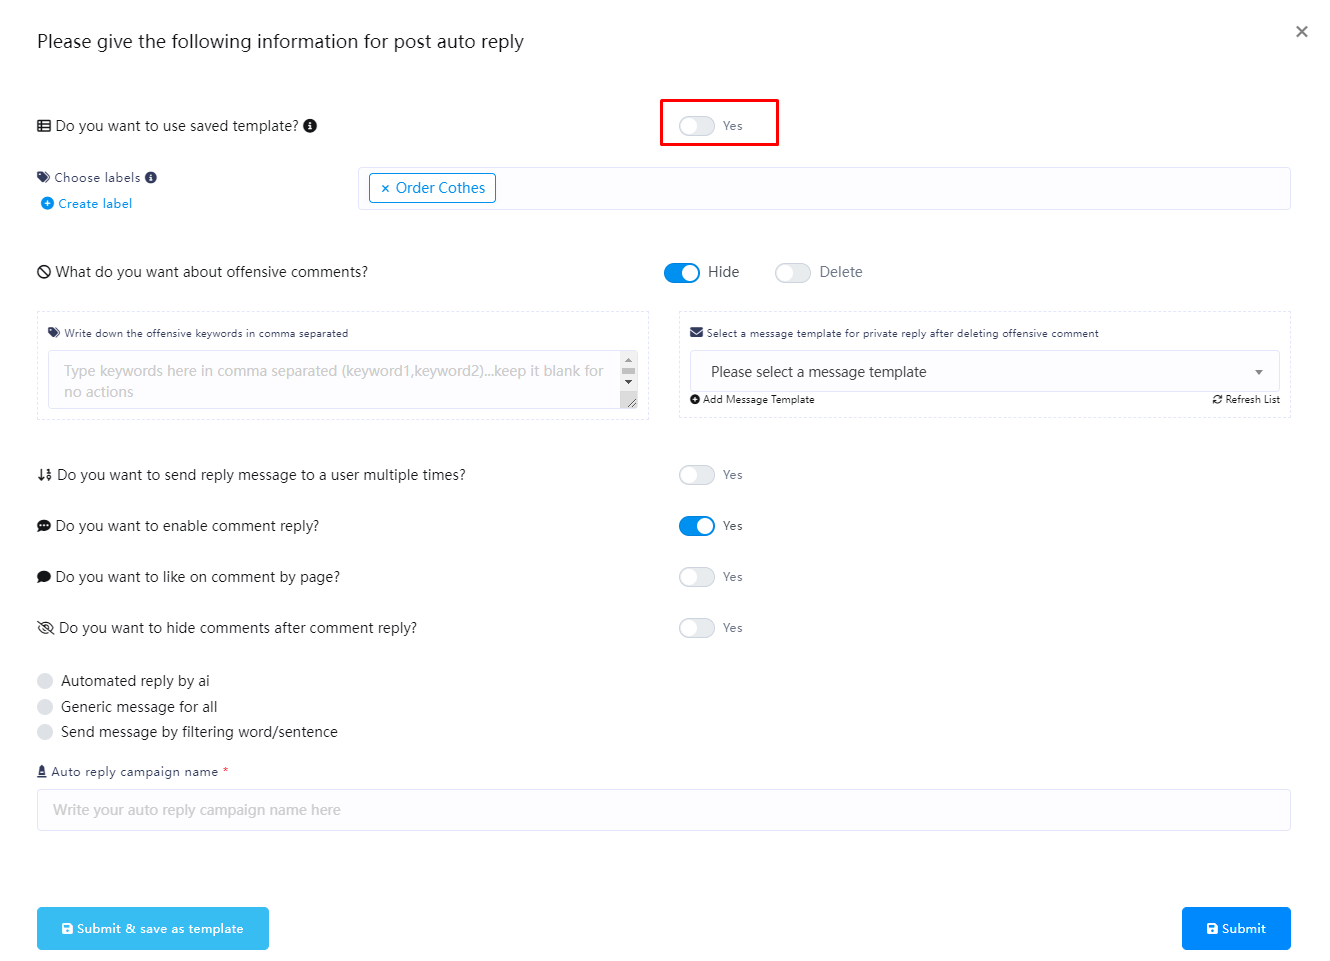
Updates Optimize automatic reply speed
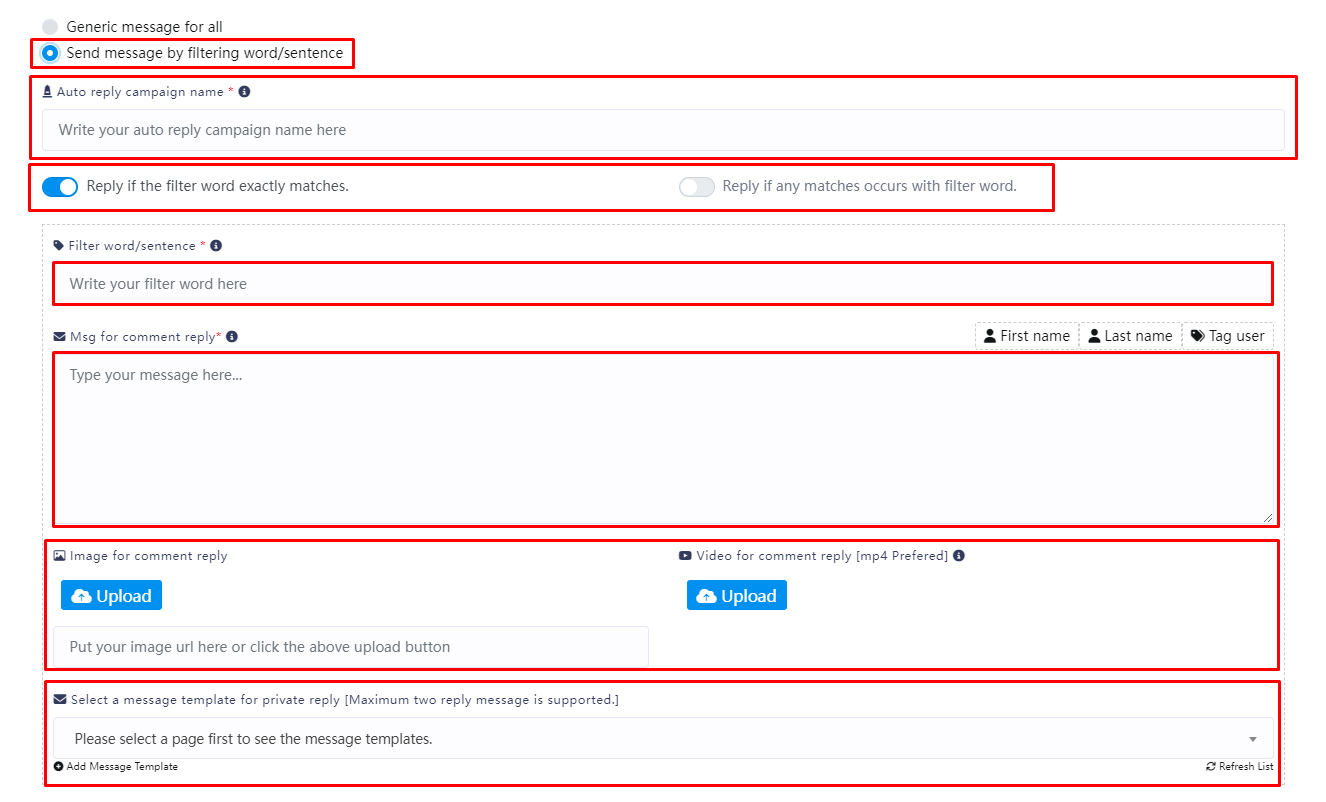
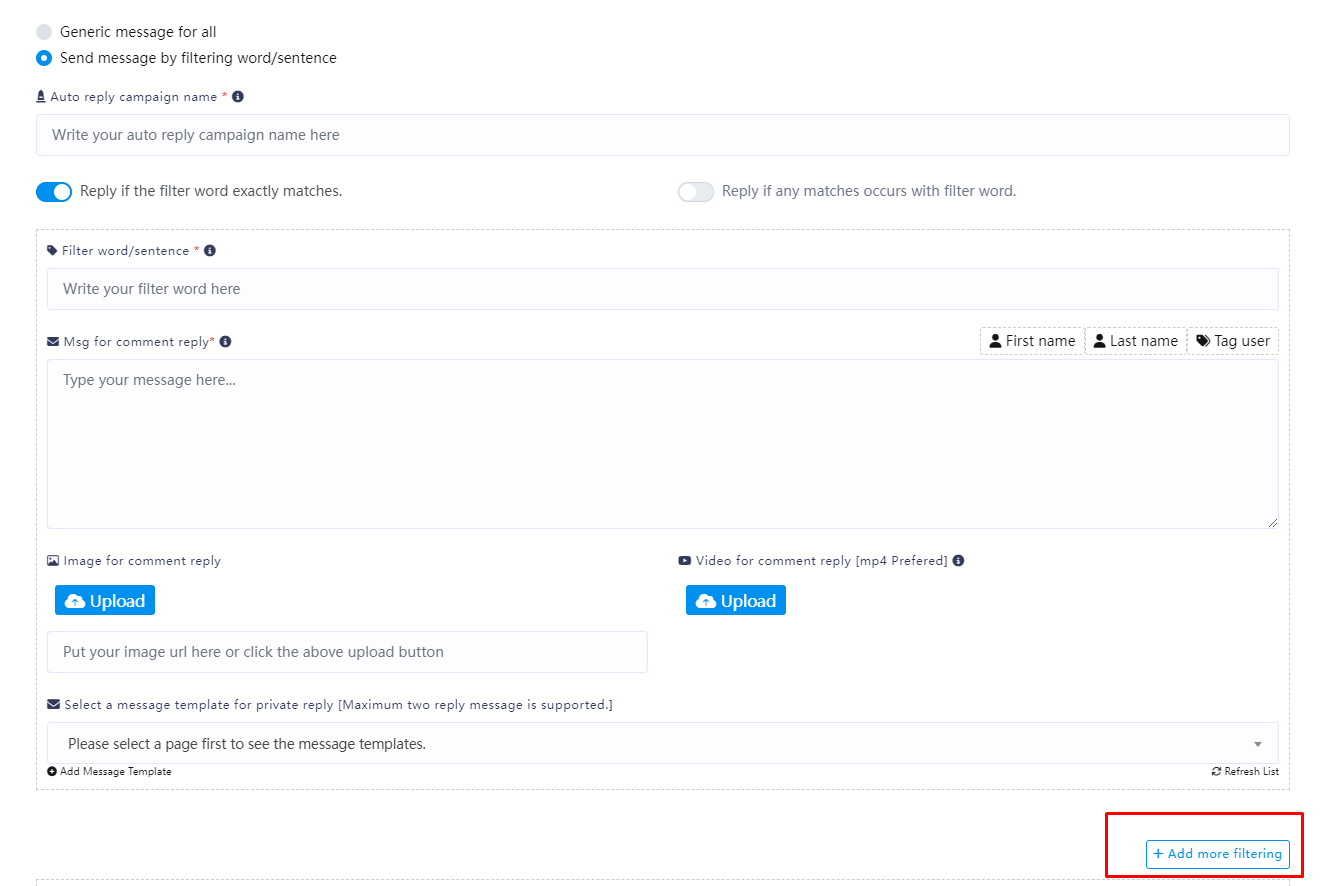
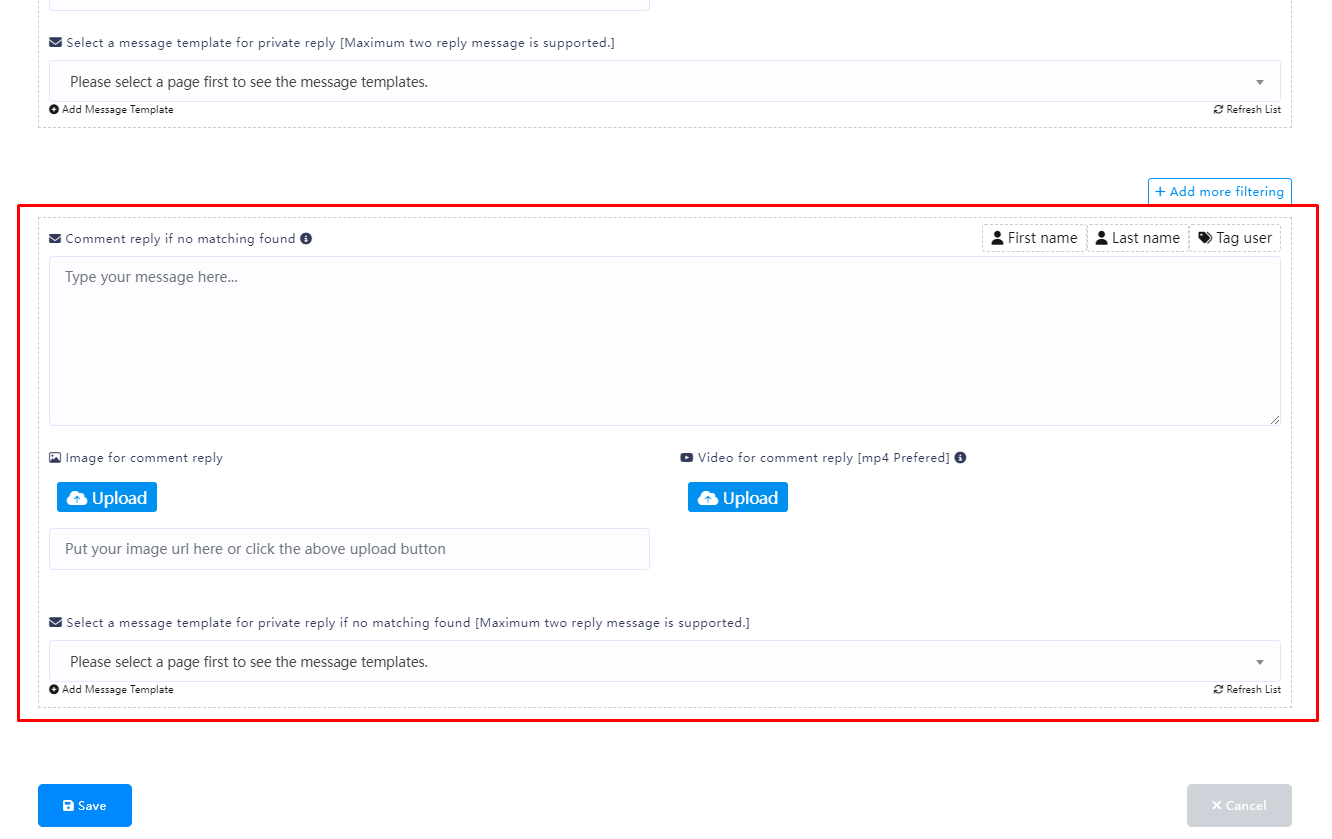
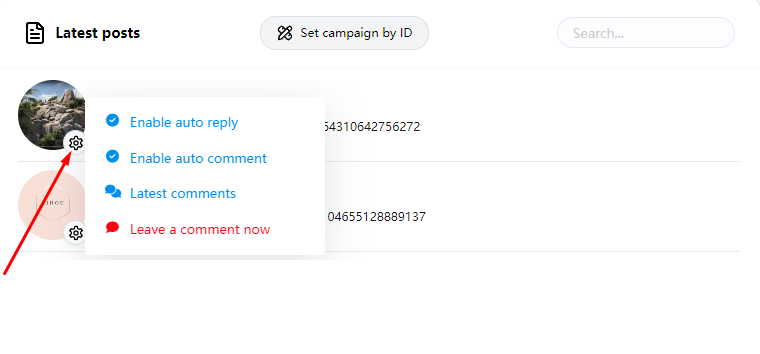
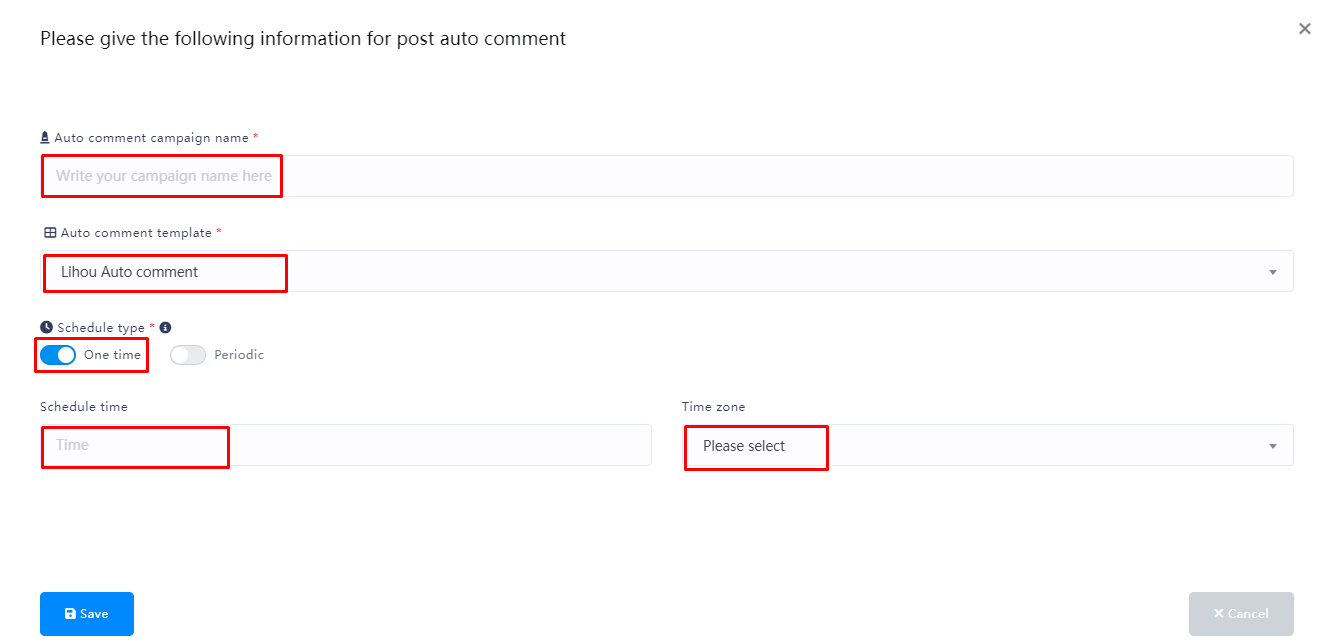
Updates Live Chat - Comment Private Reply Label
Updates
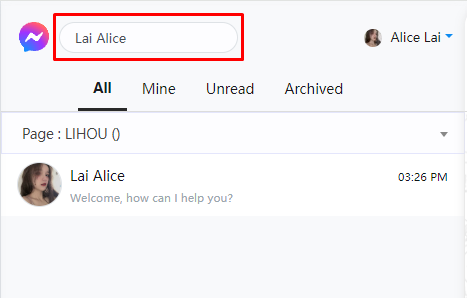
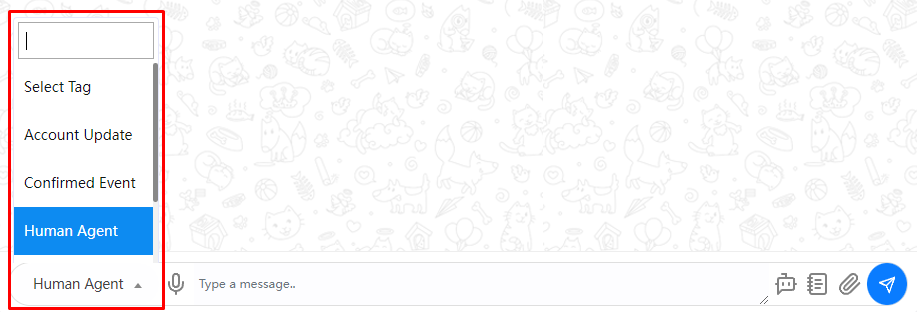
NEW Enhanced Livechat Experience
NEW User and Page Avatars in Chat Bubbles
FIXED Notification Click Issue
TWEAKED Image Preview in Chatroom
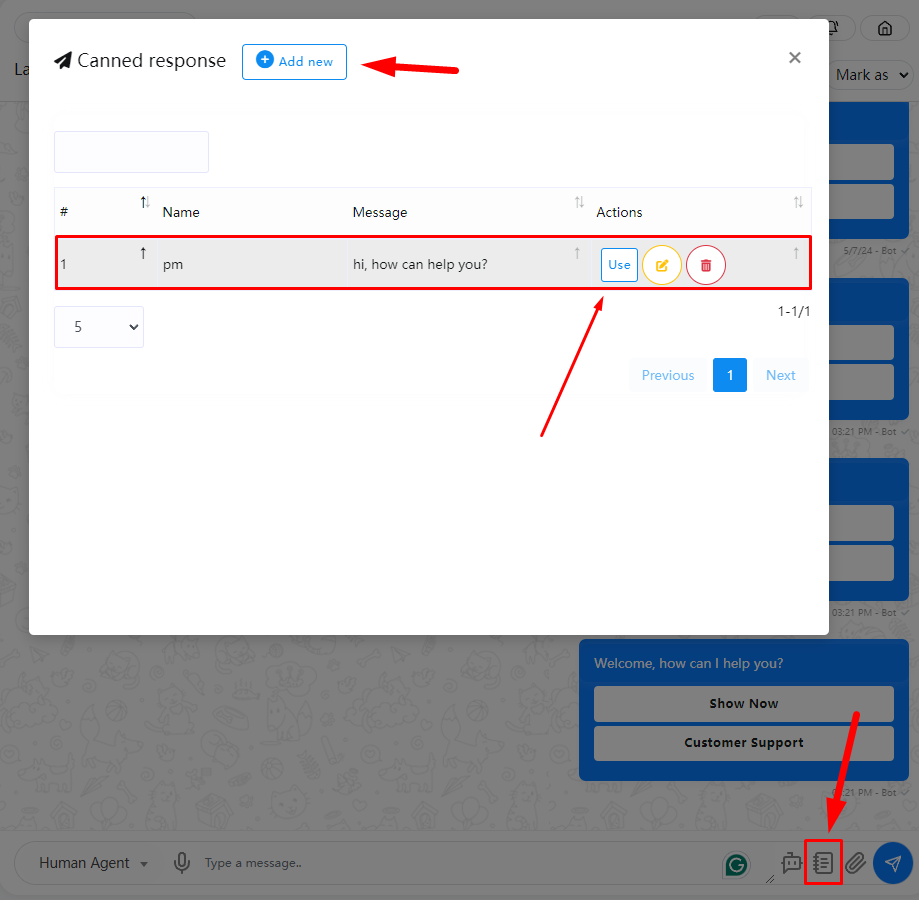
TWEAKED Message Display Optimization
Updates
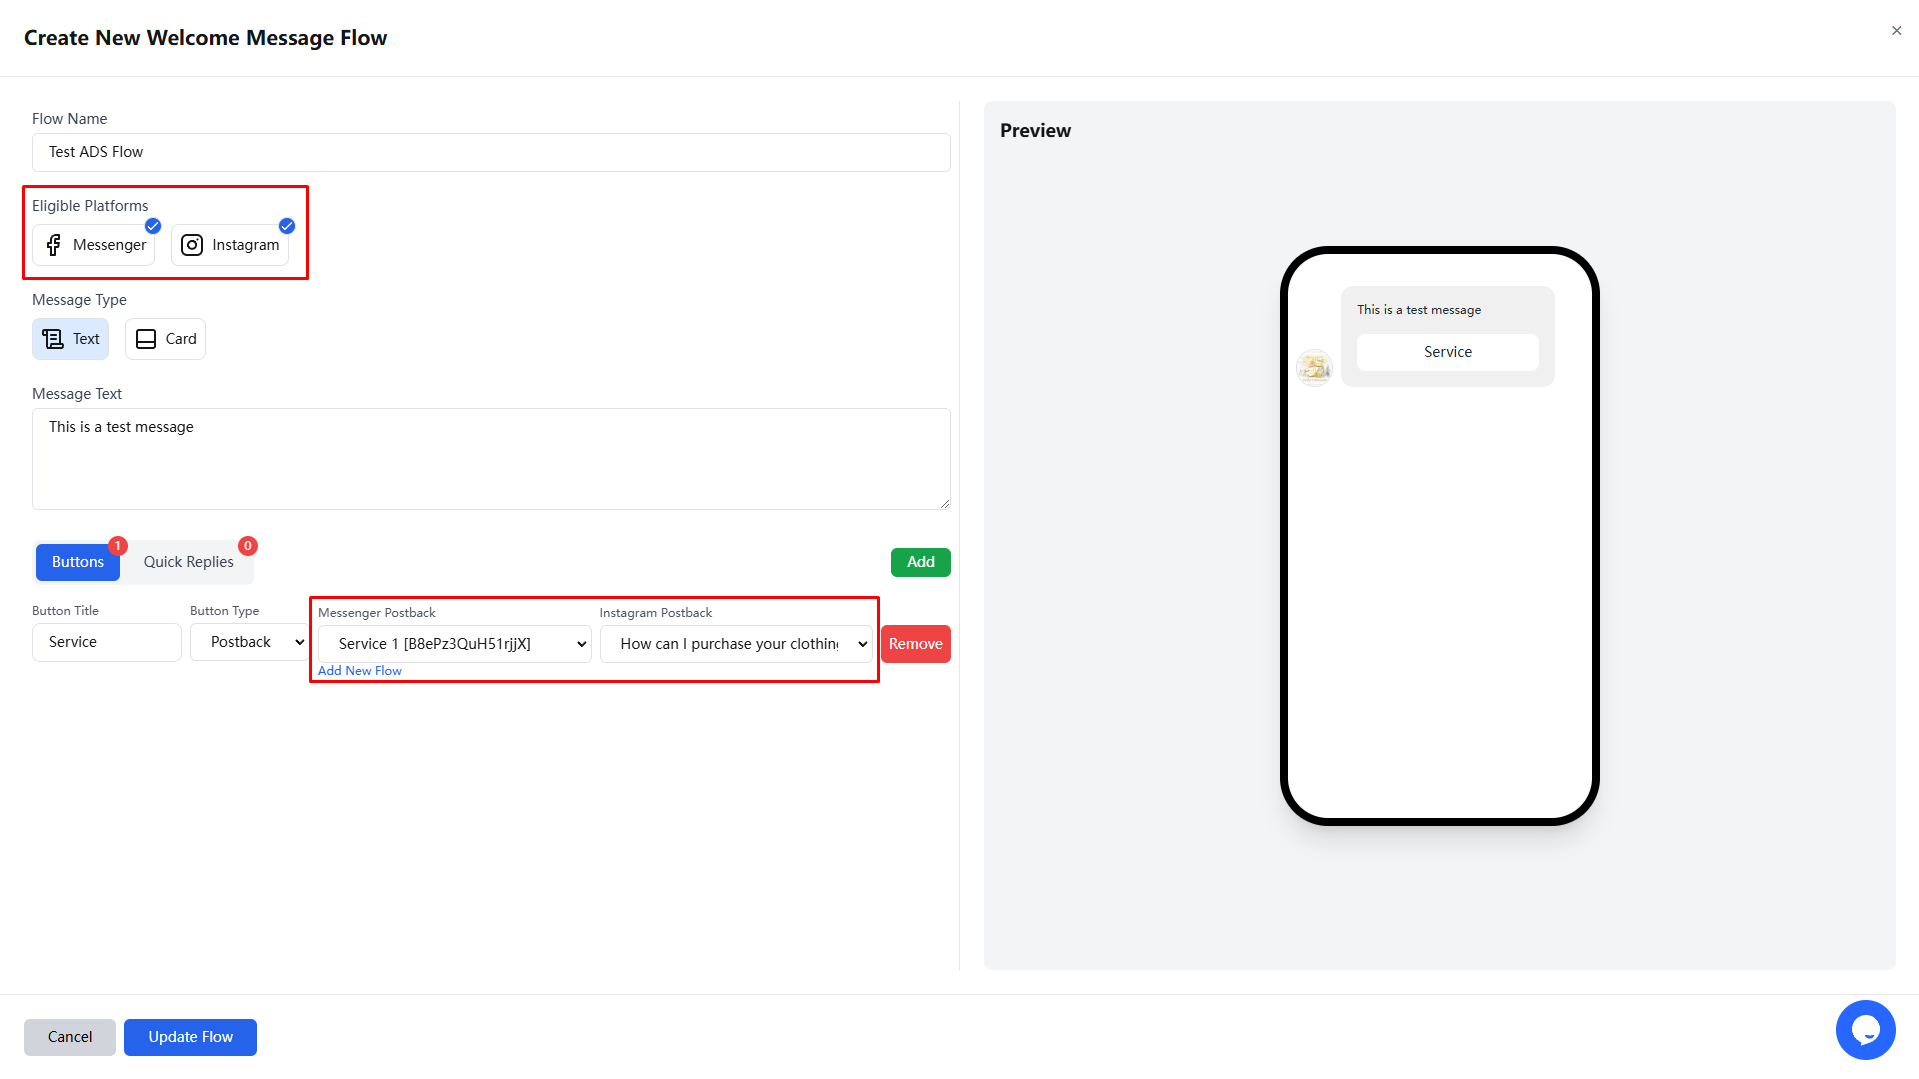
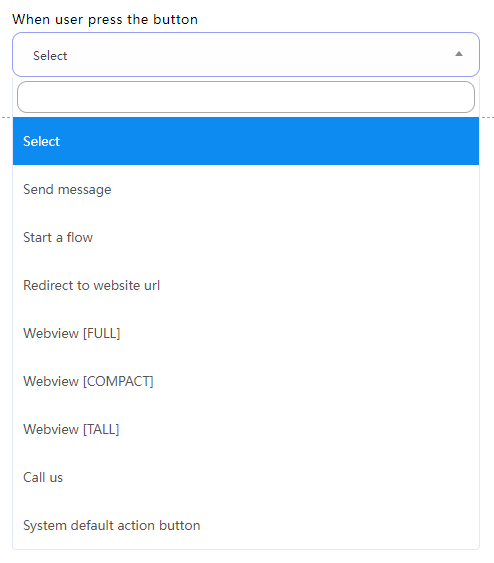
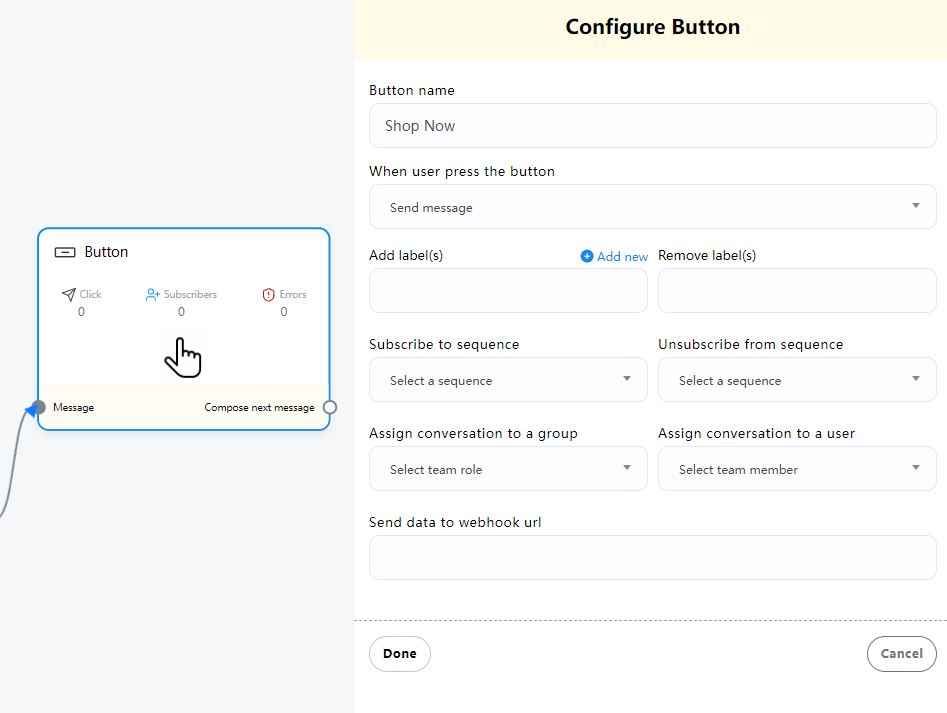
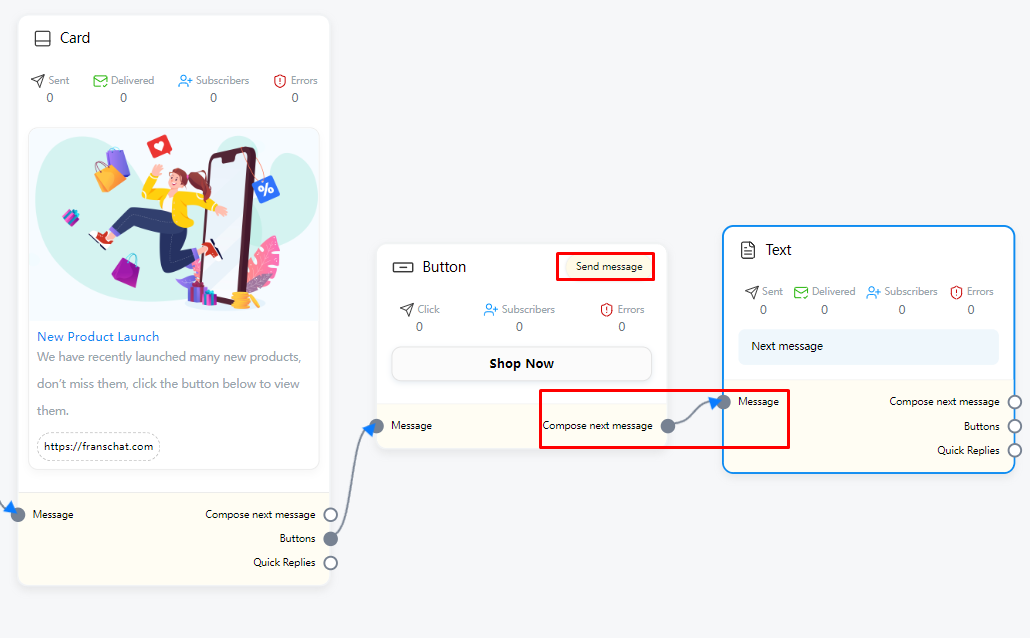
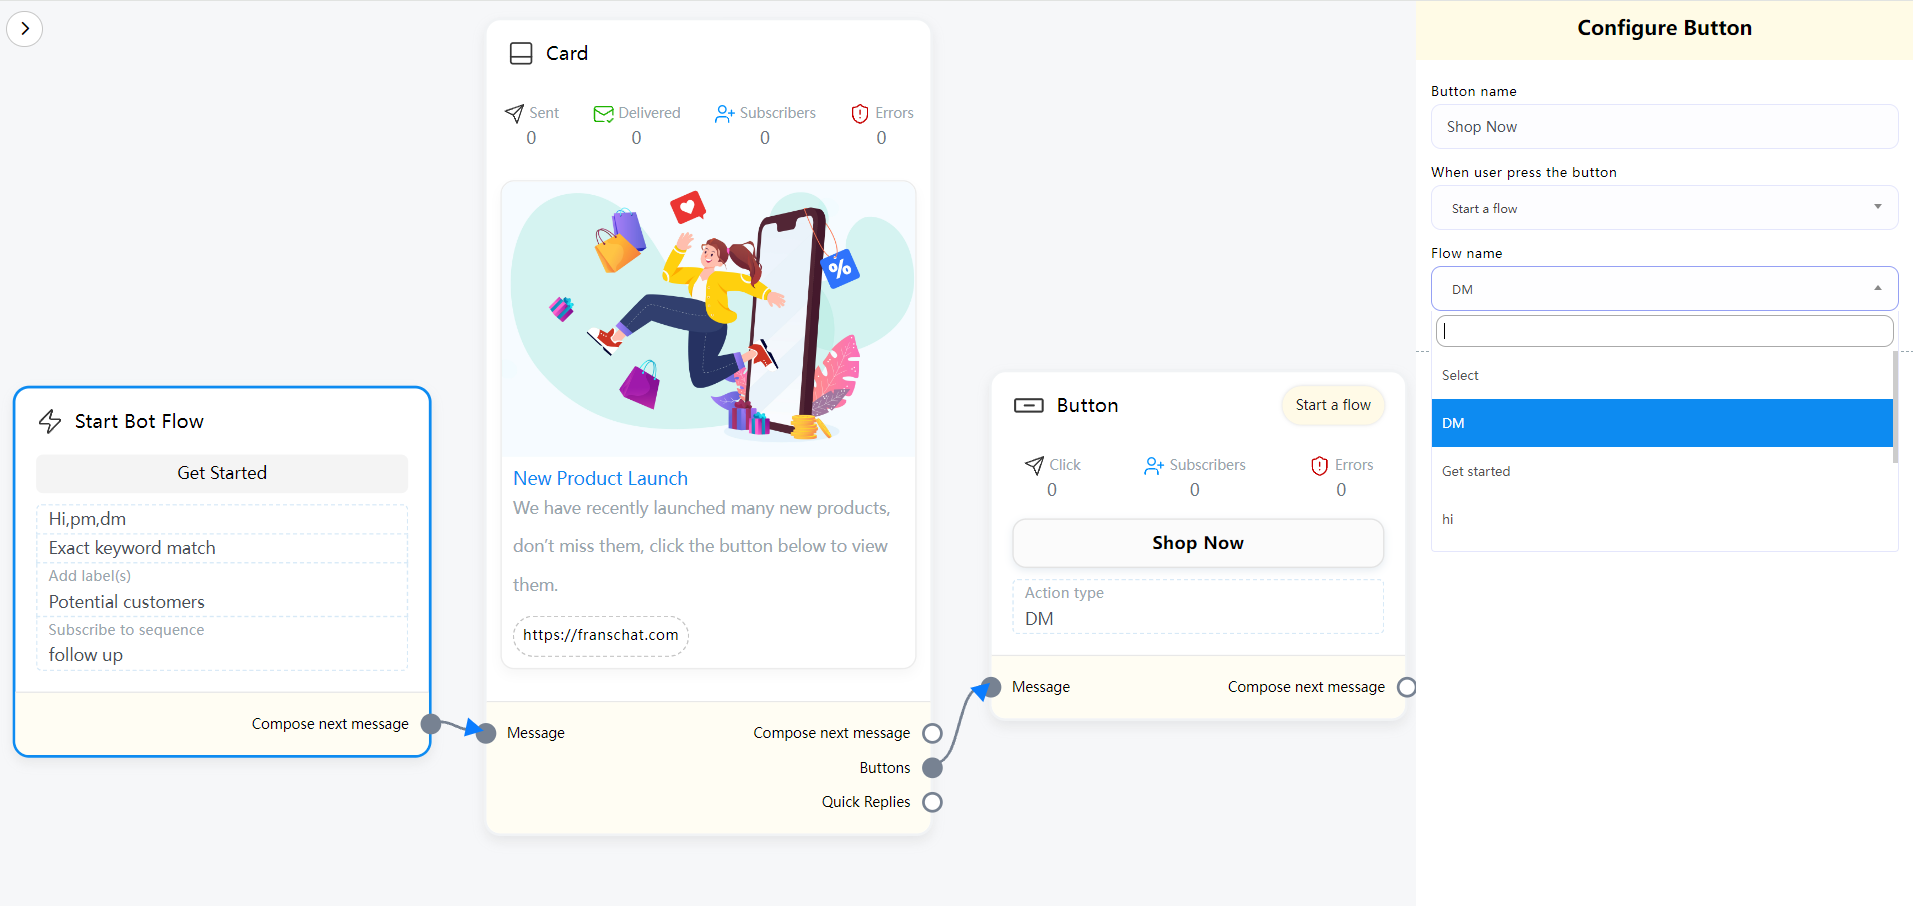
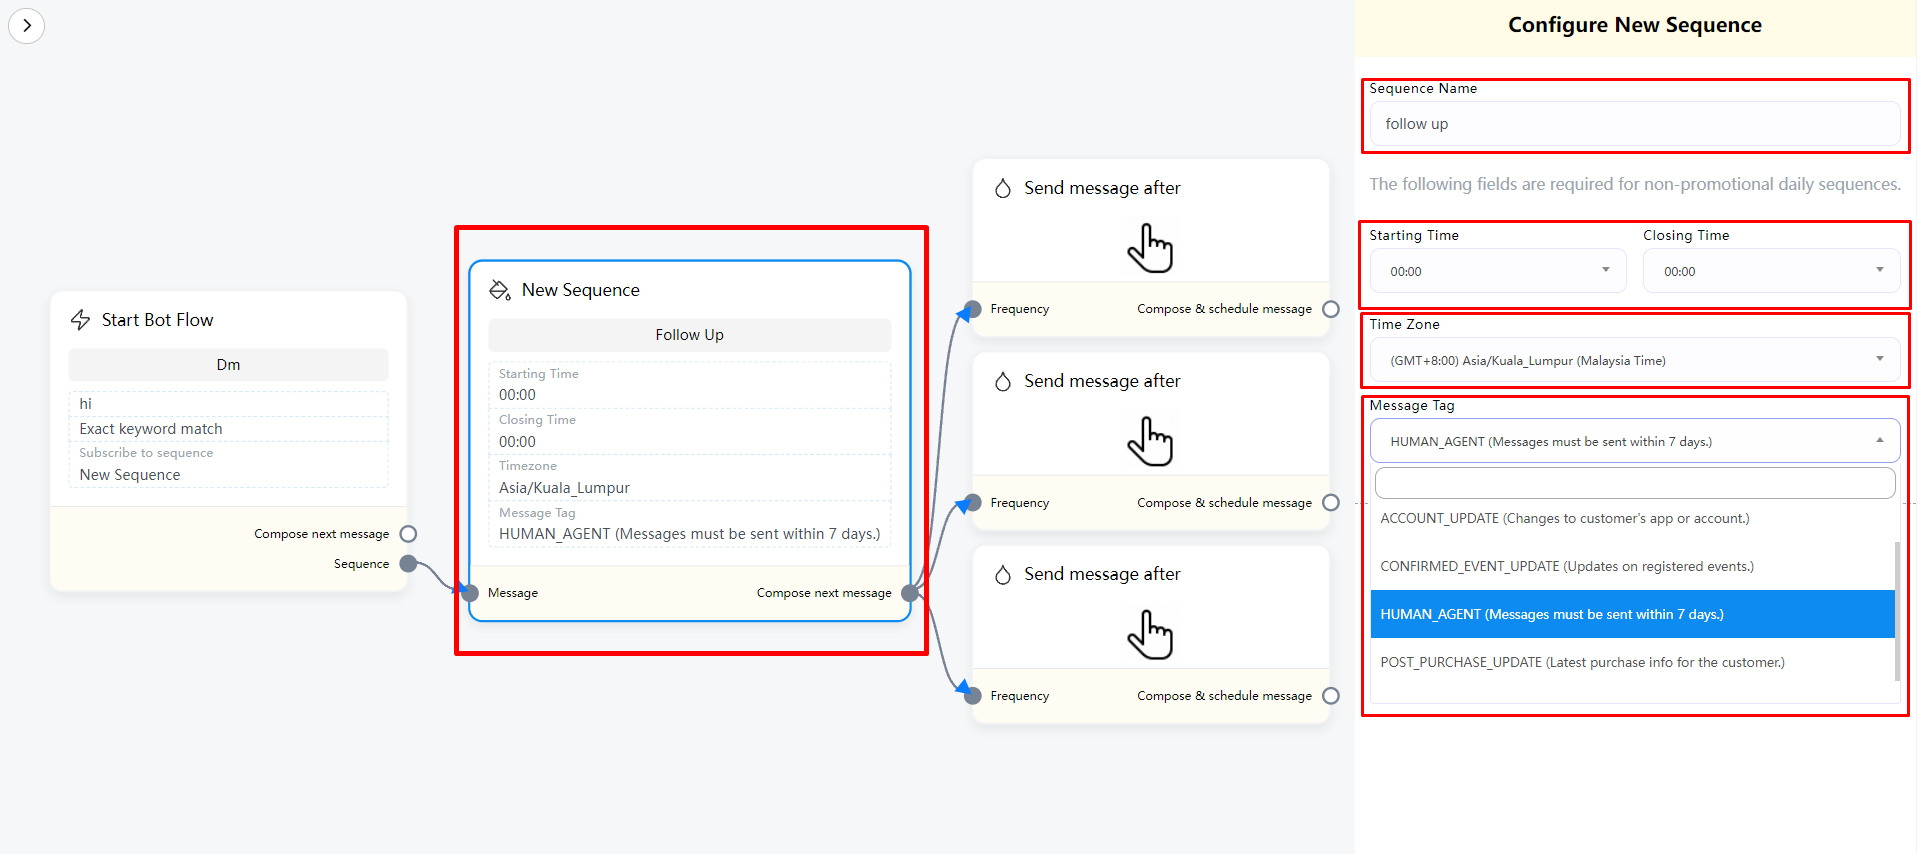
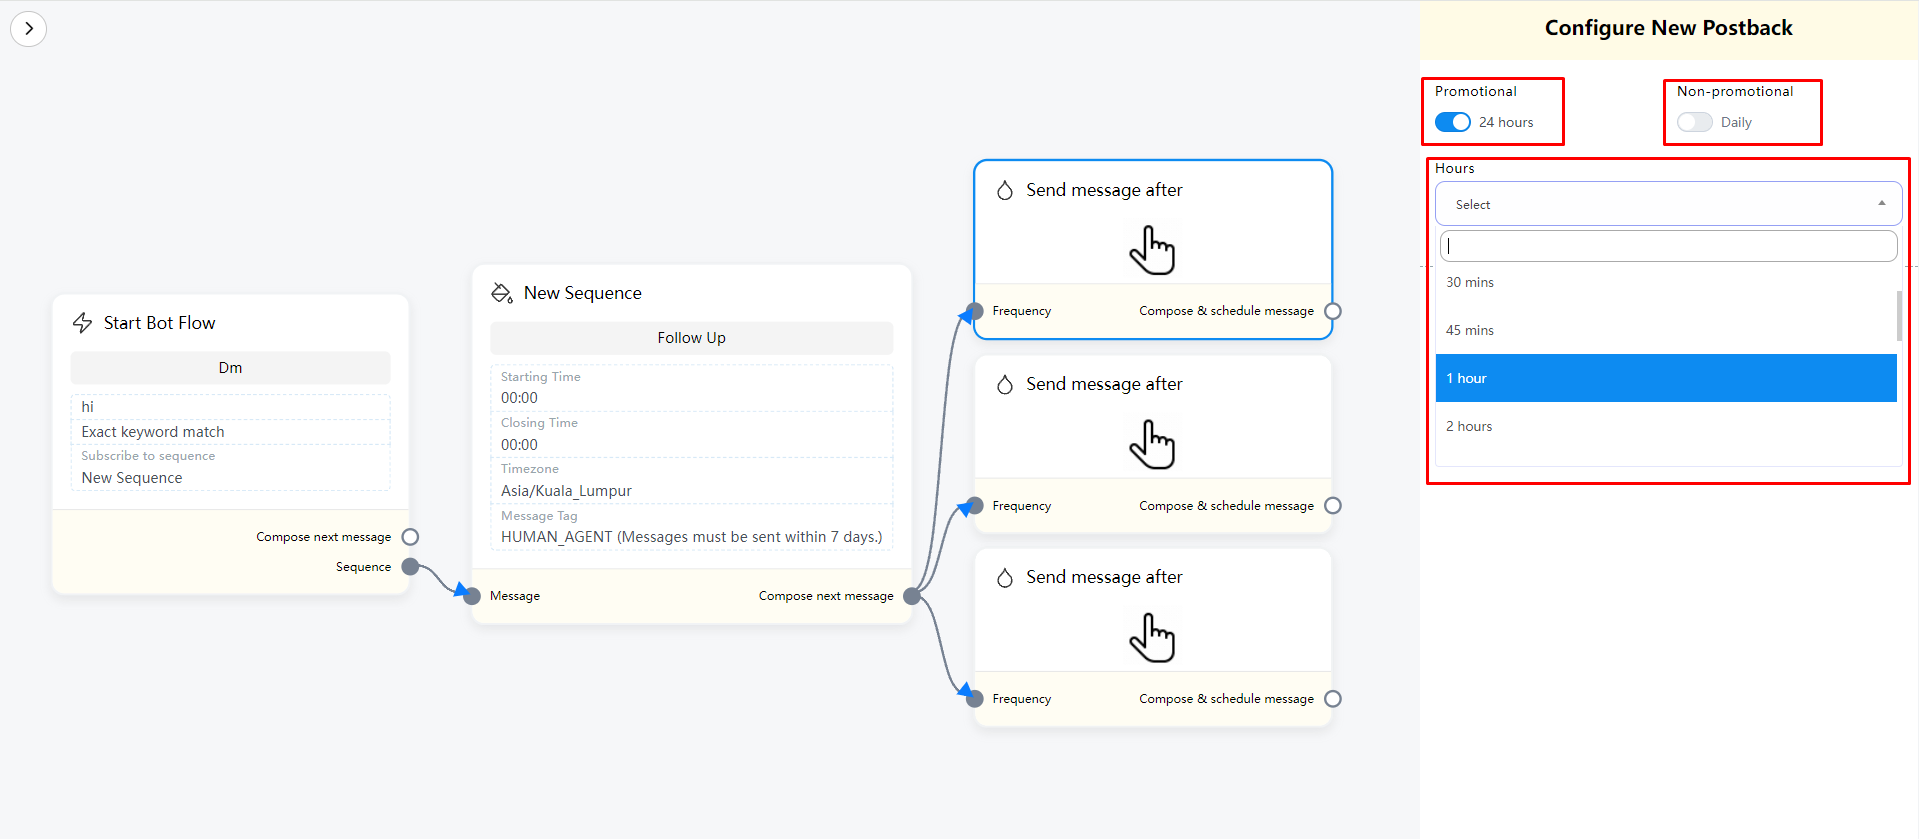
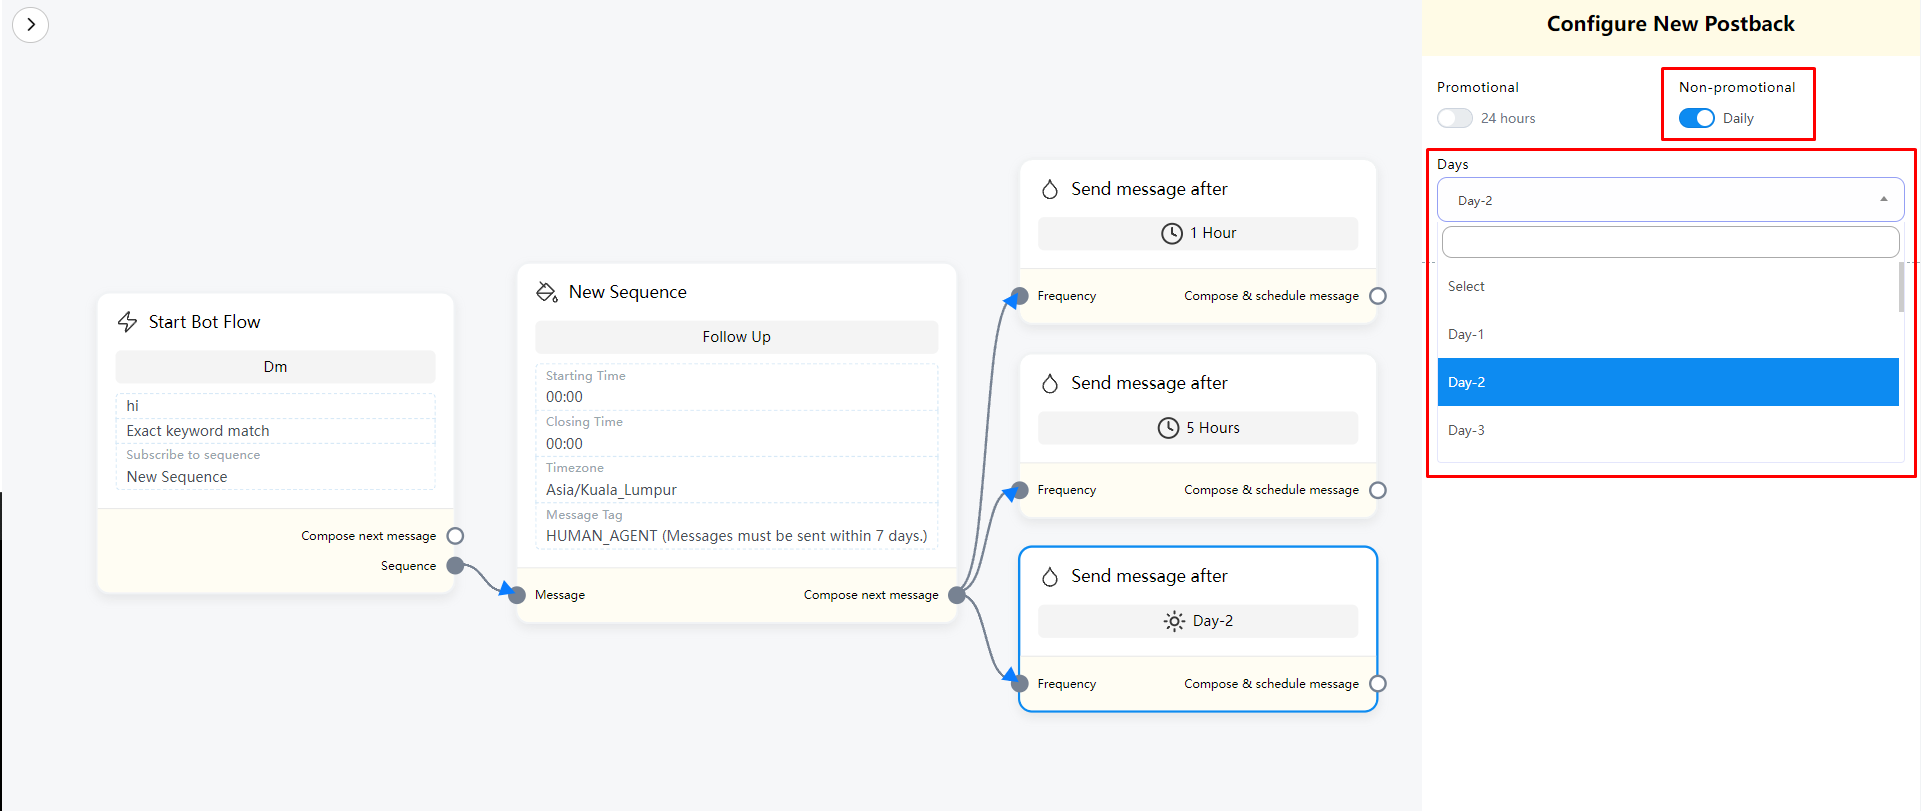
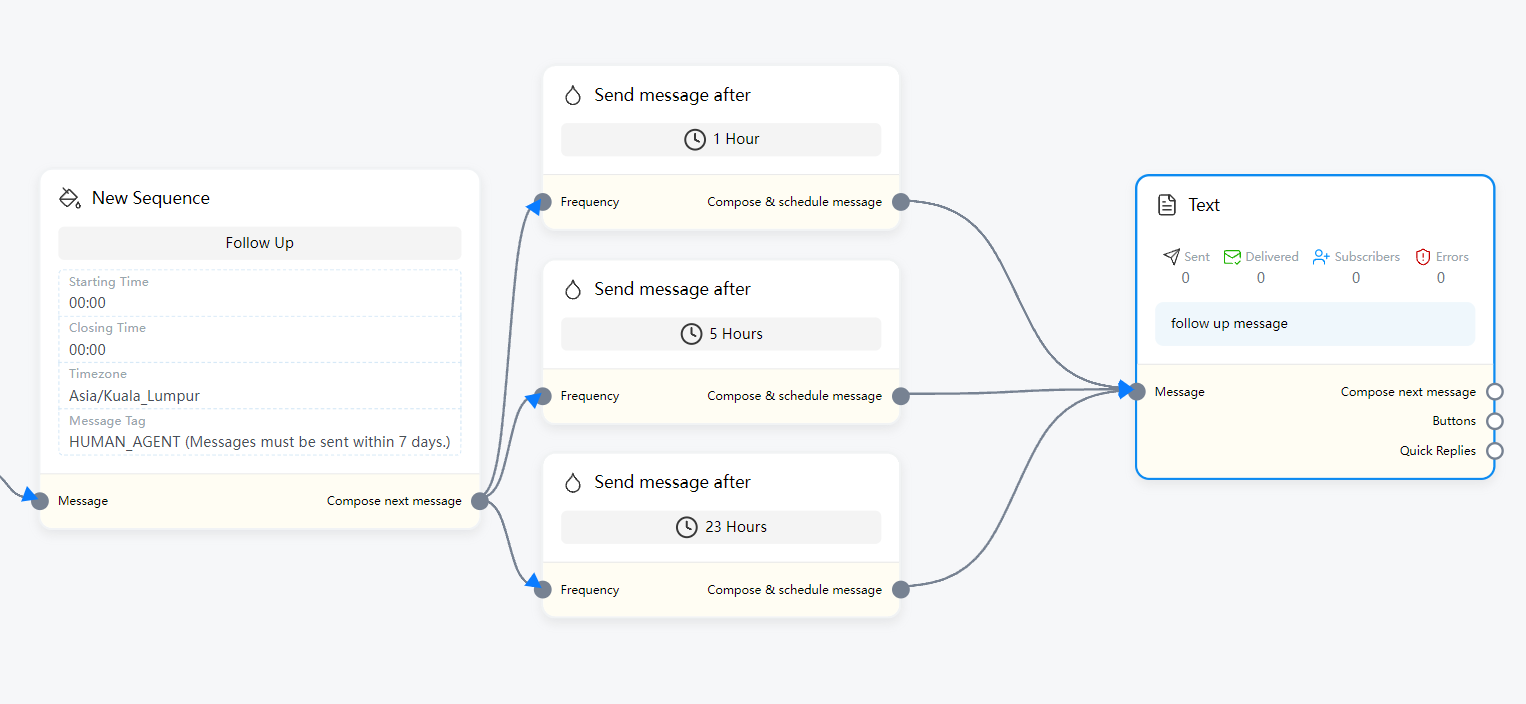
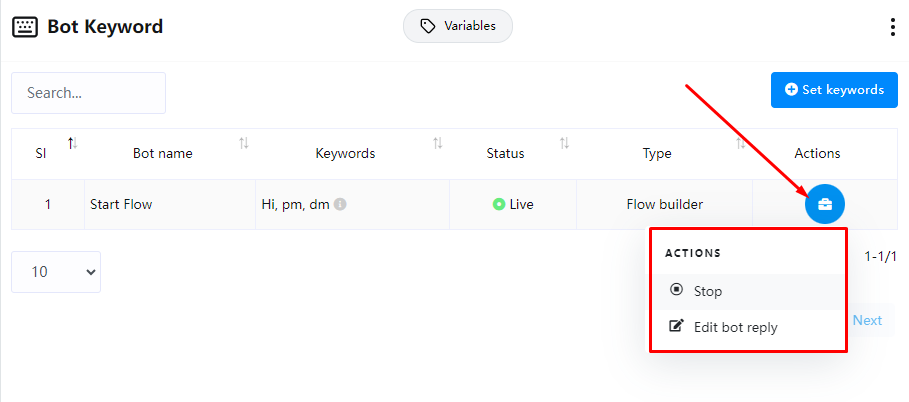
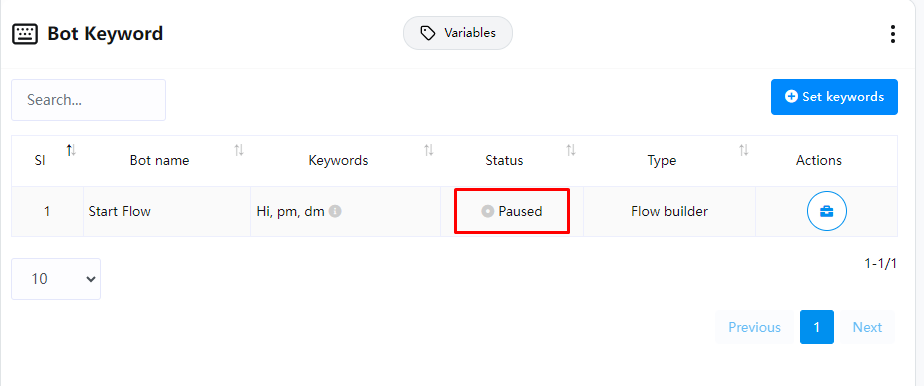
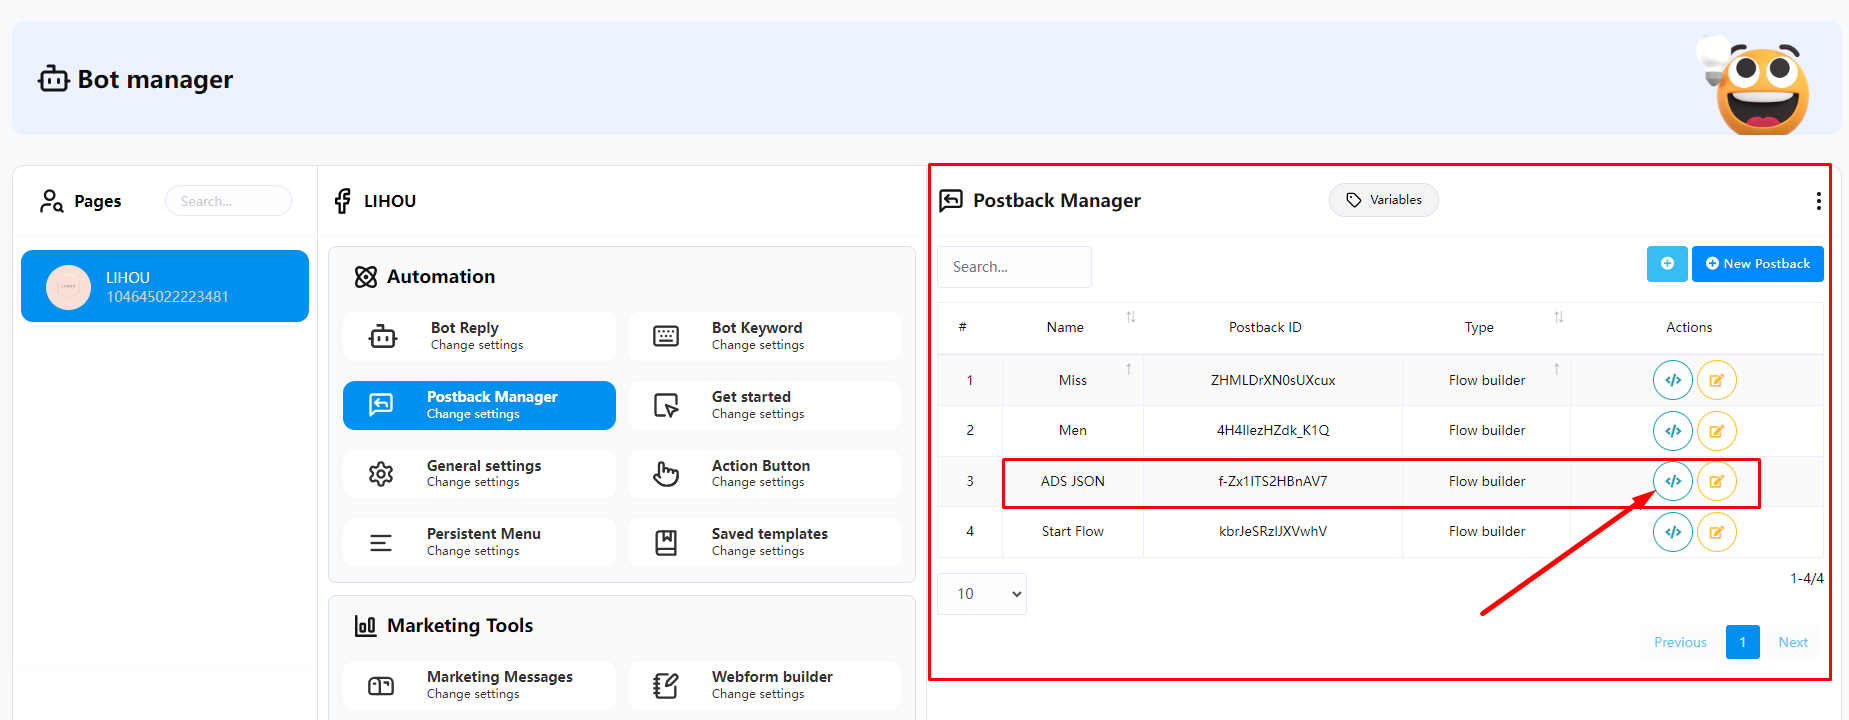
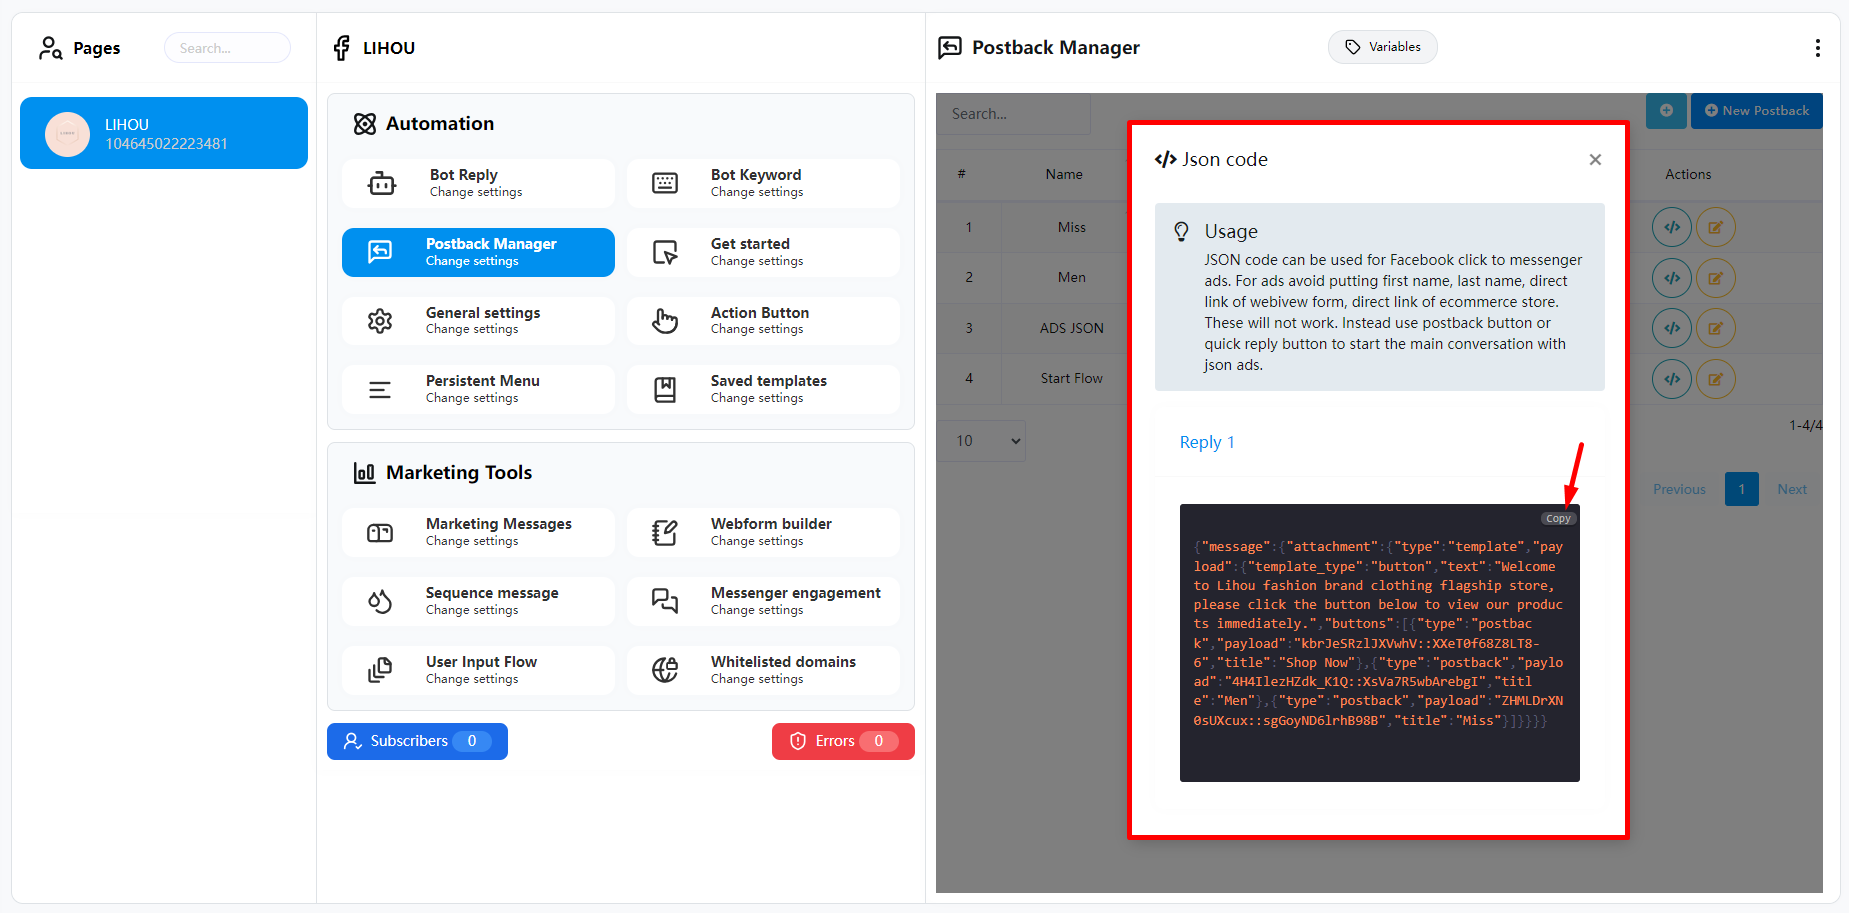
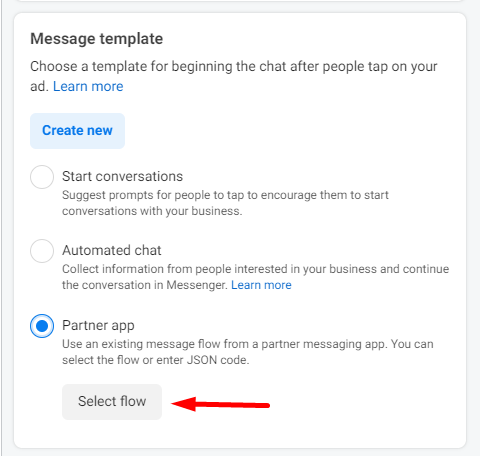
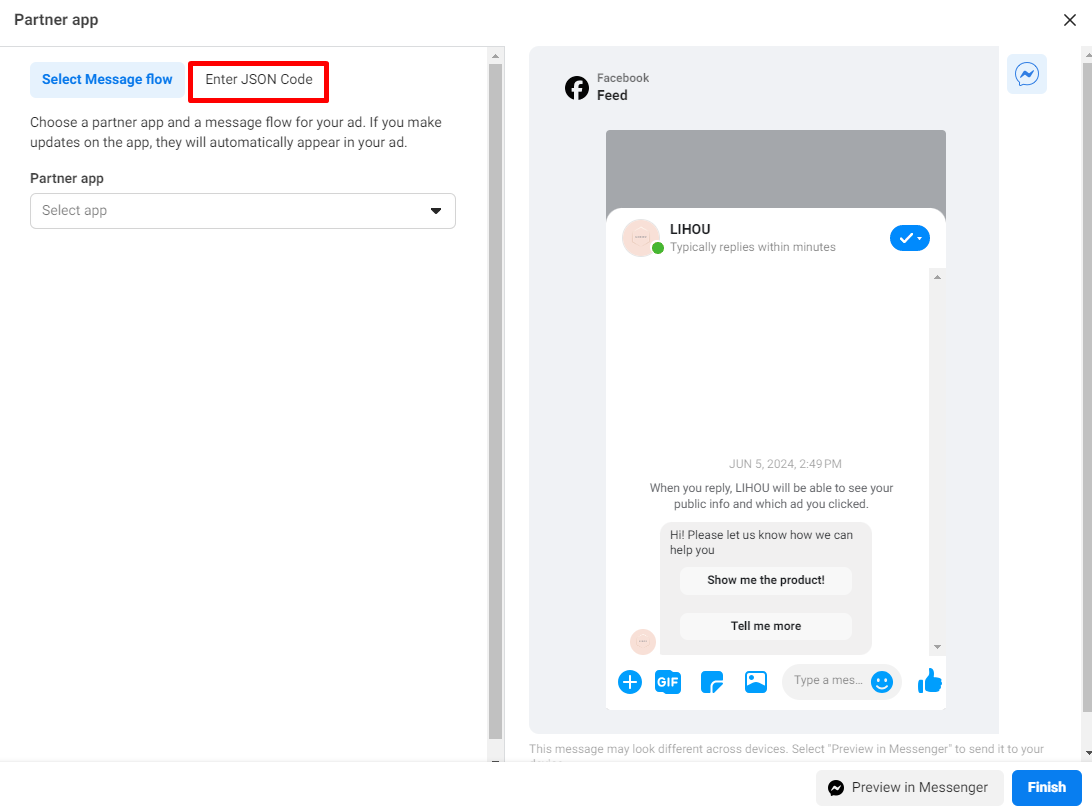
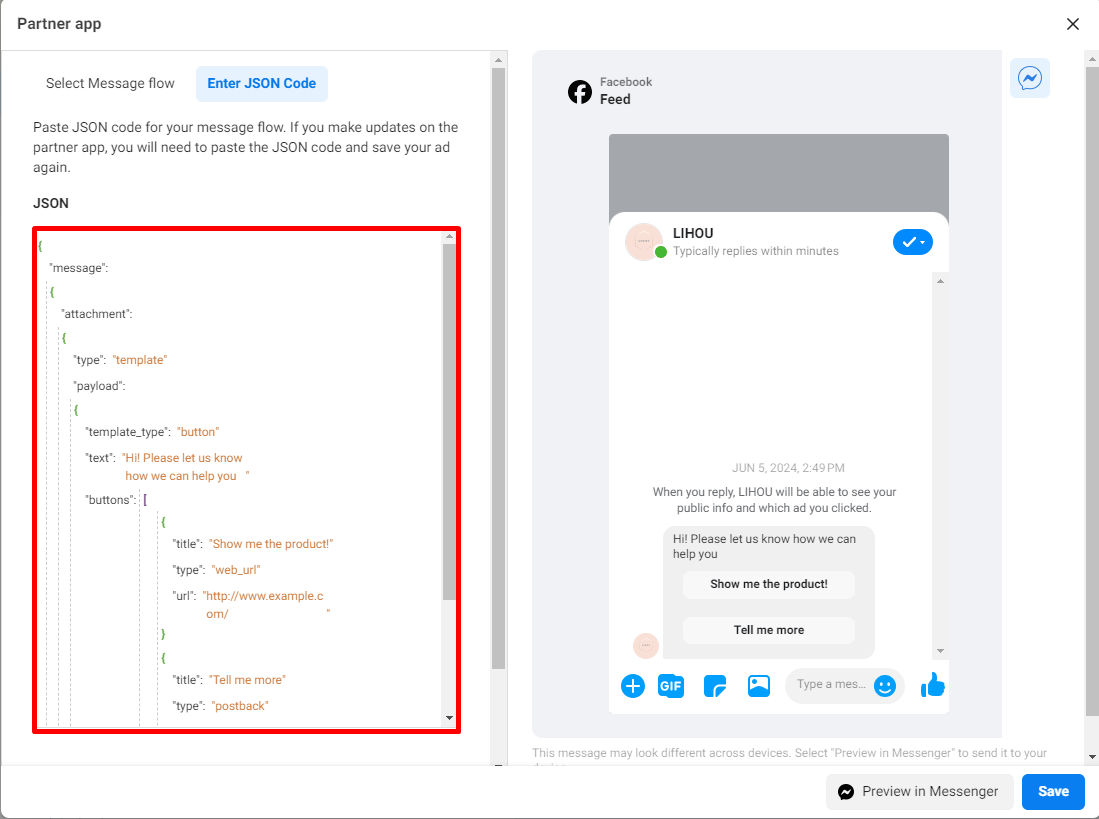
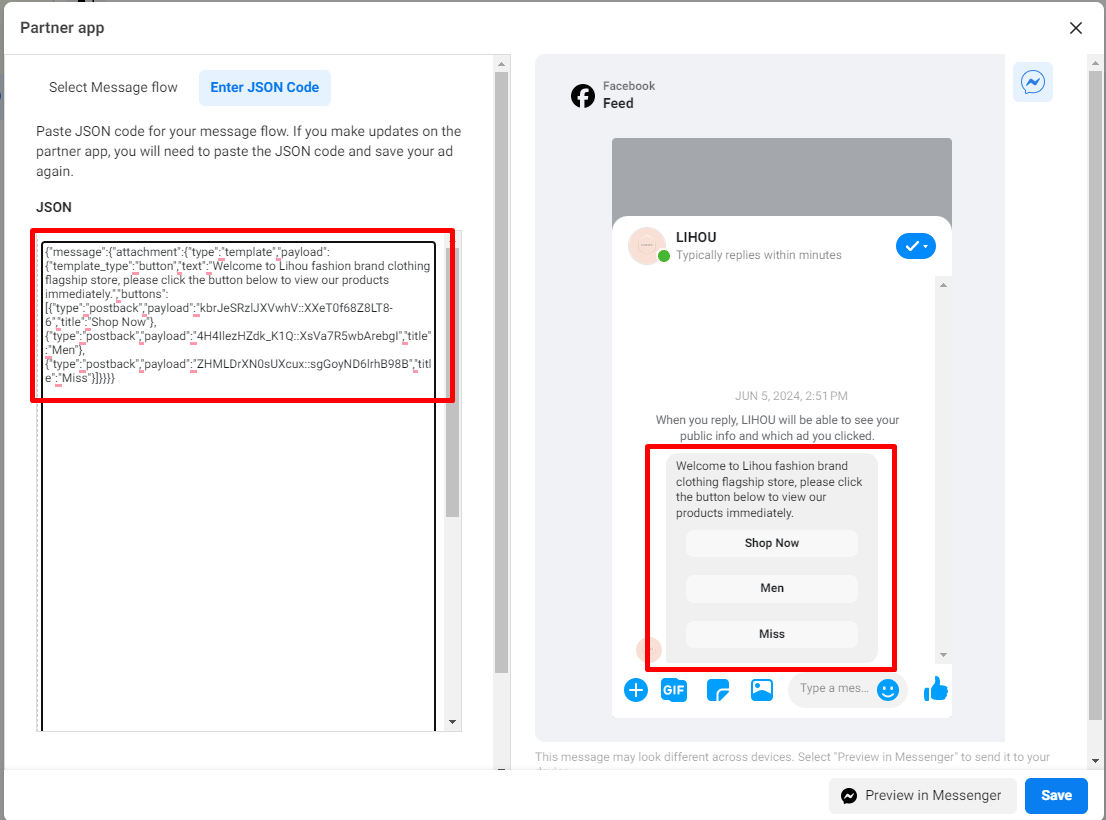
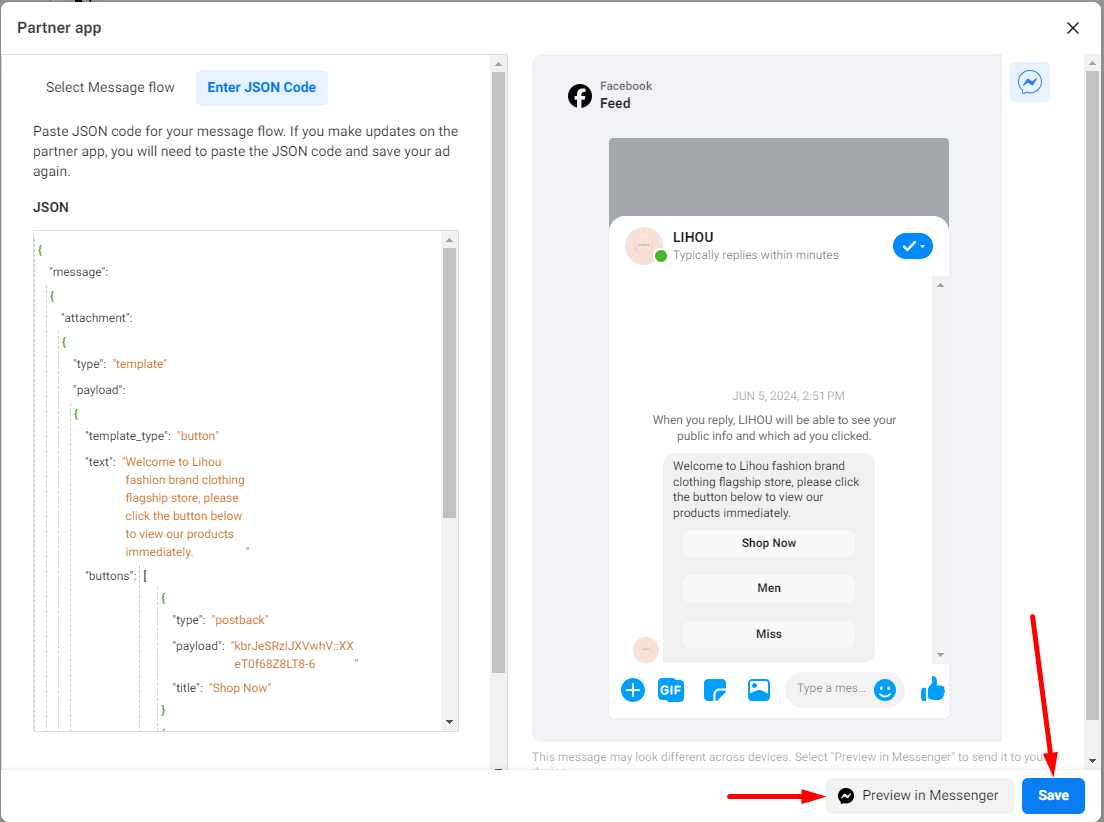
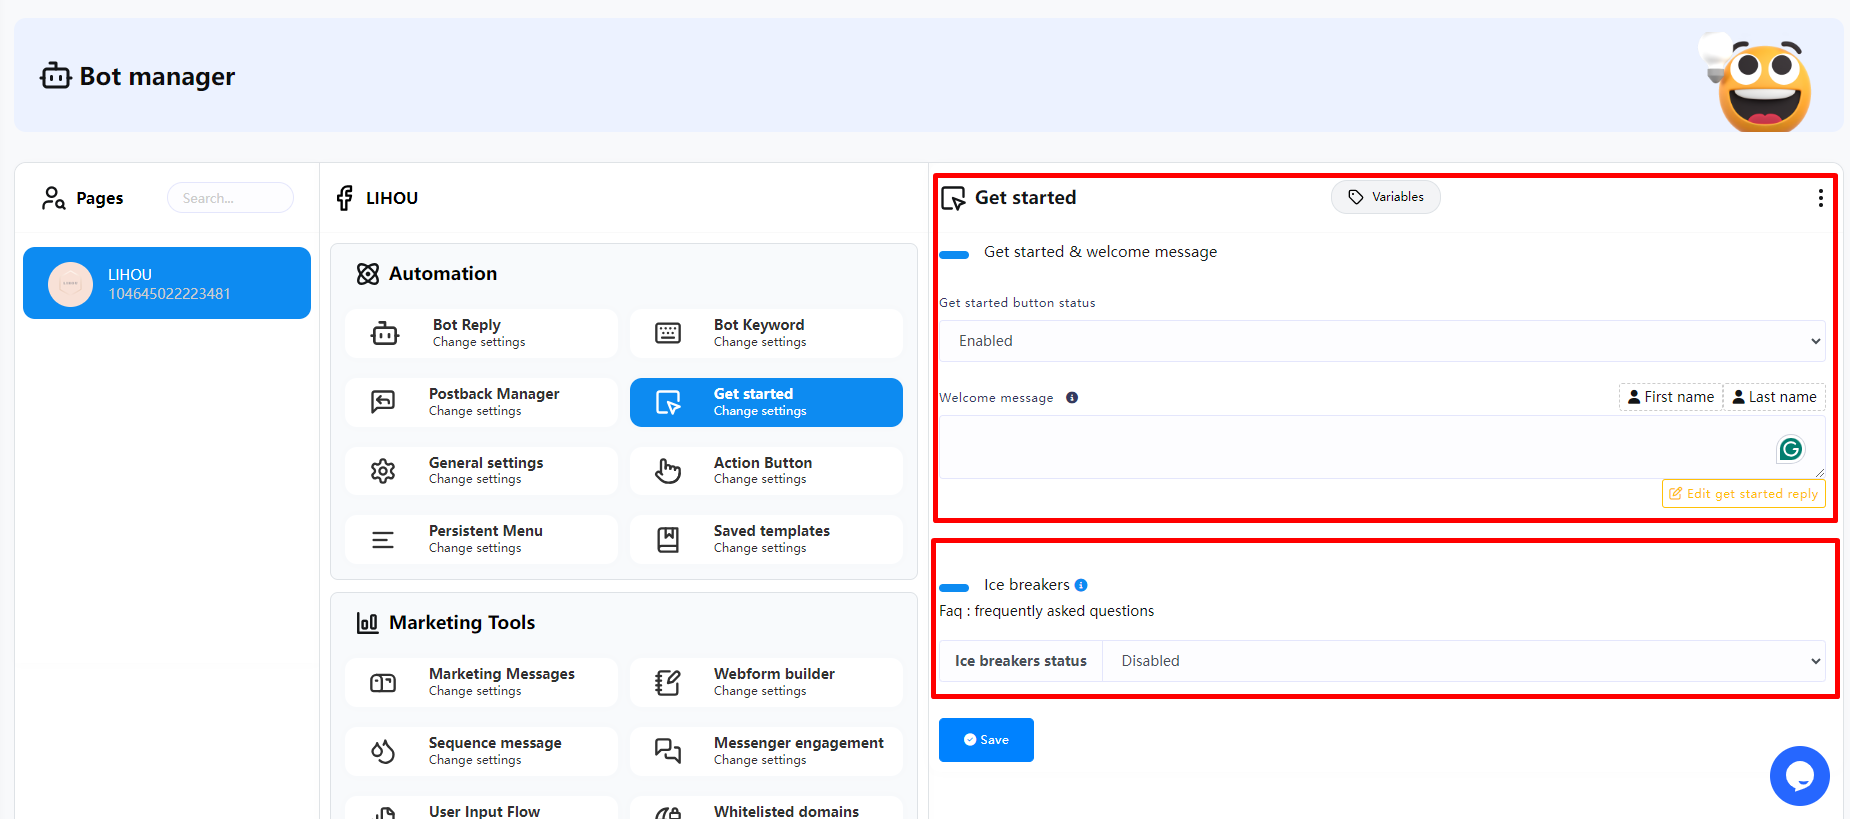
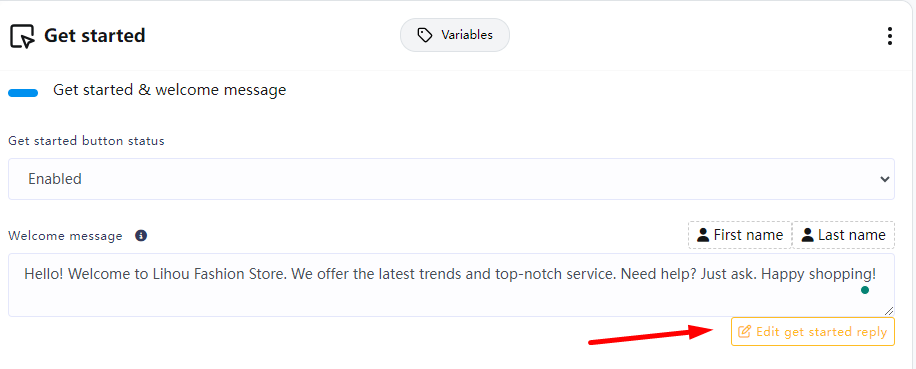
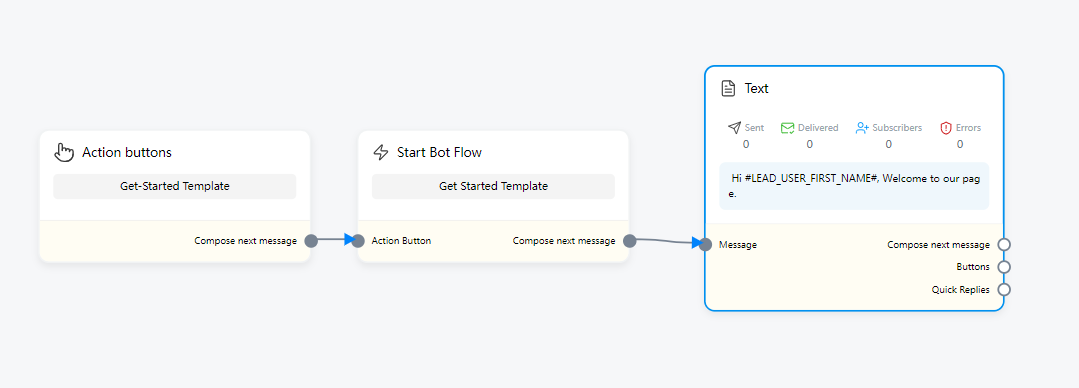
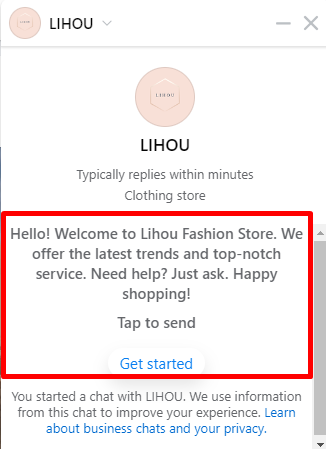
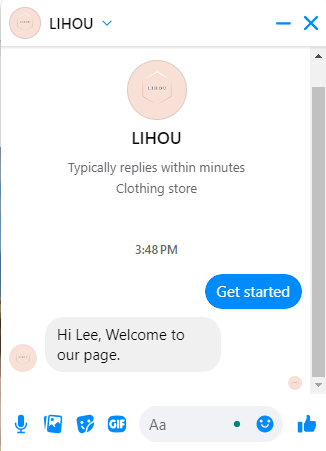
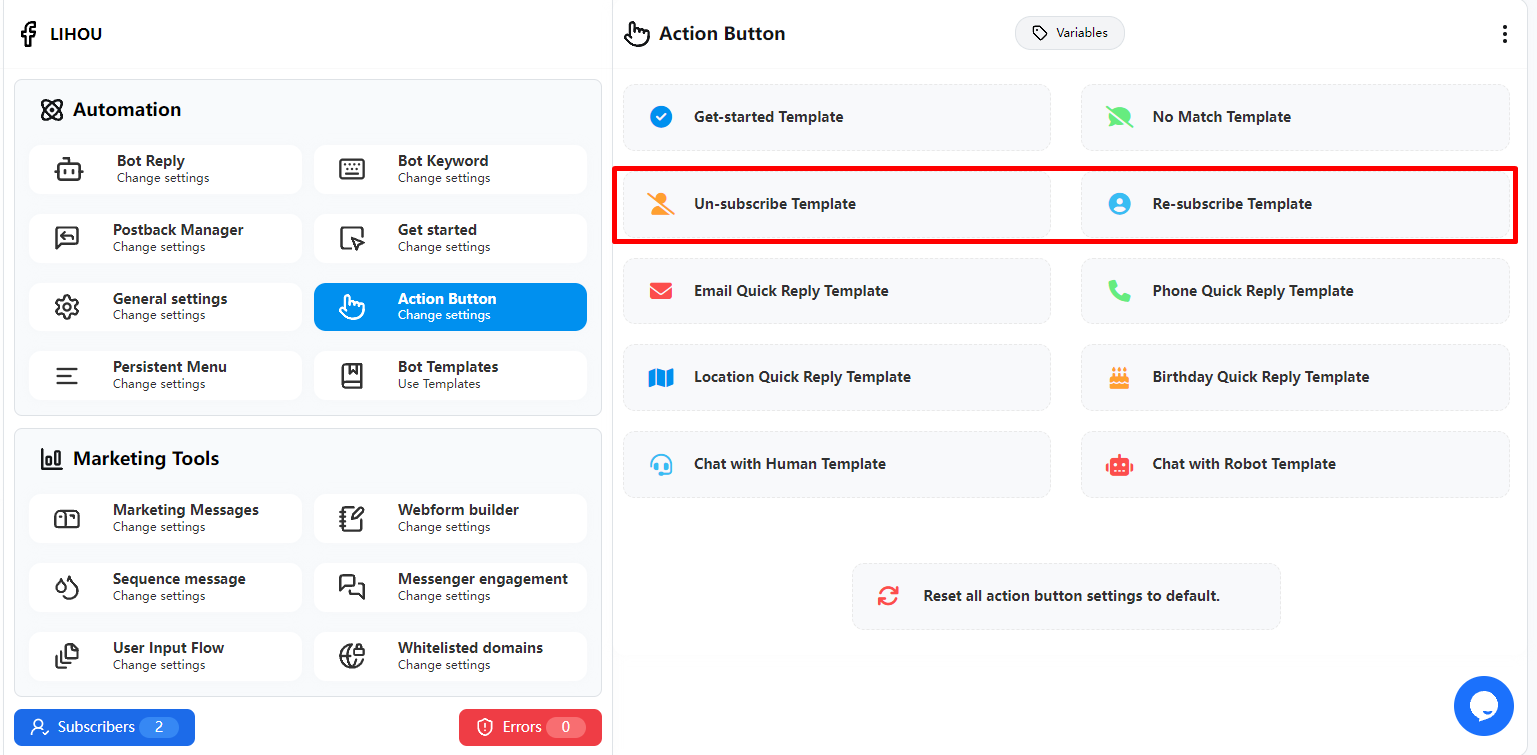
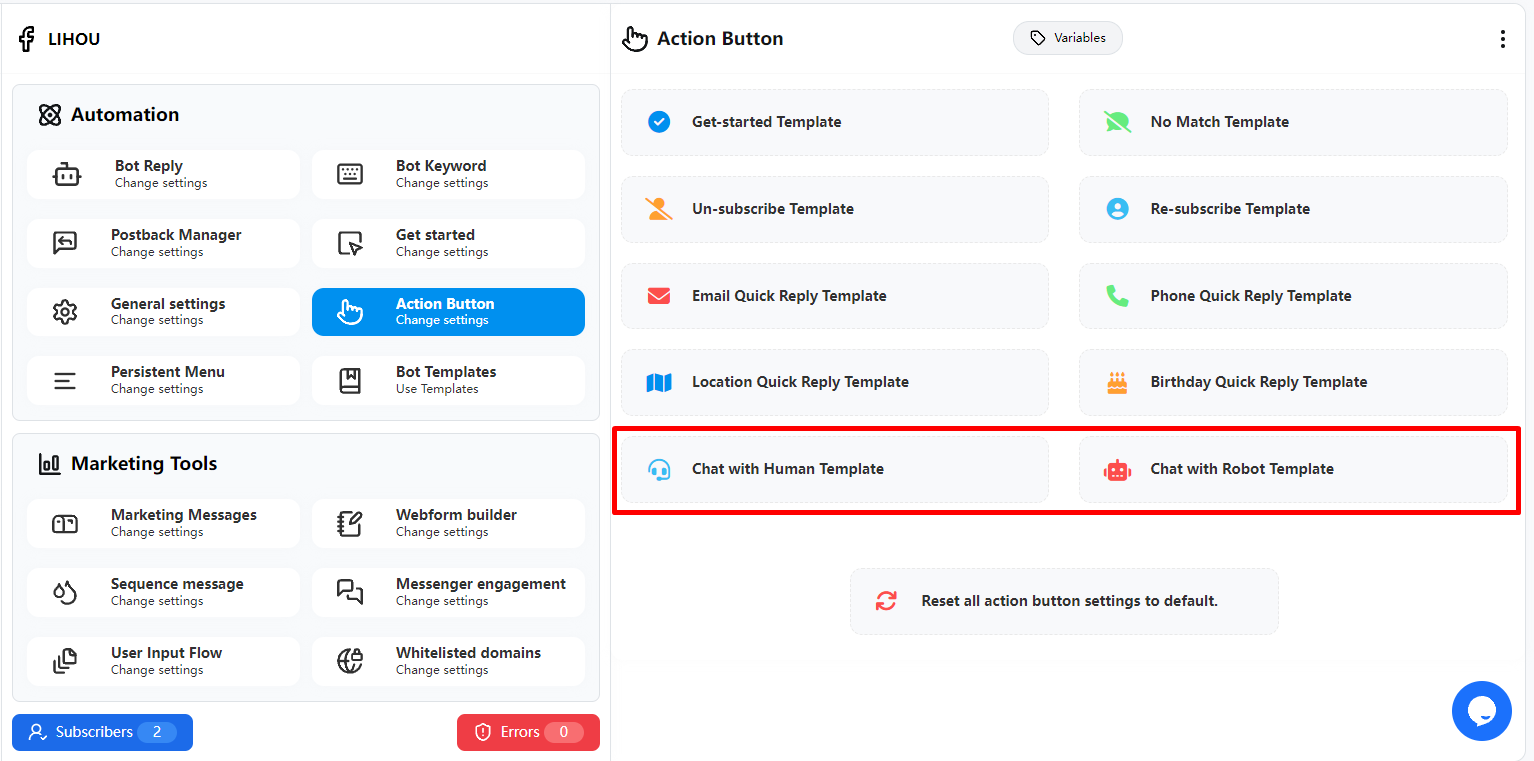
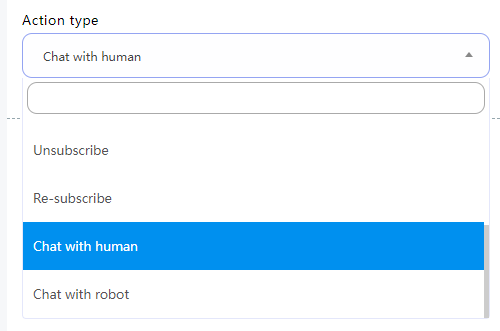
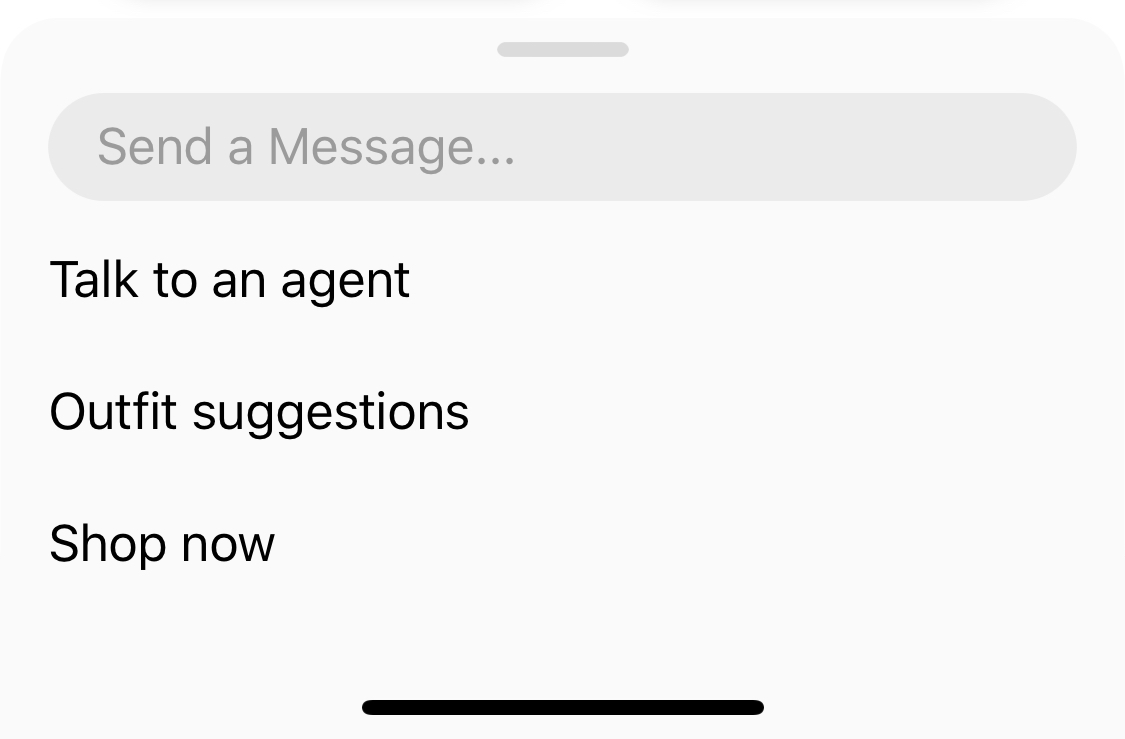
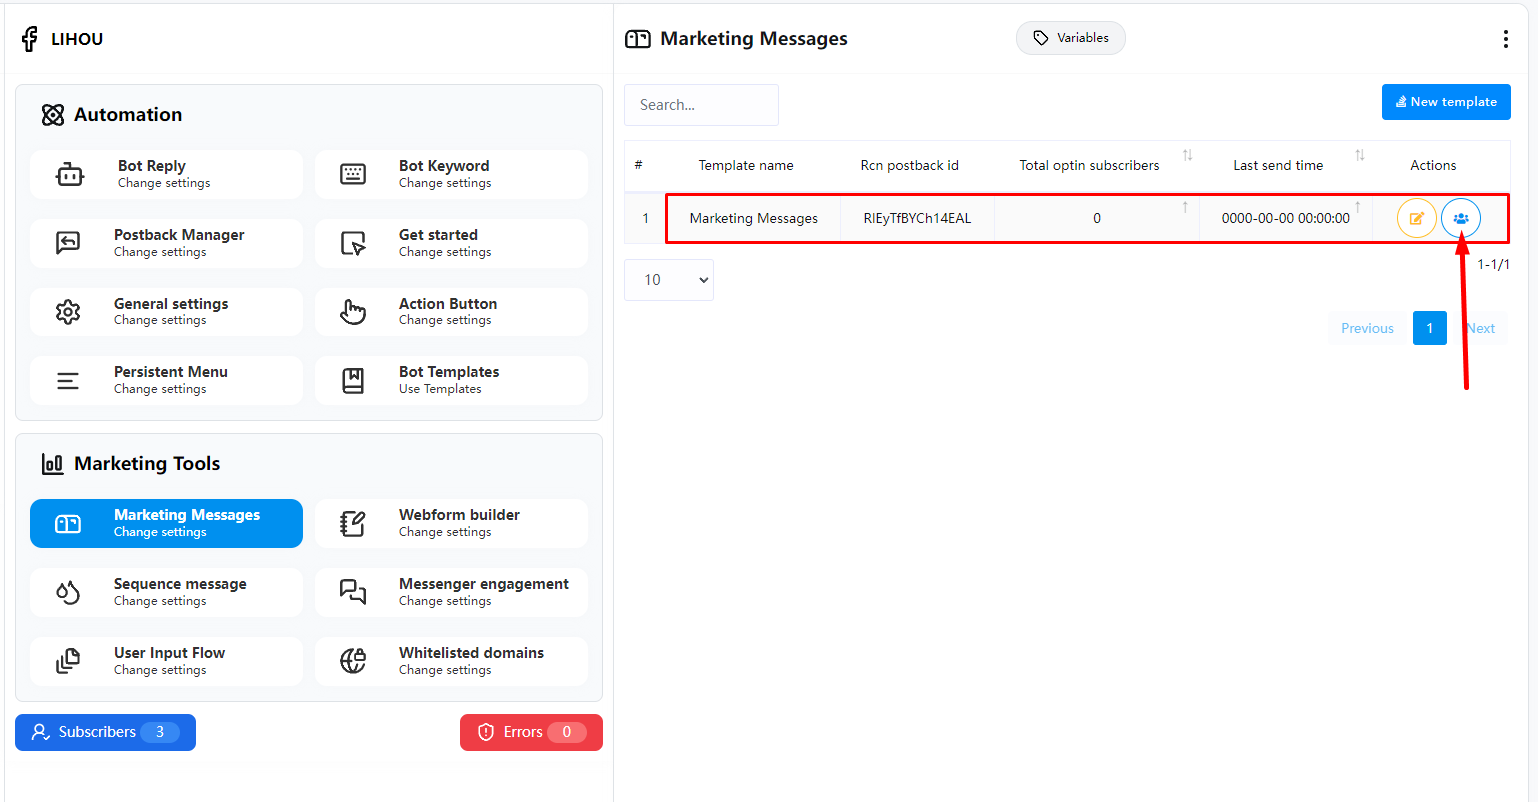
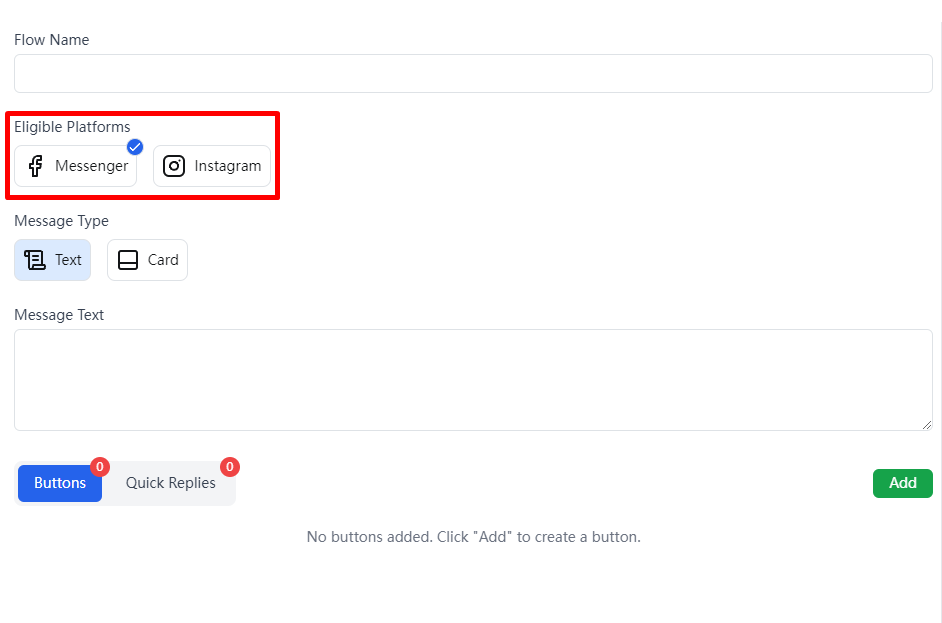
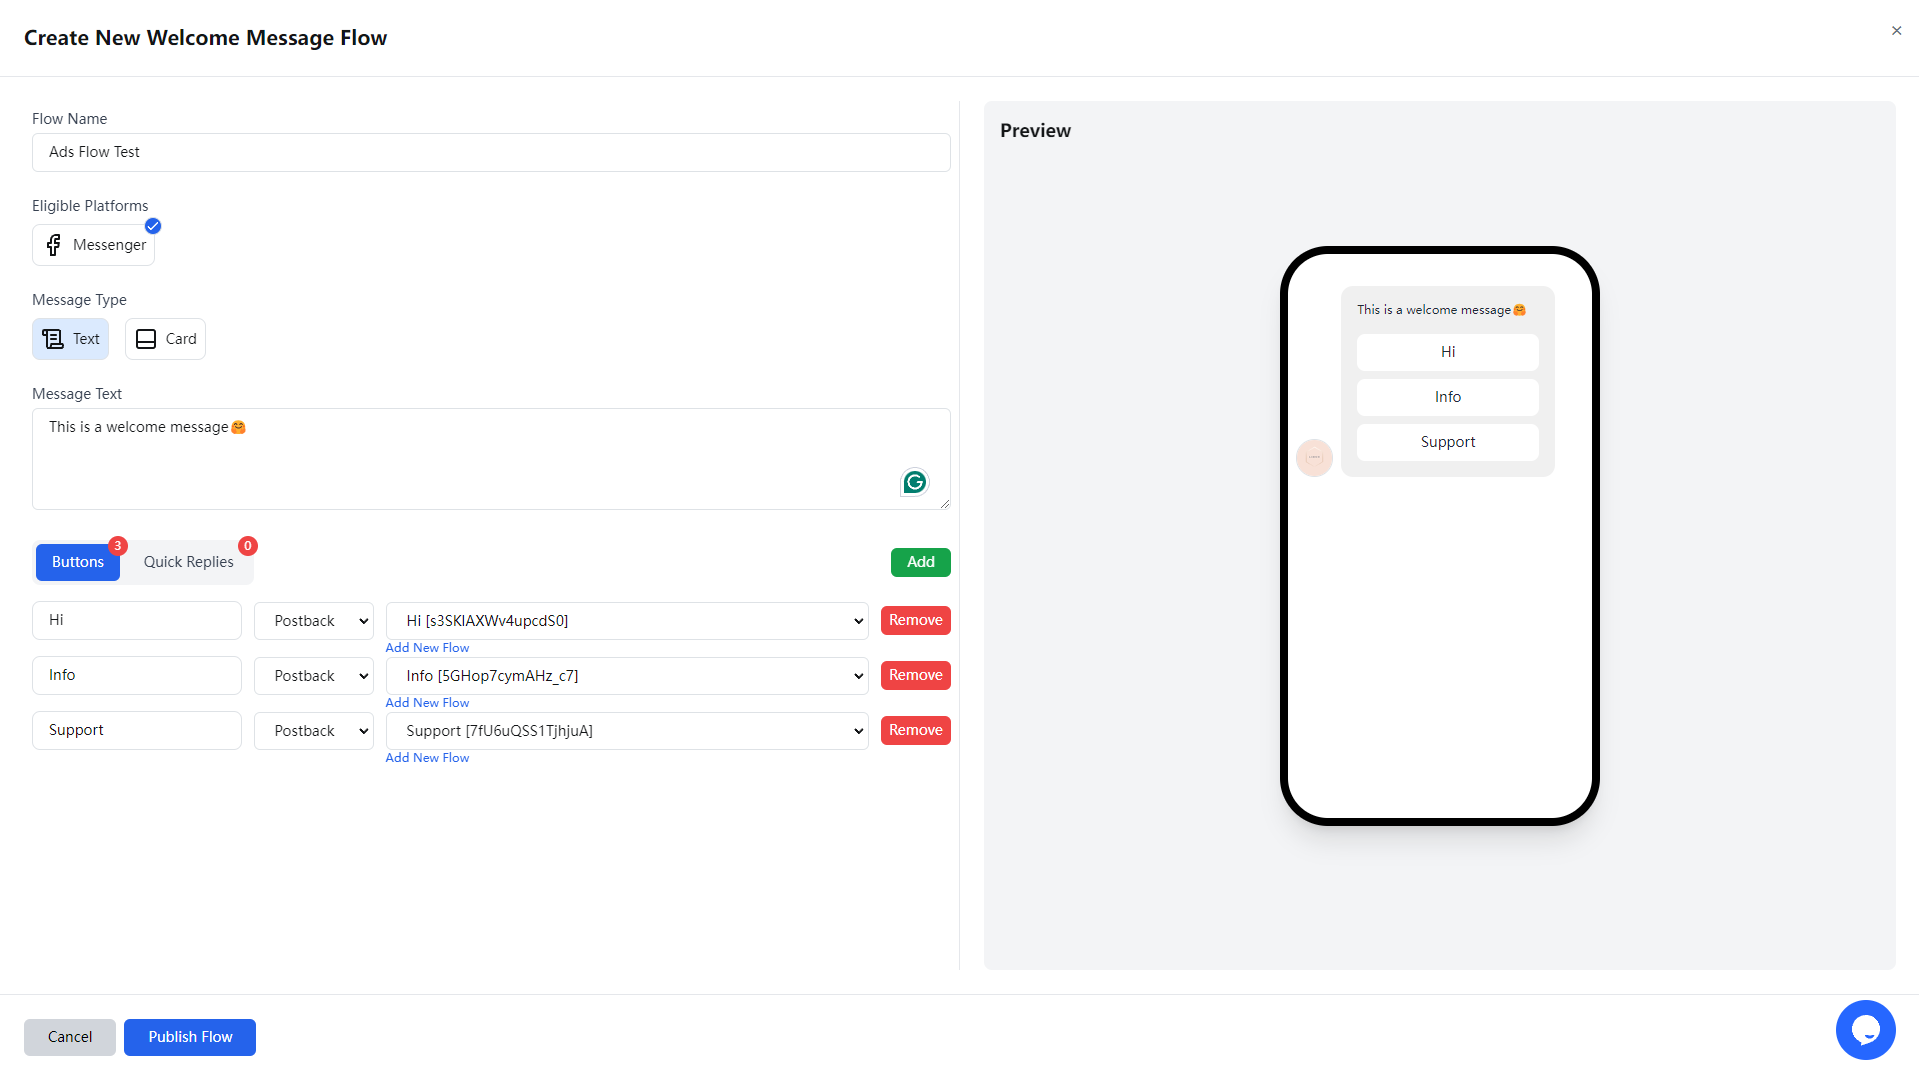
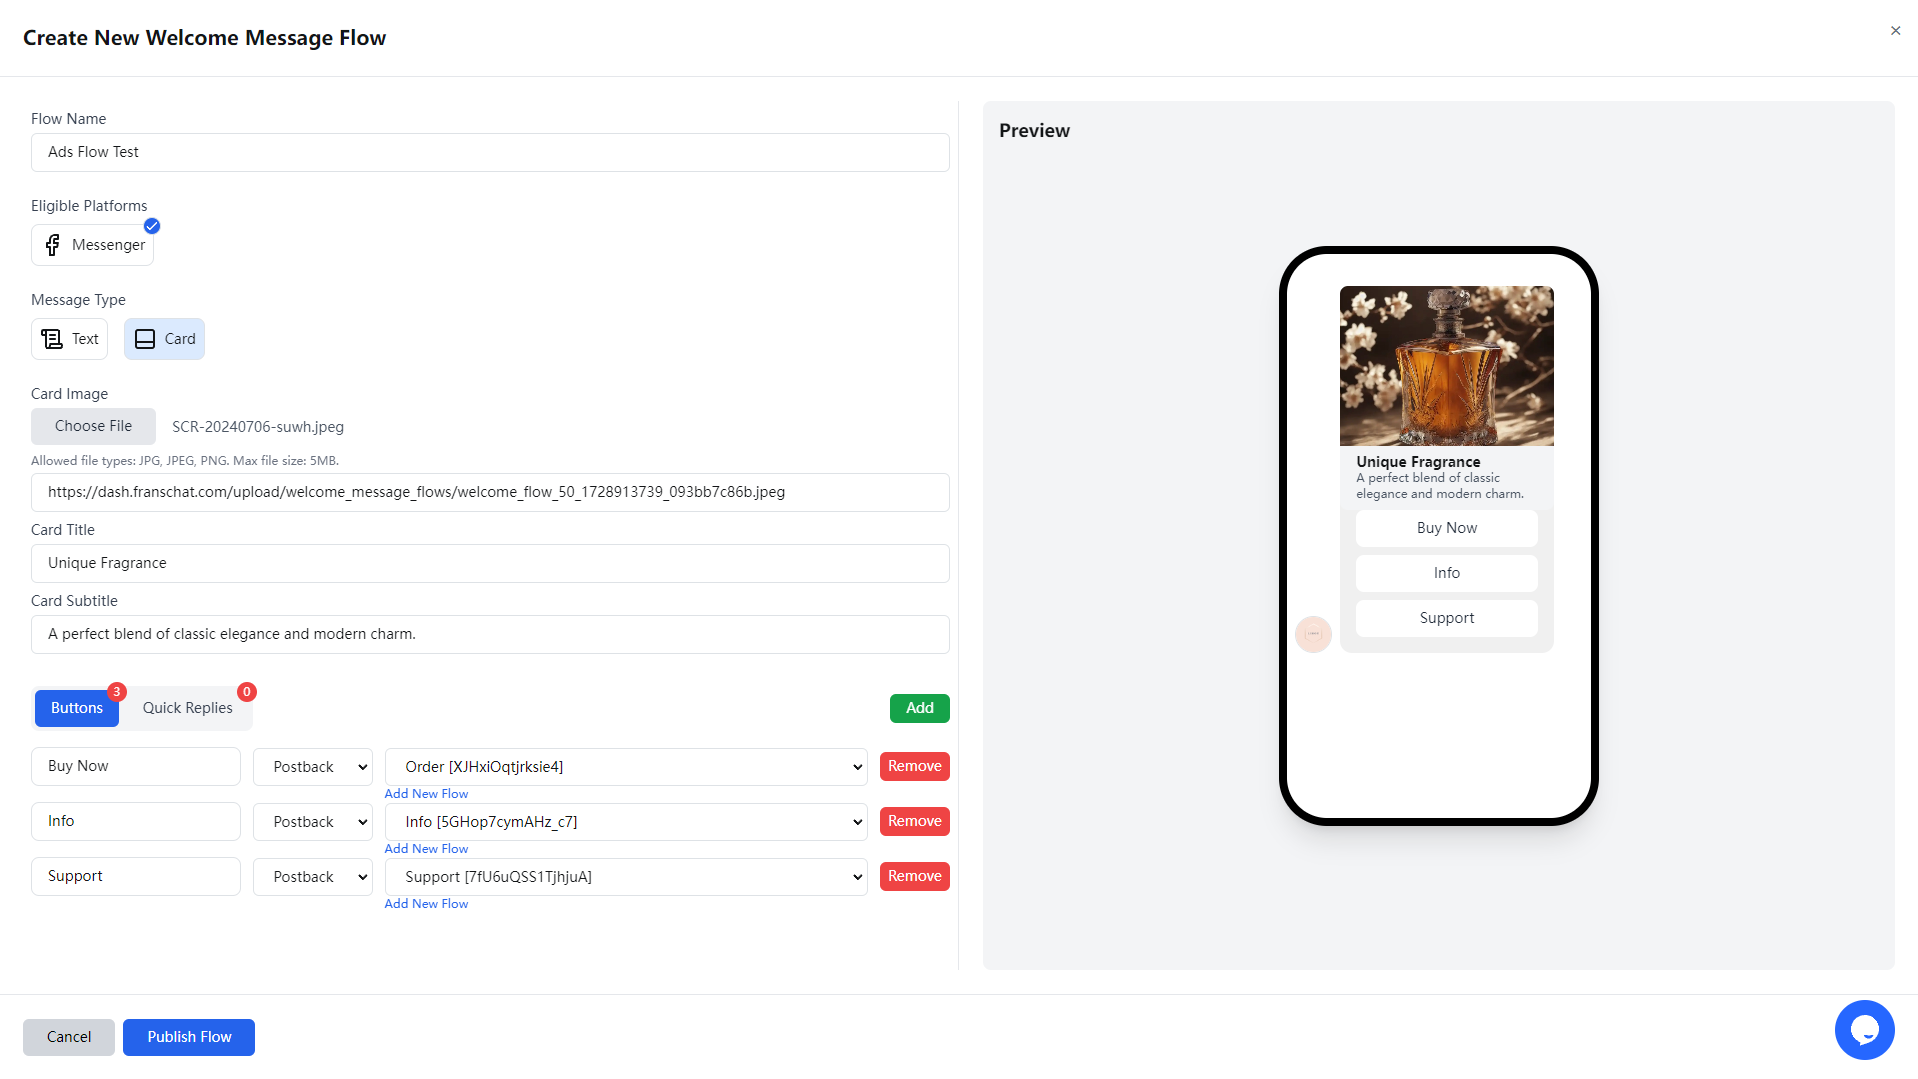
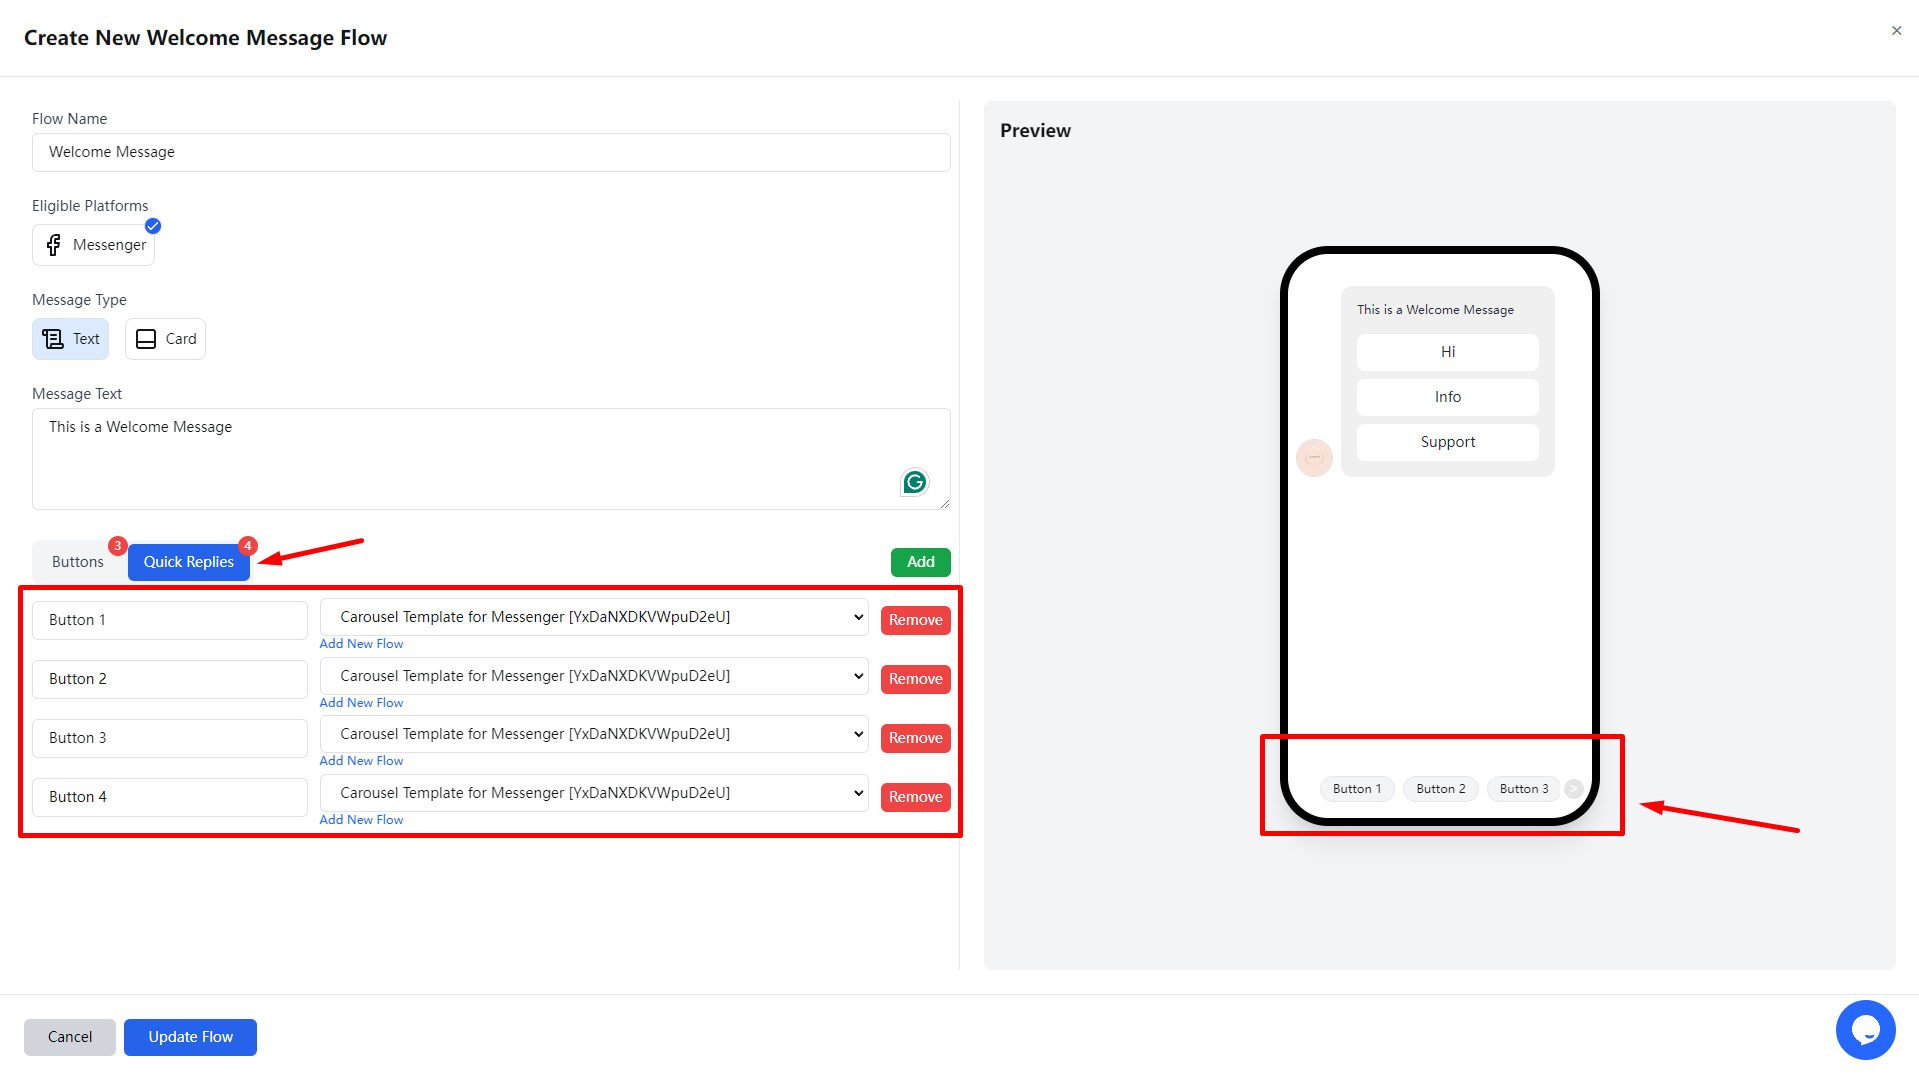
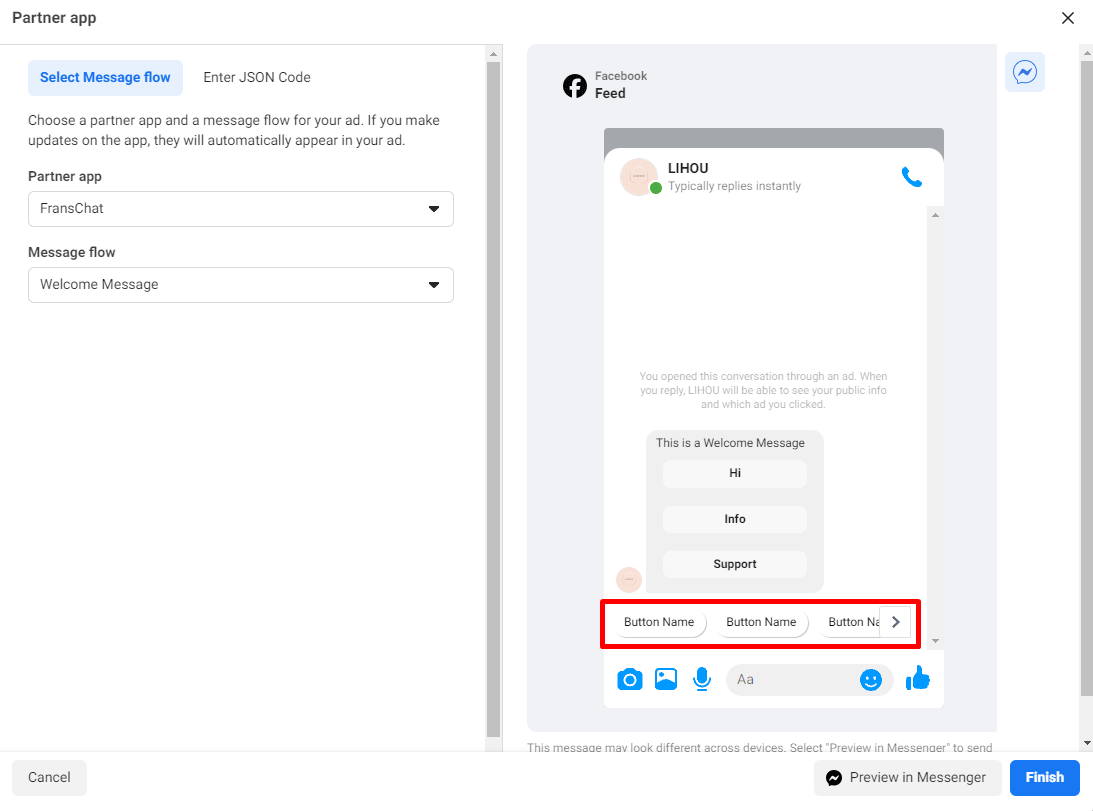
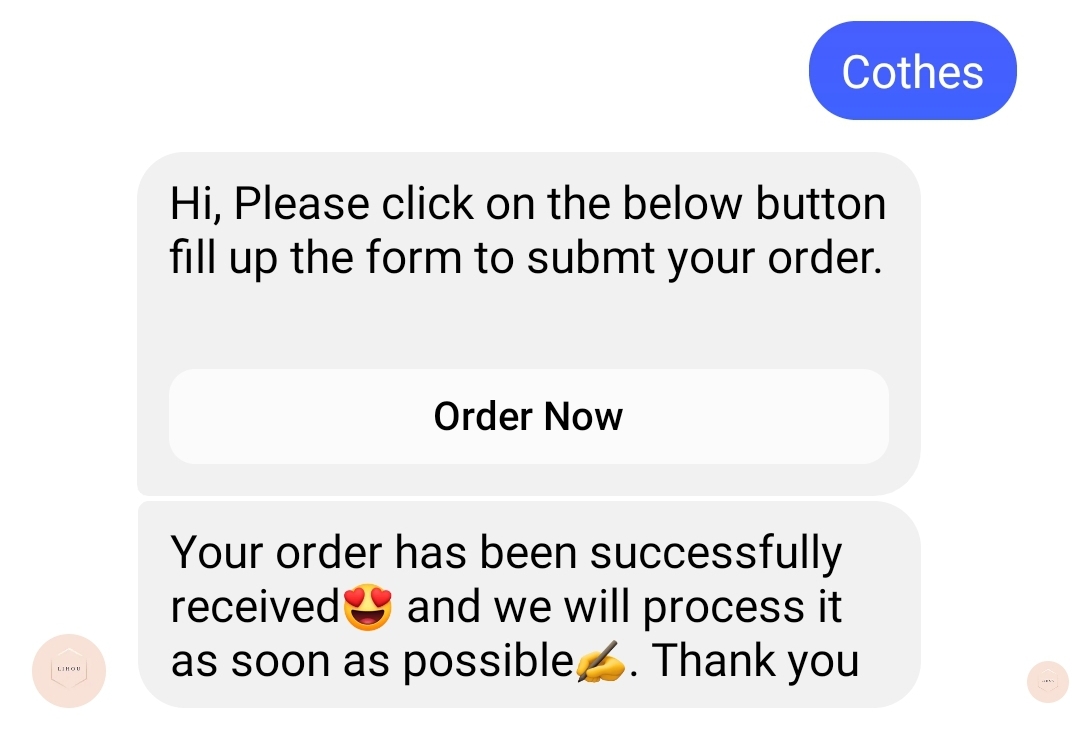
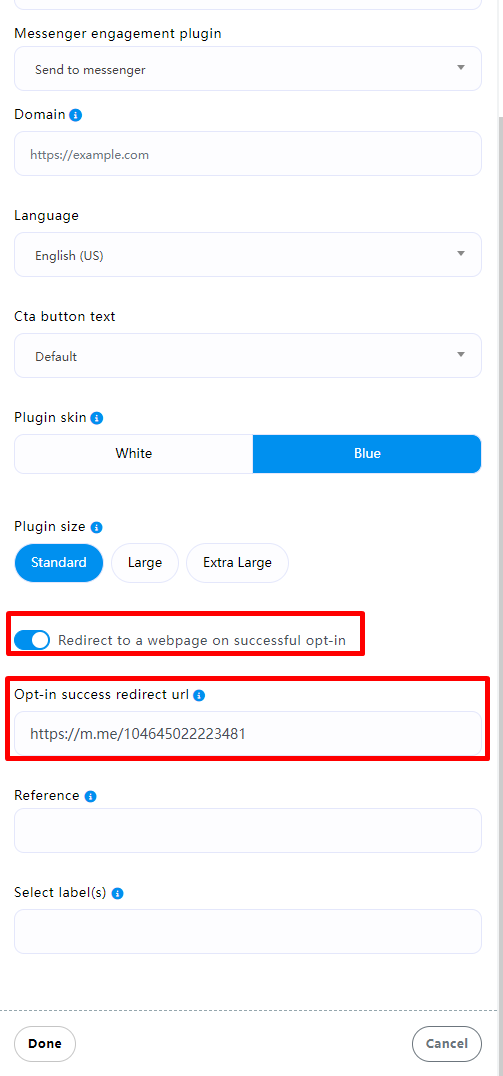
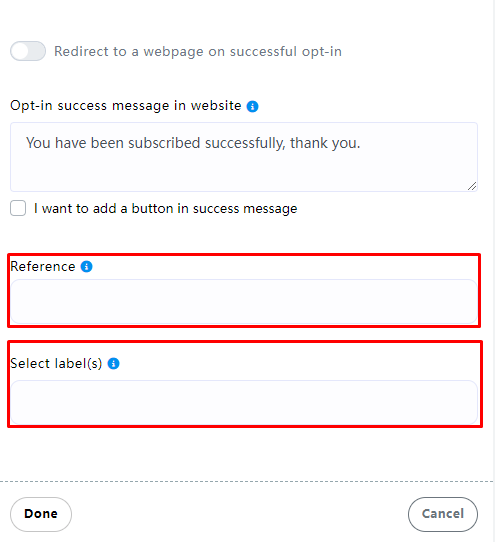
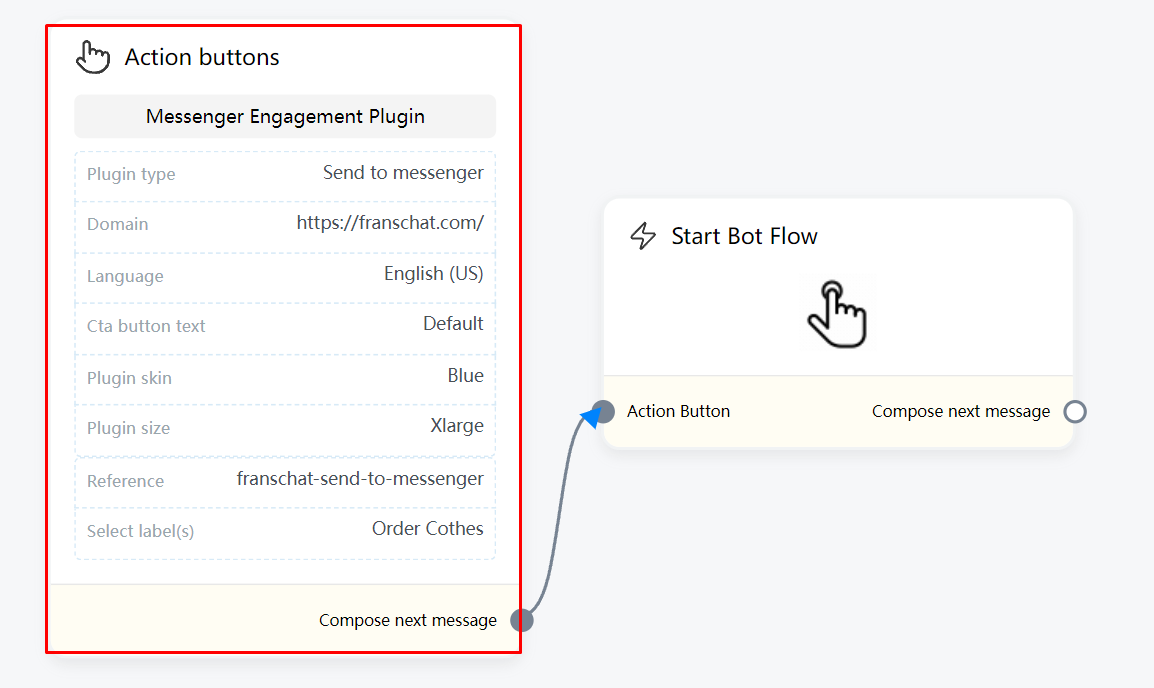
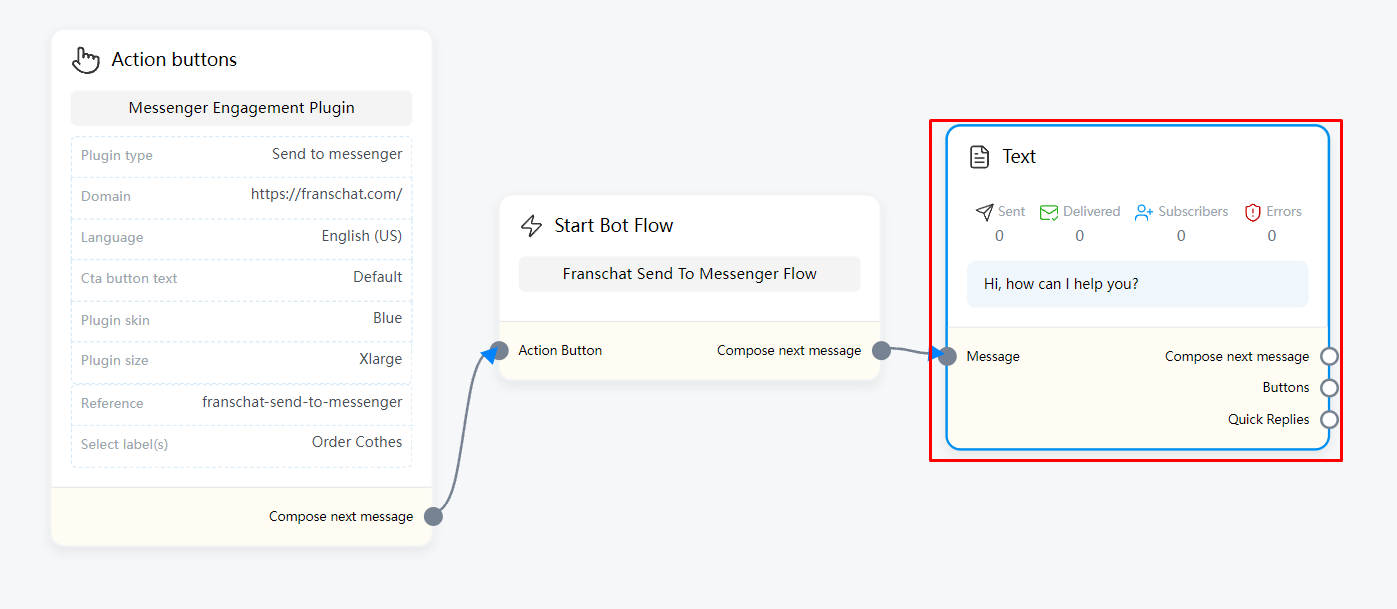
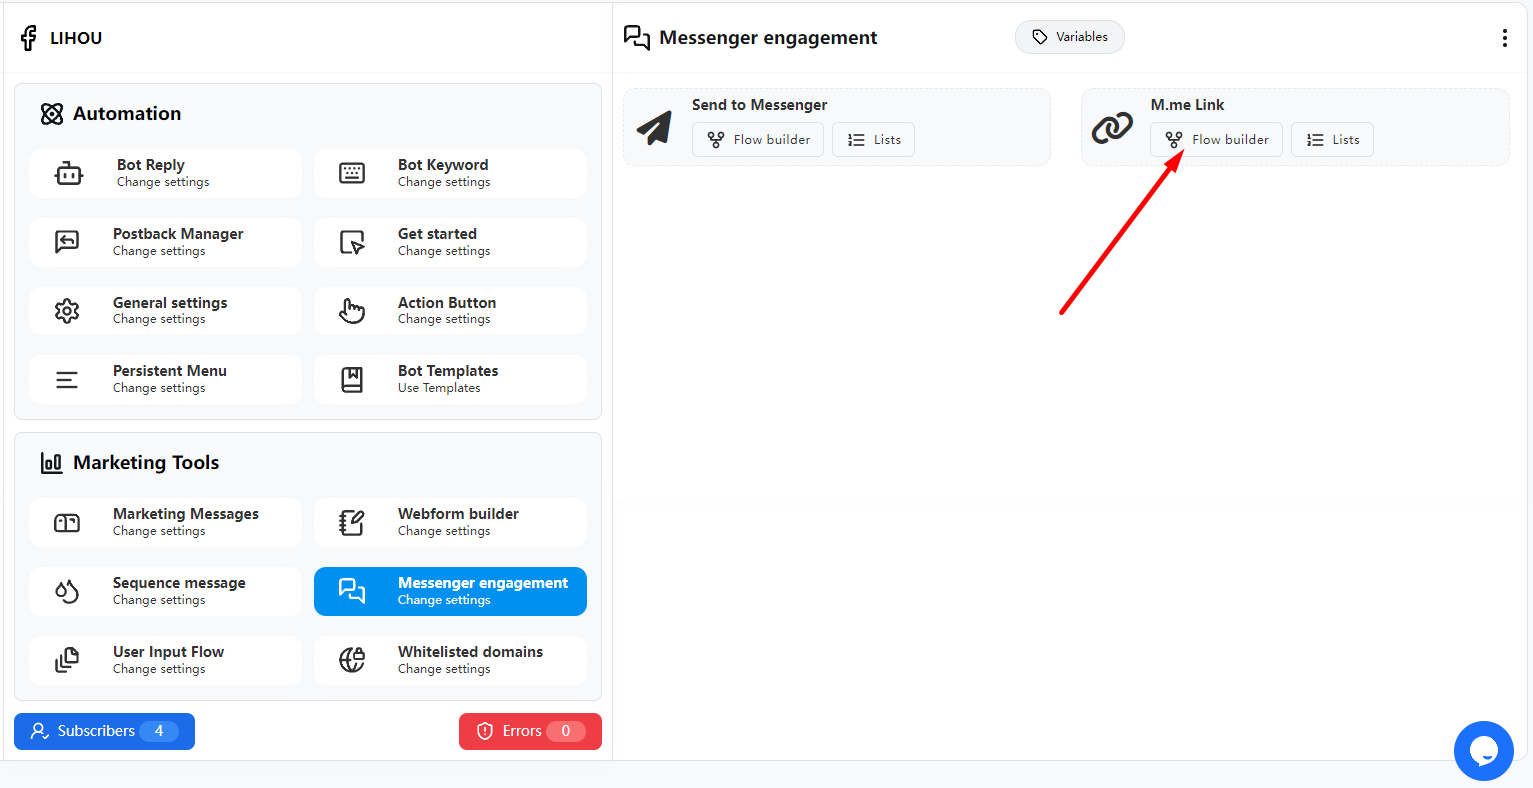
Updates Ads Welcome Message Support postback on both platforms
Updates
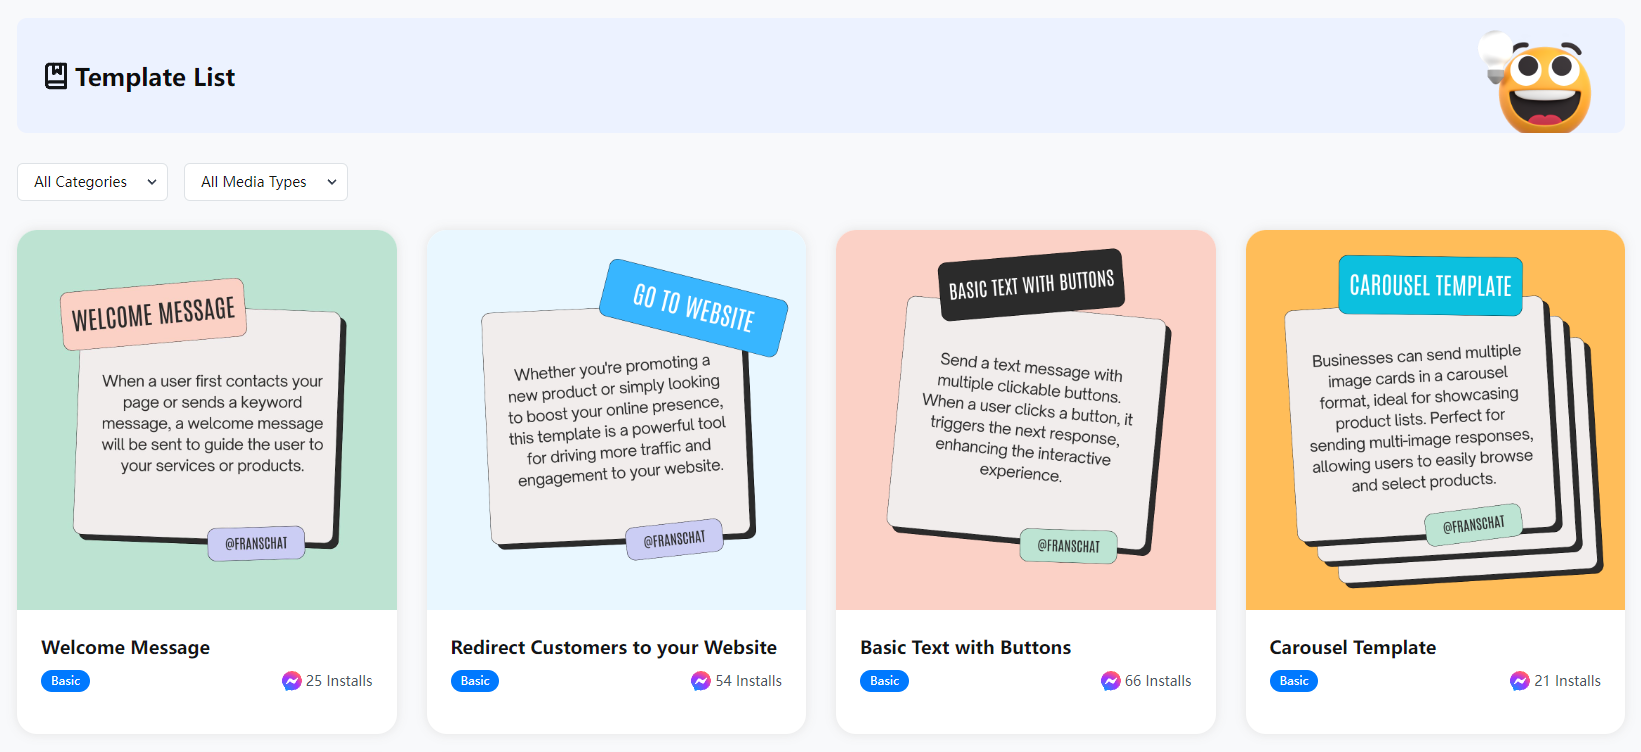
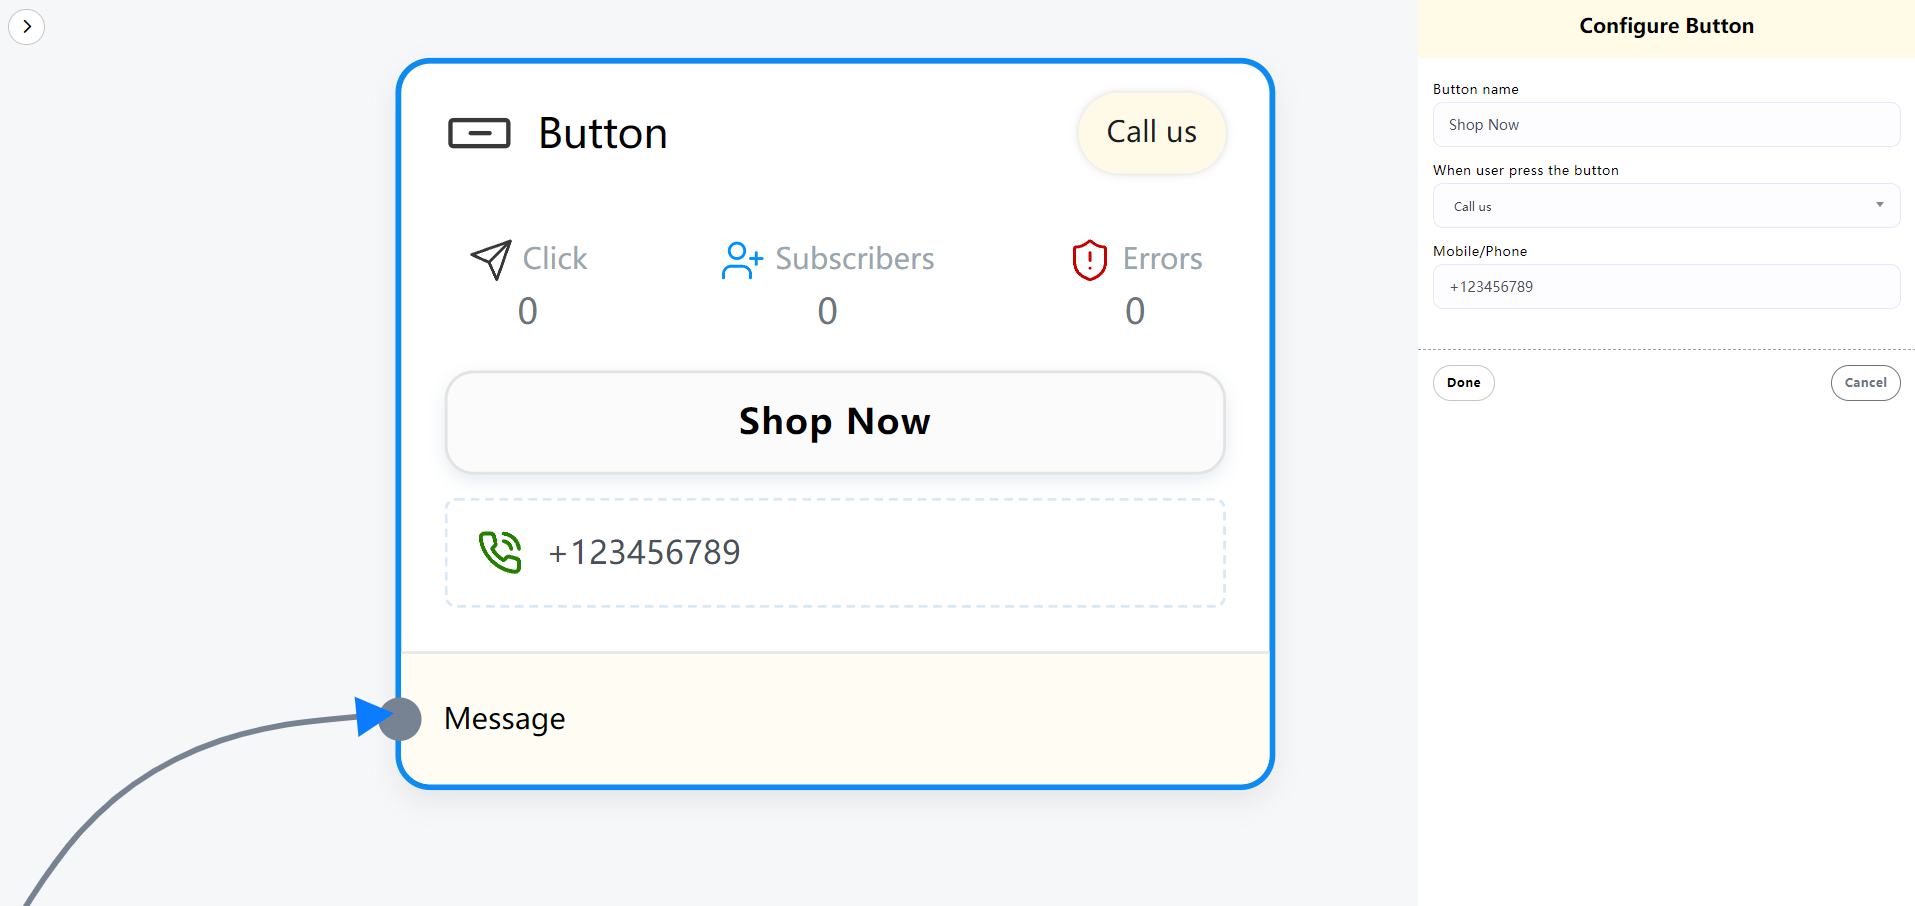
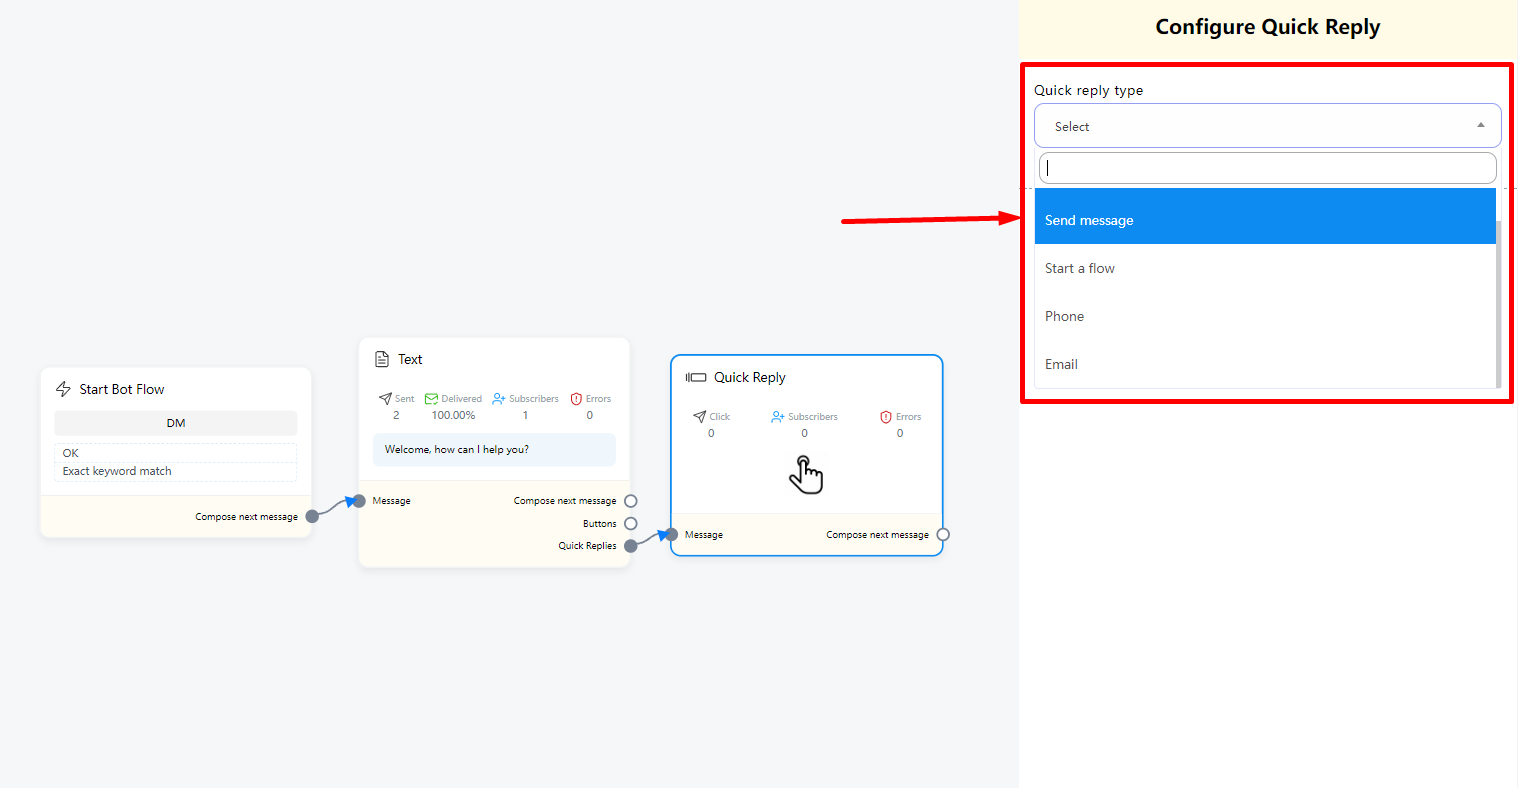
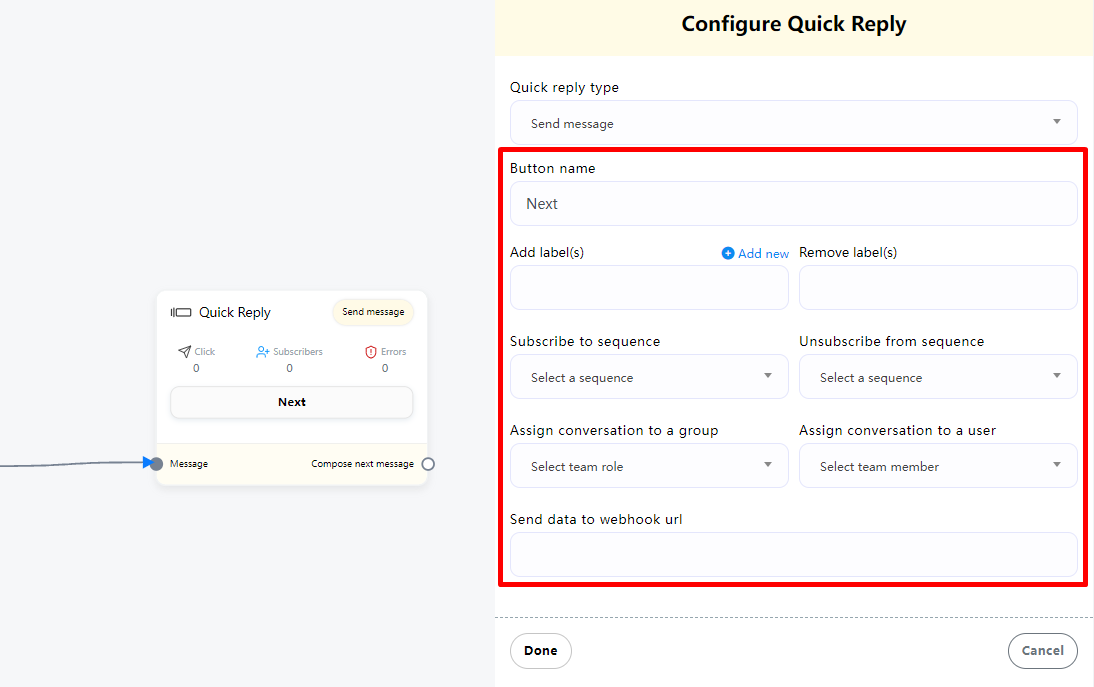
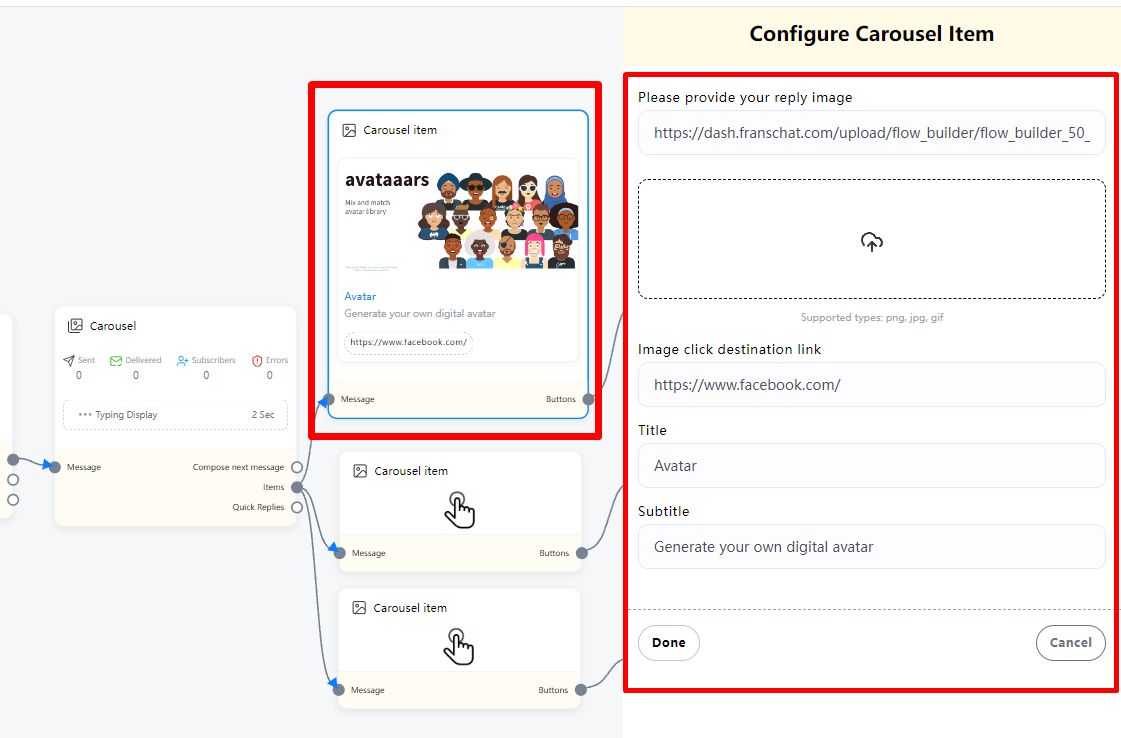
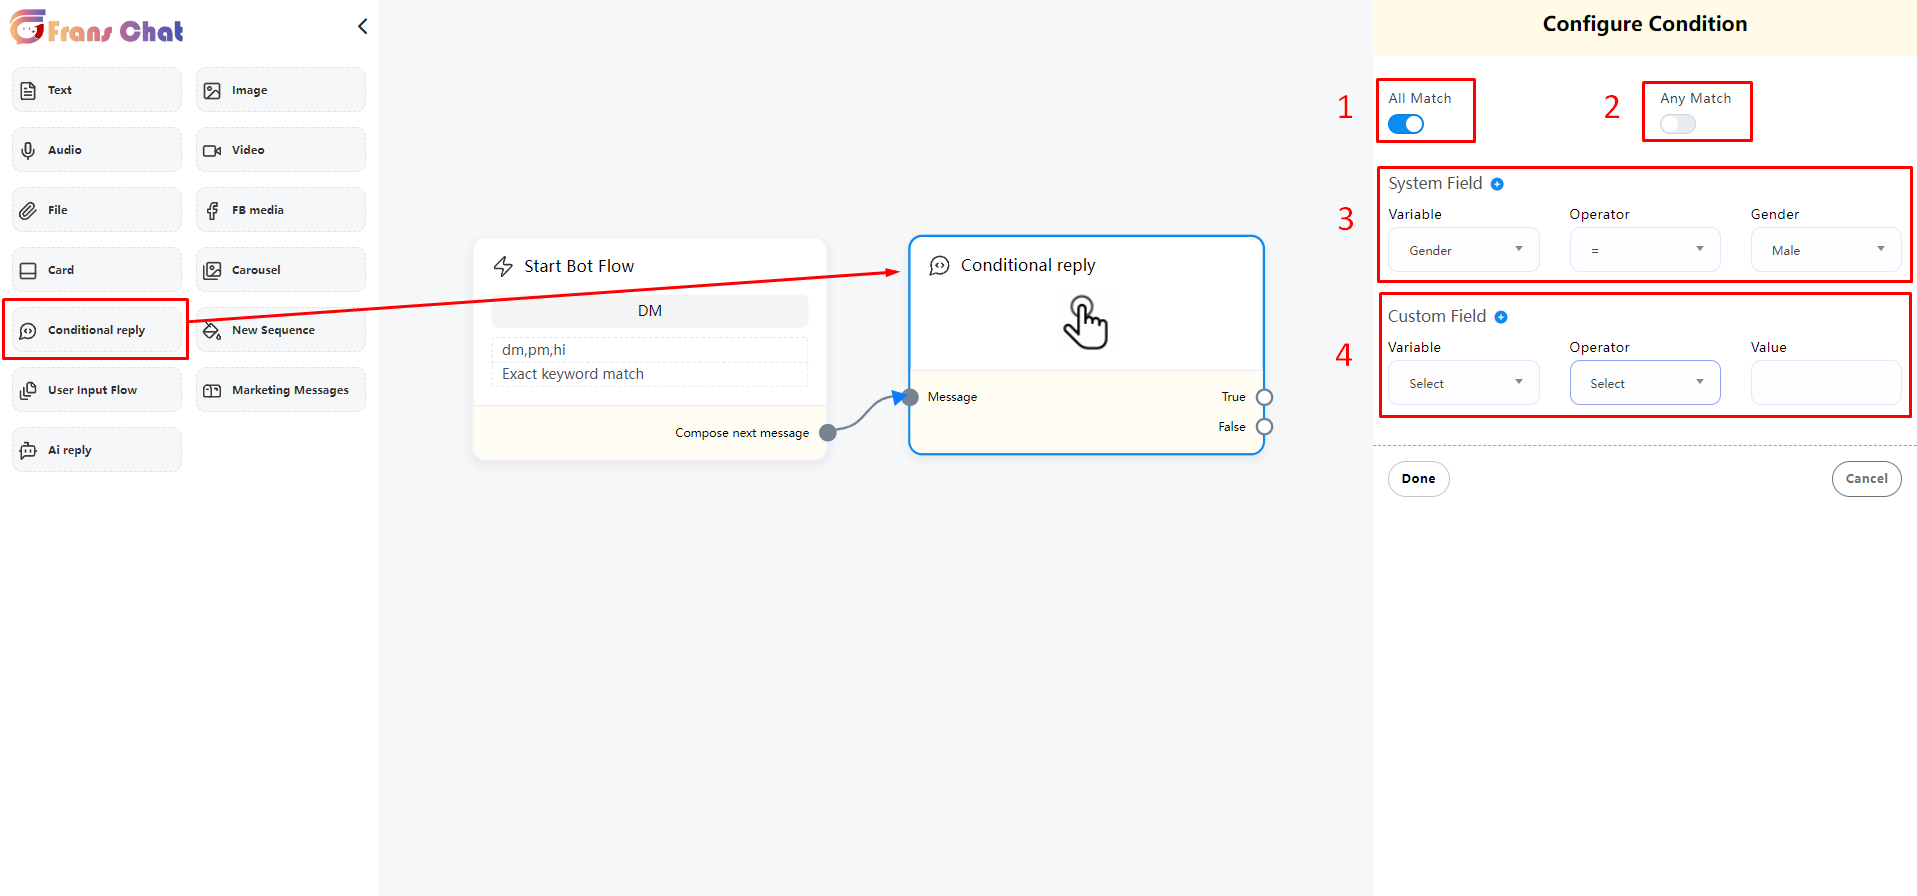
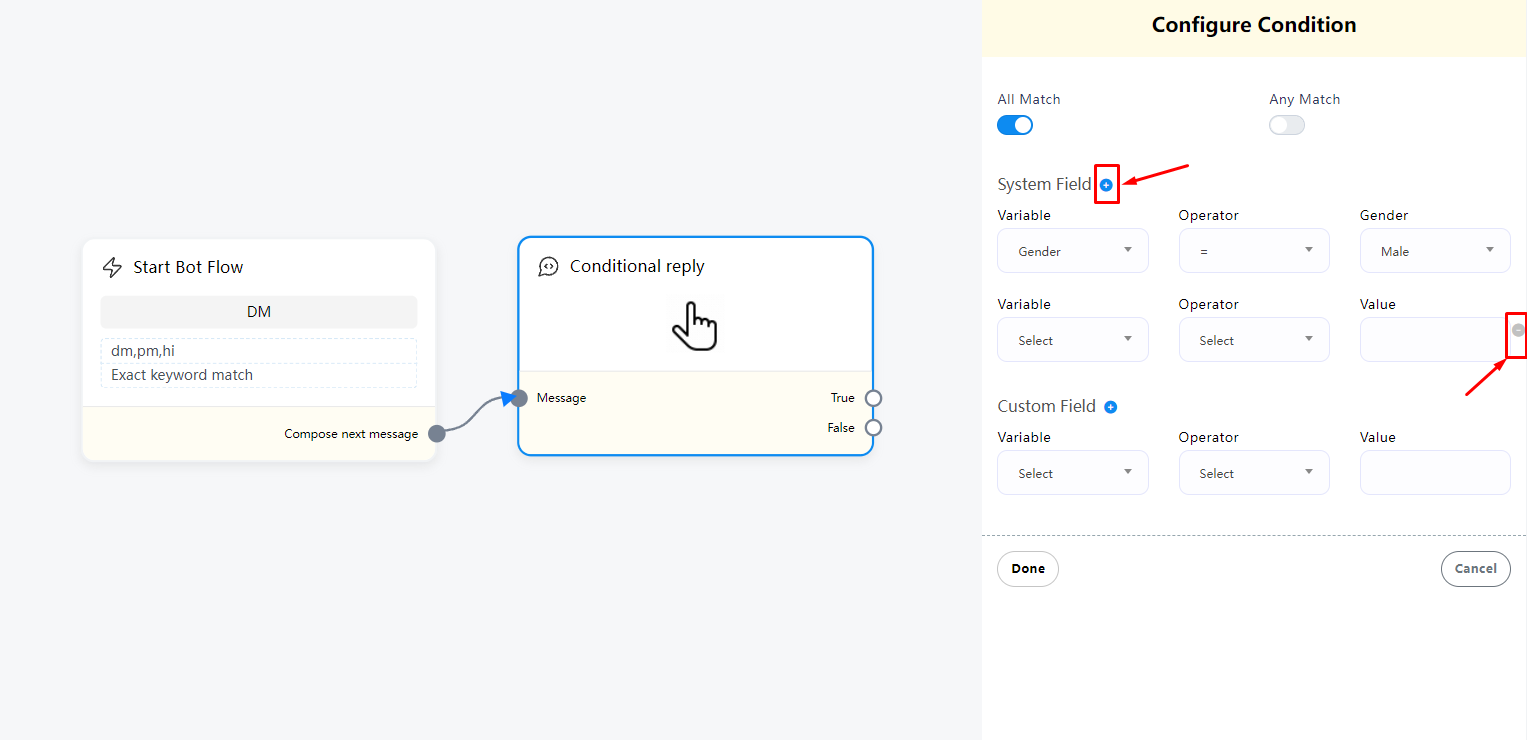
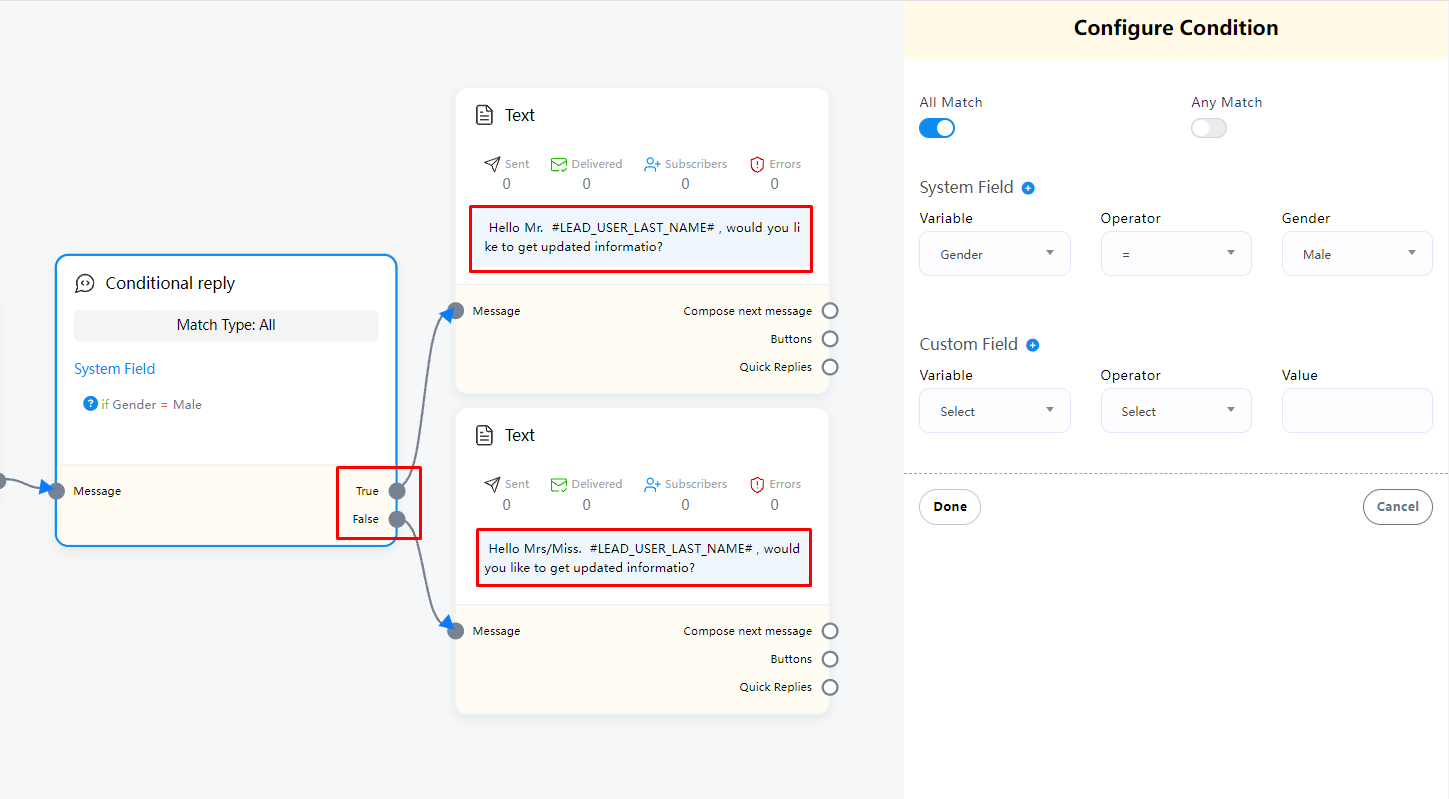
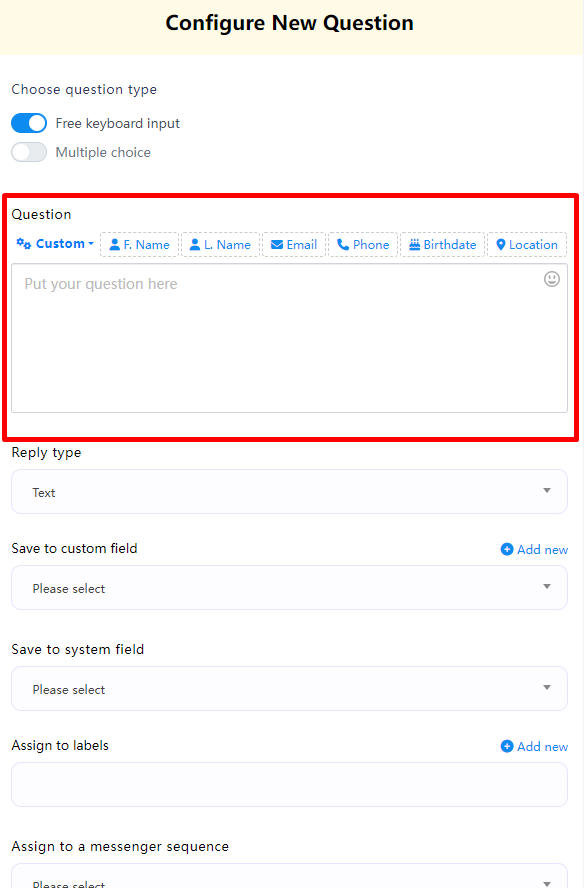
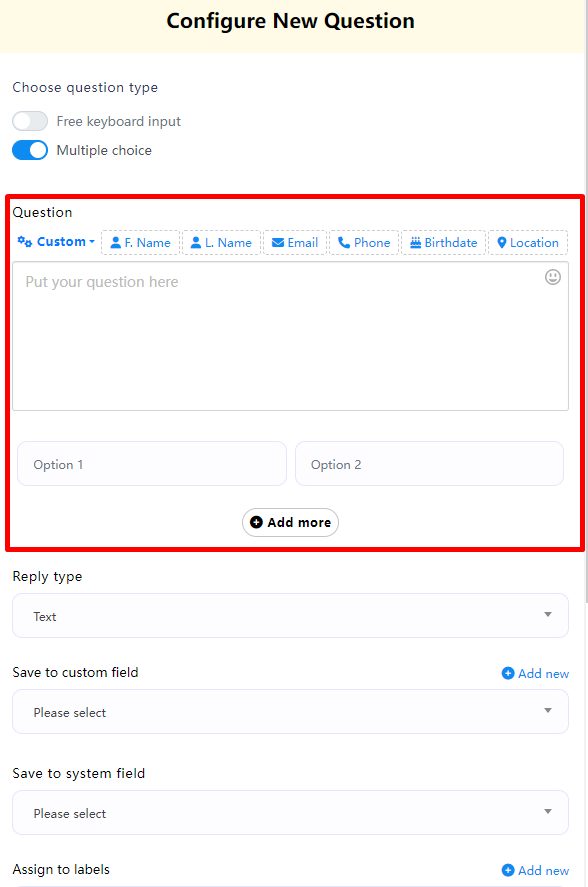
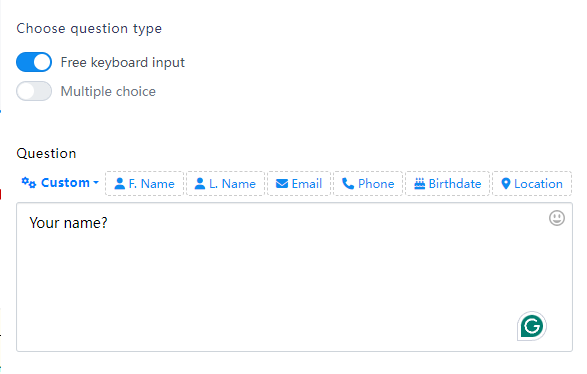
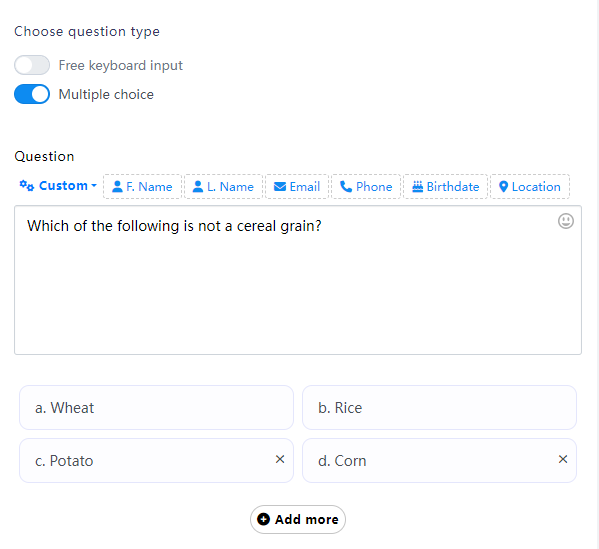
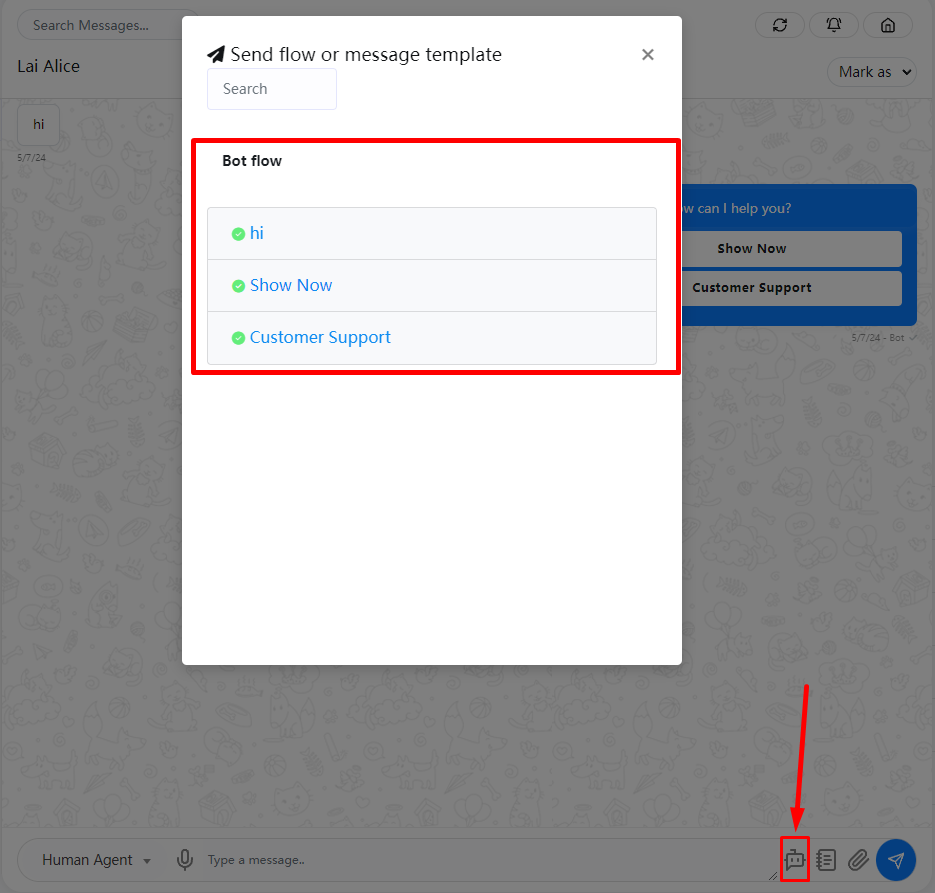
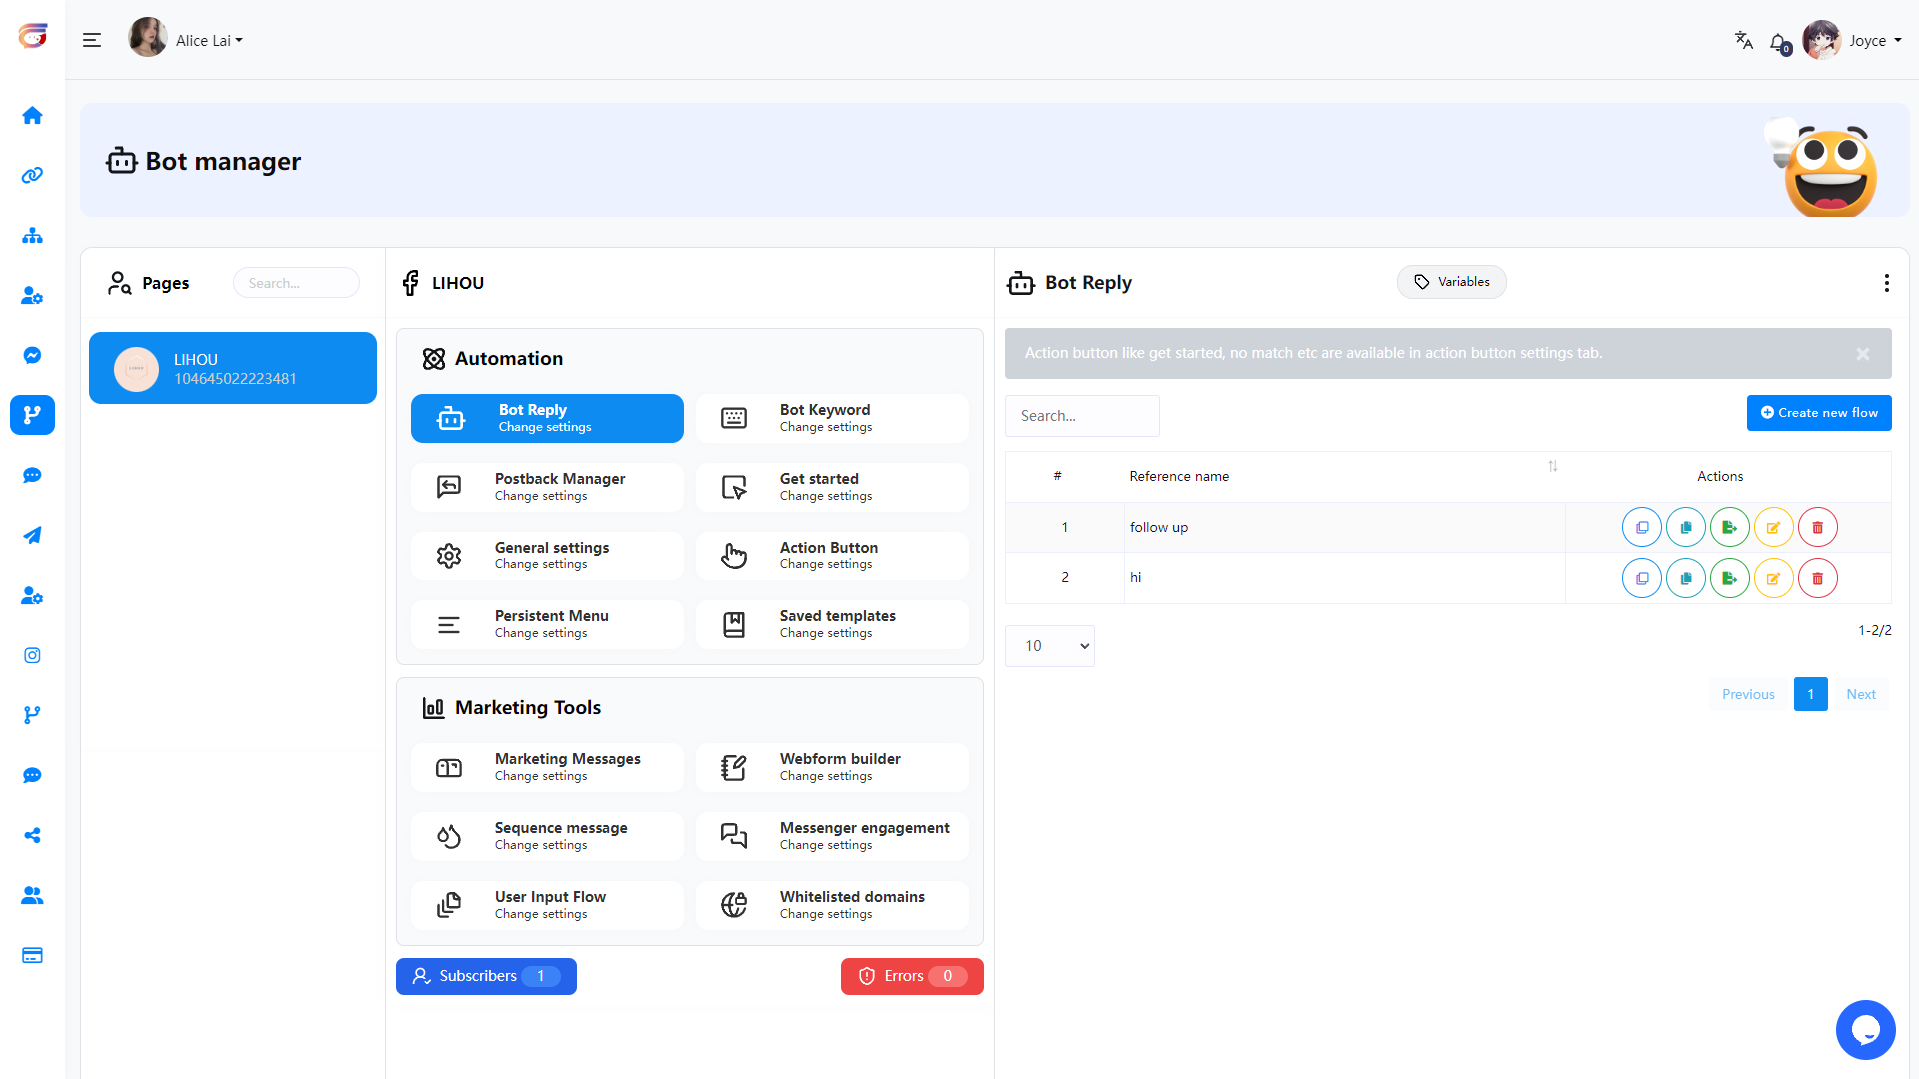
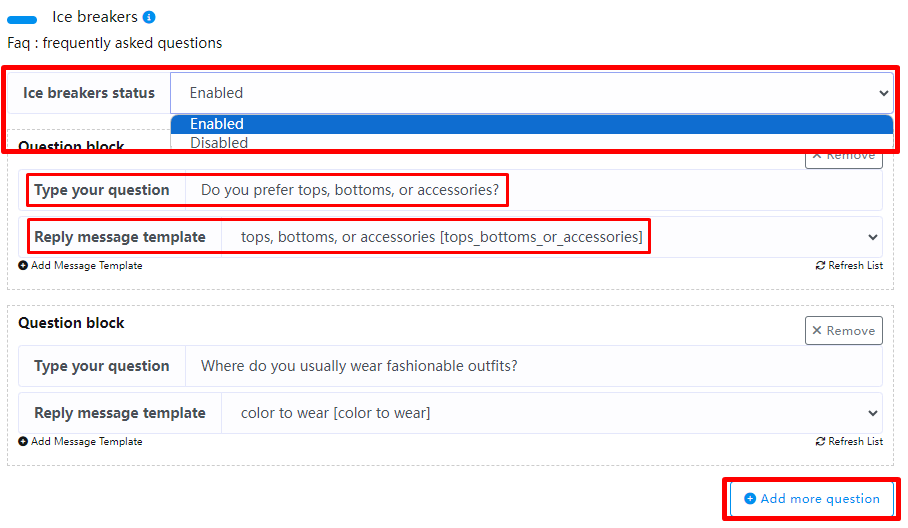
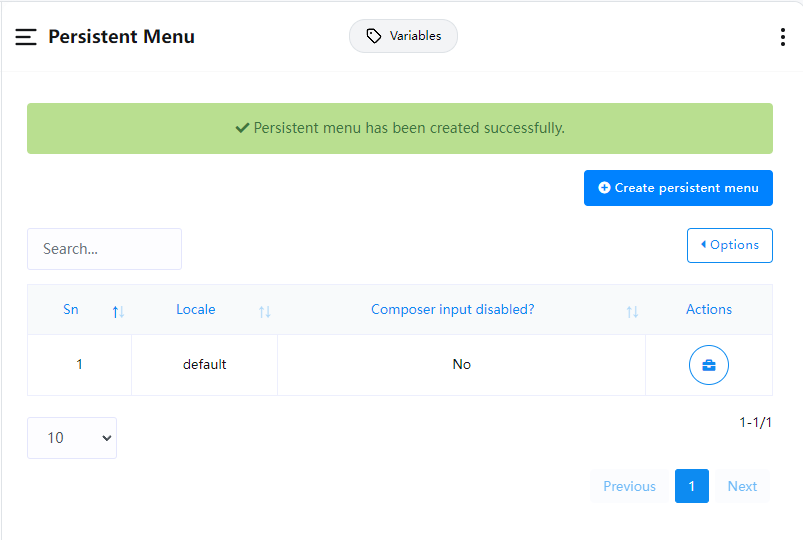
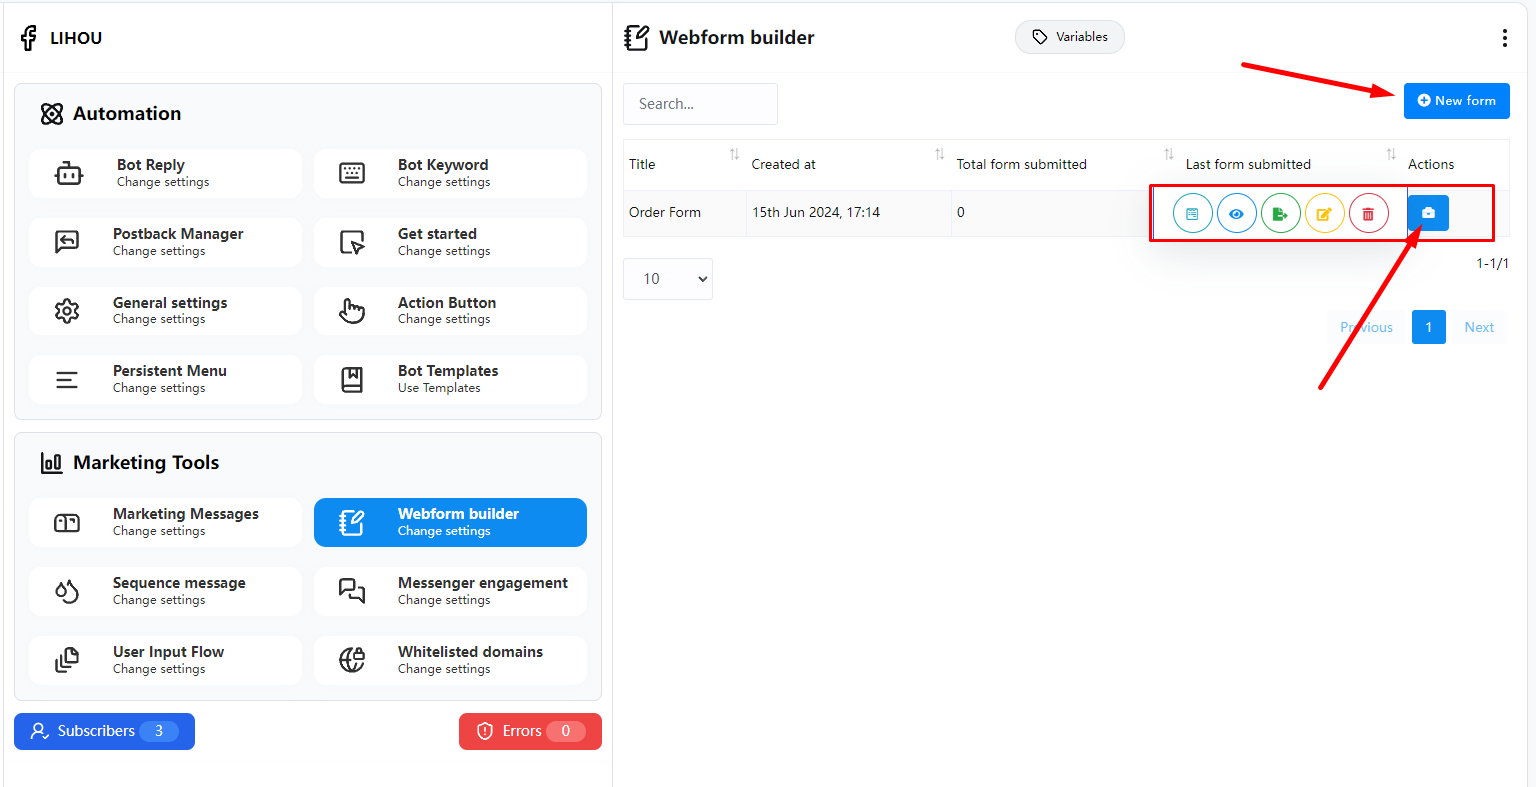
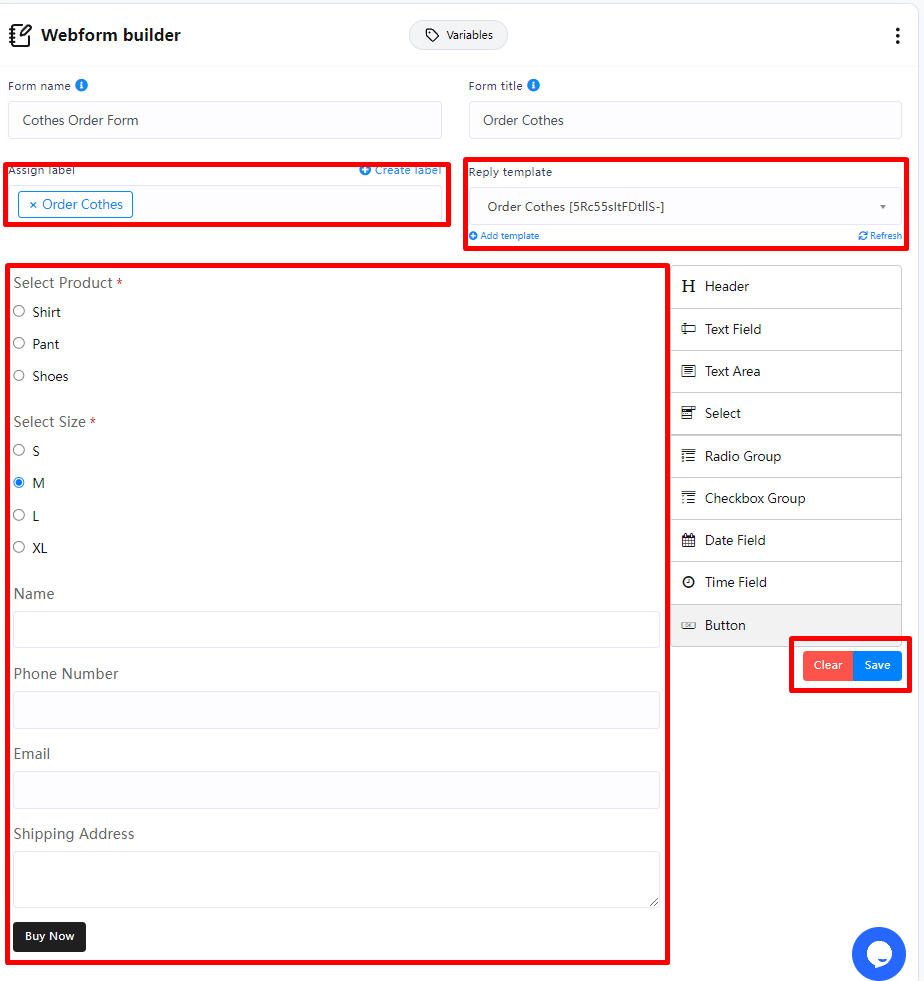
NEW Add Flow Templates
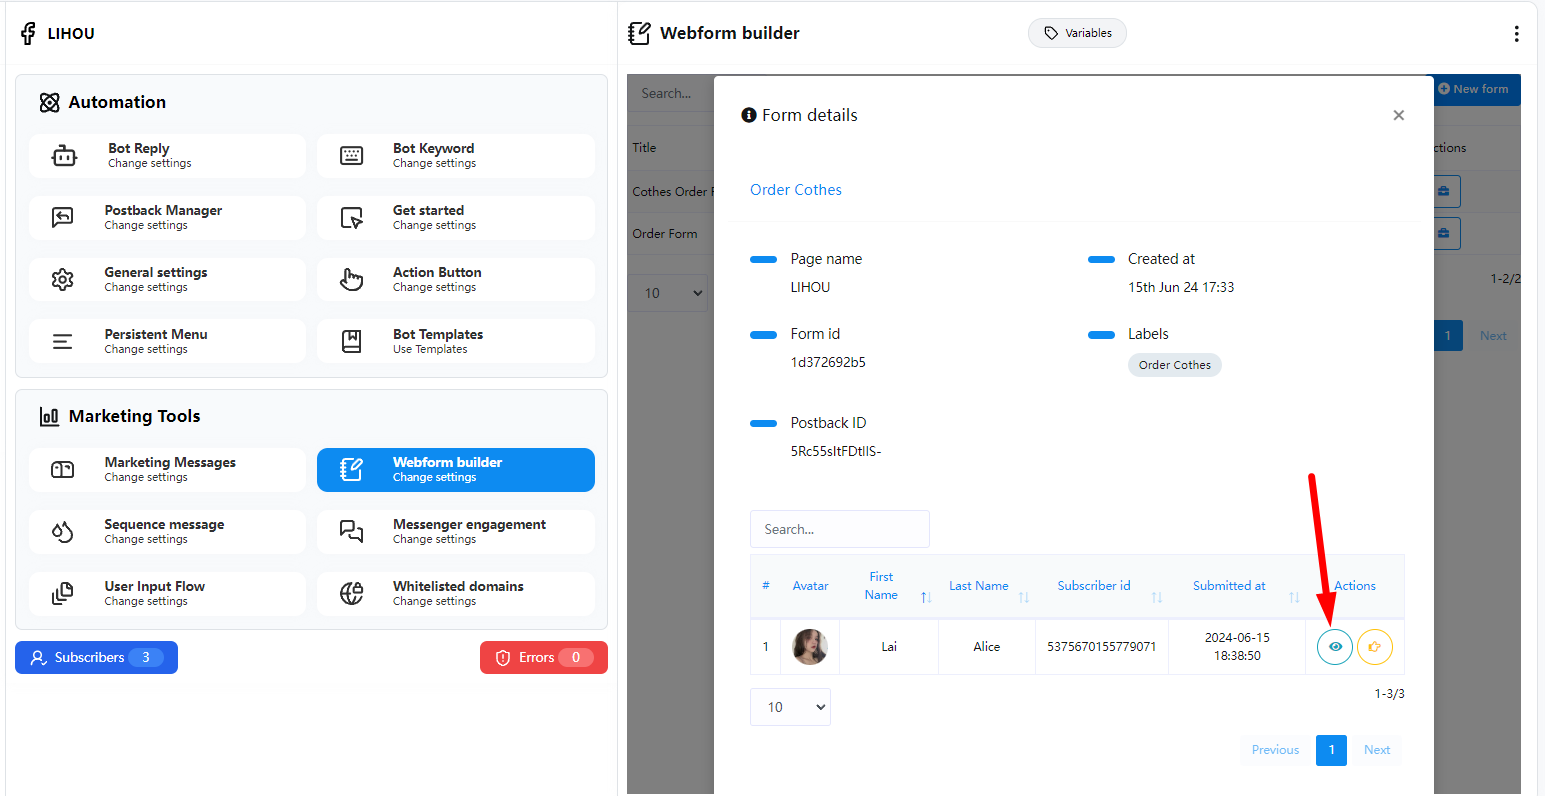
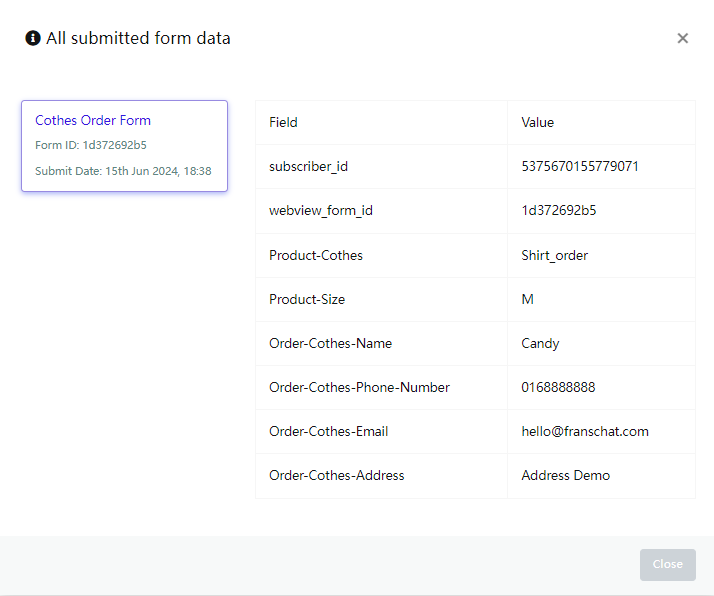
NEW Invoice Access After Subscription Plan
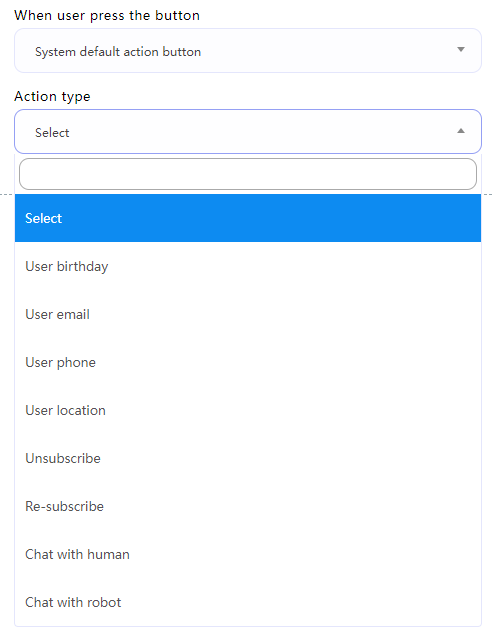
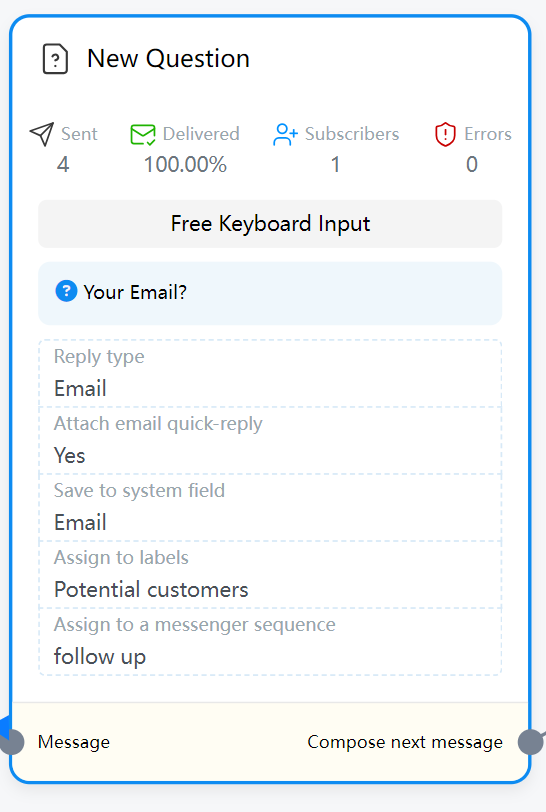
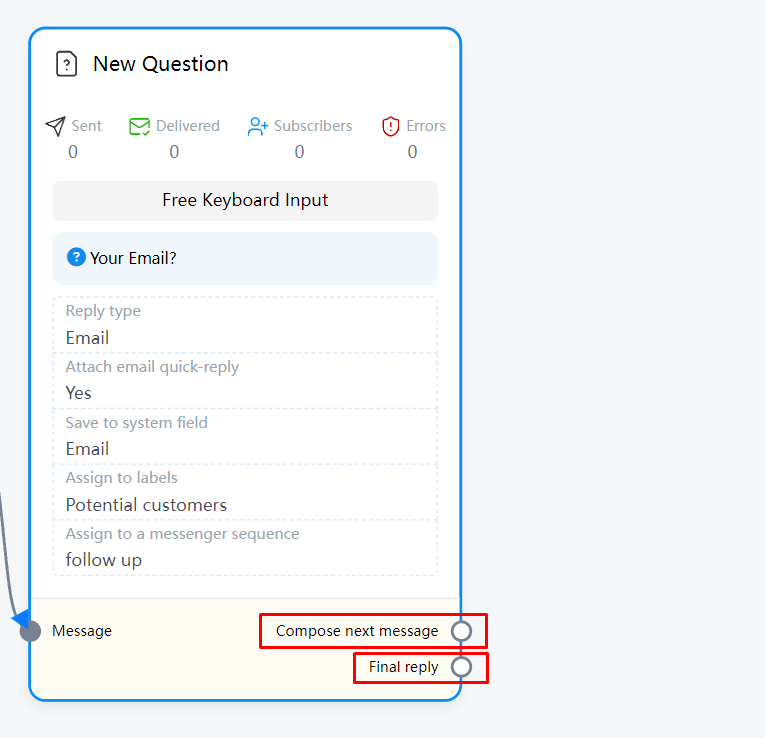
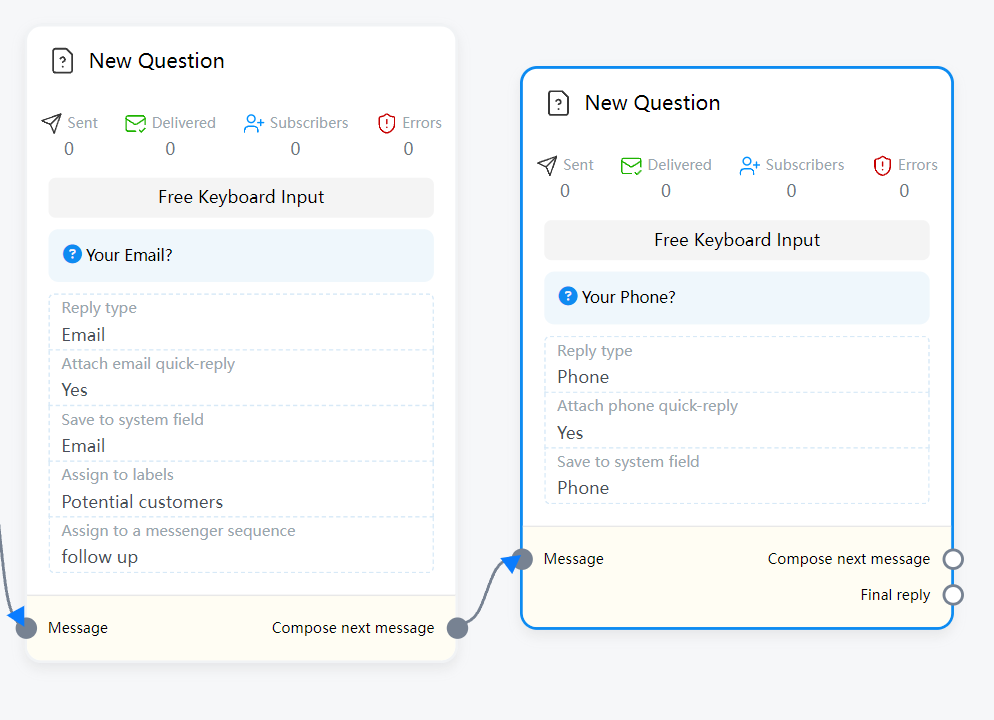
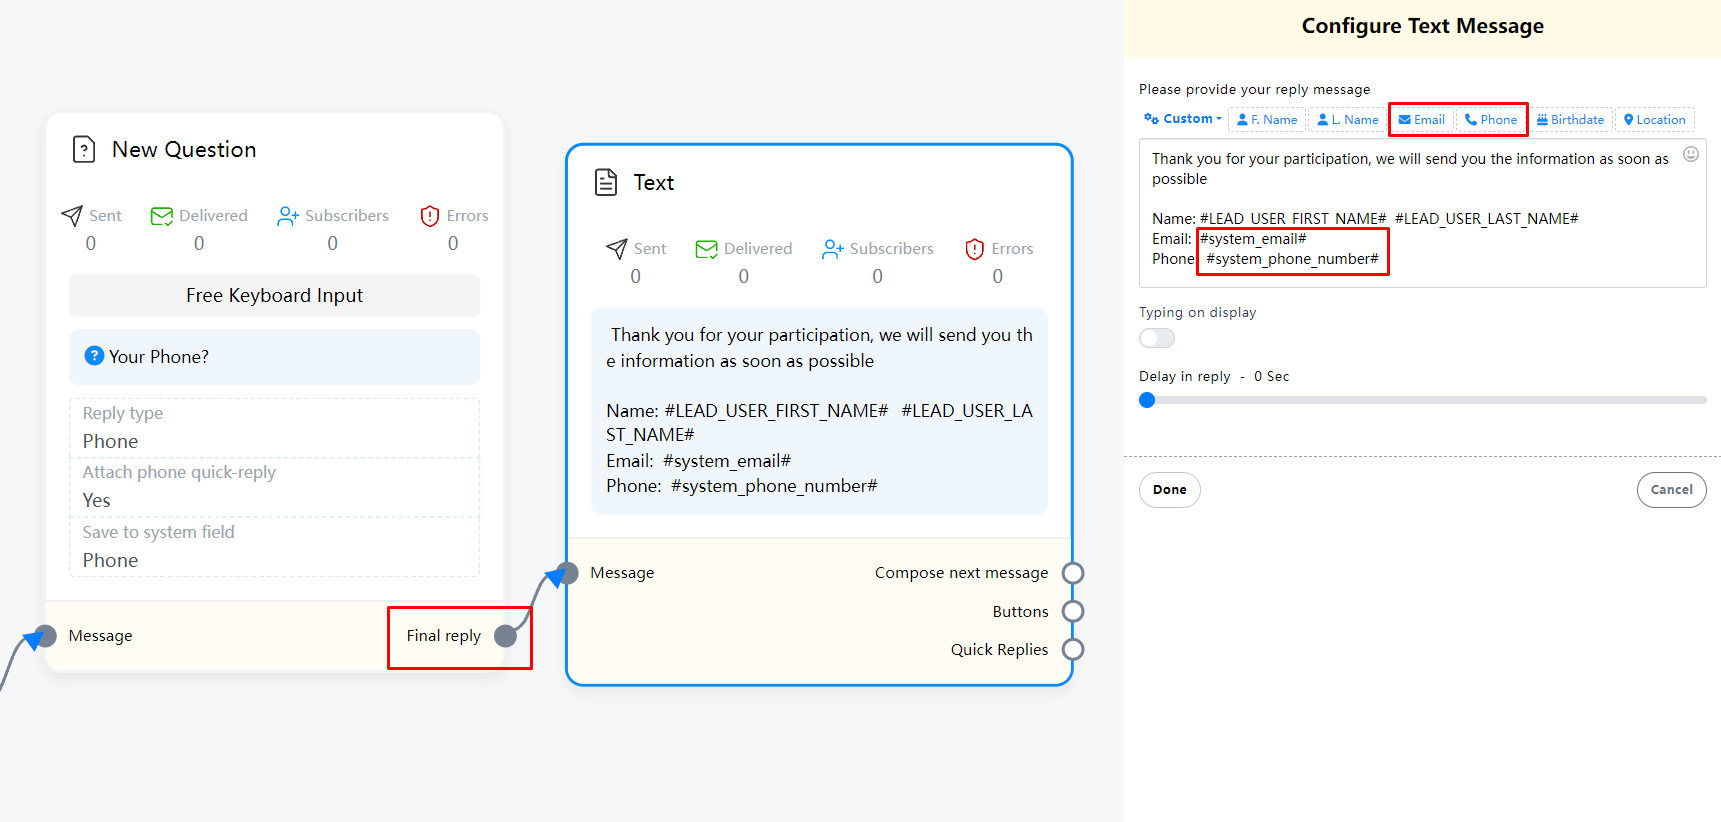
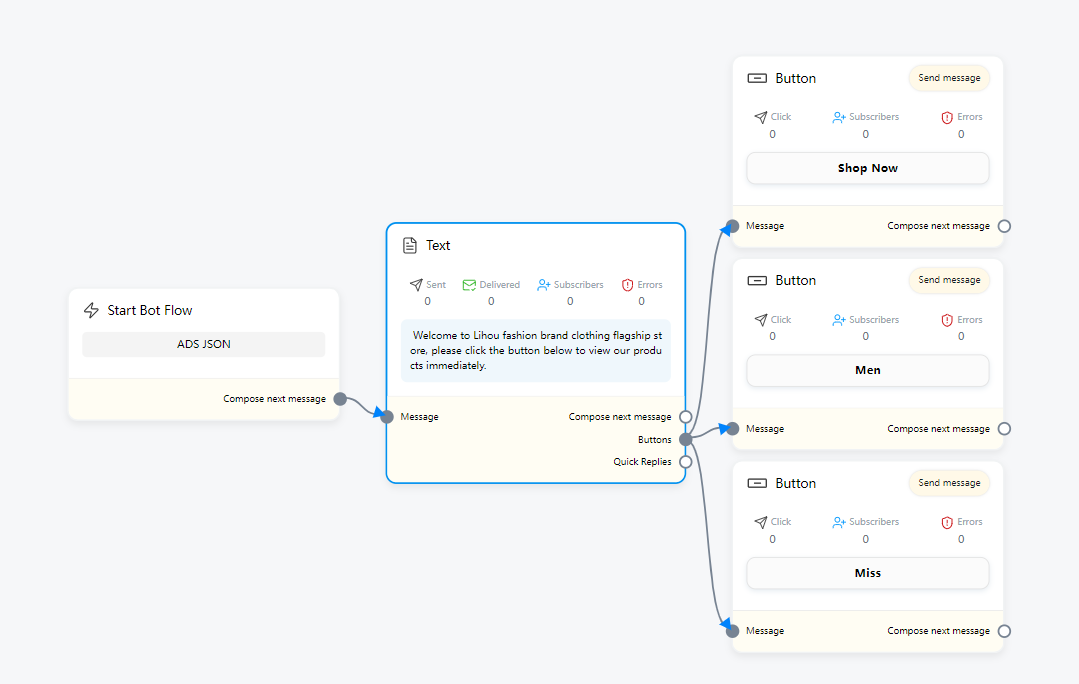
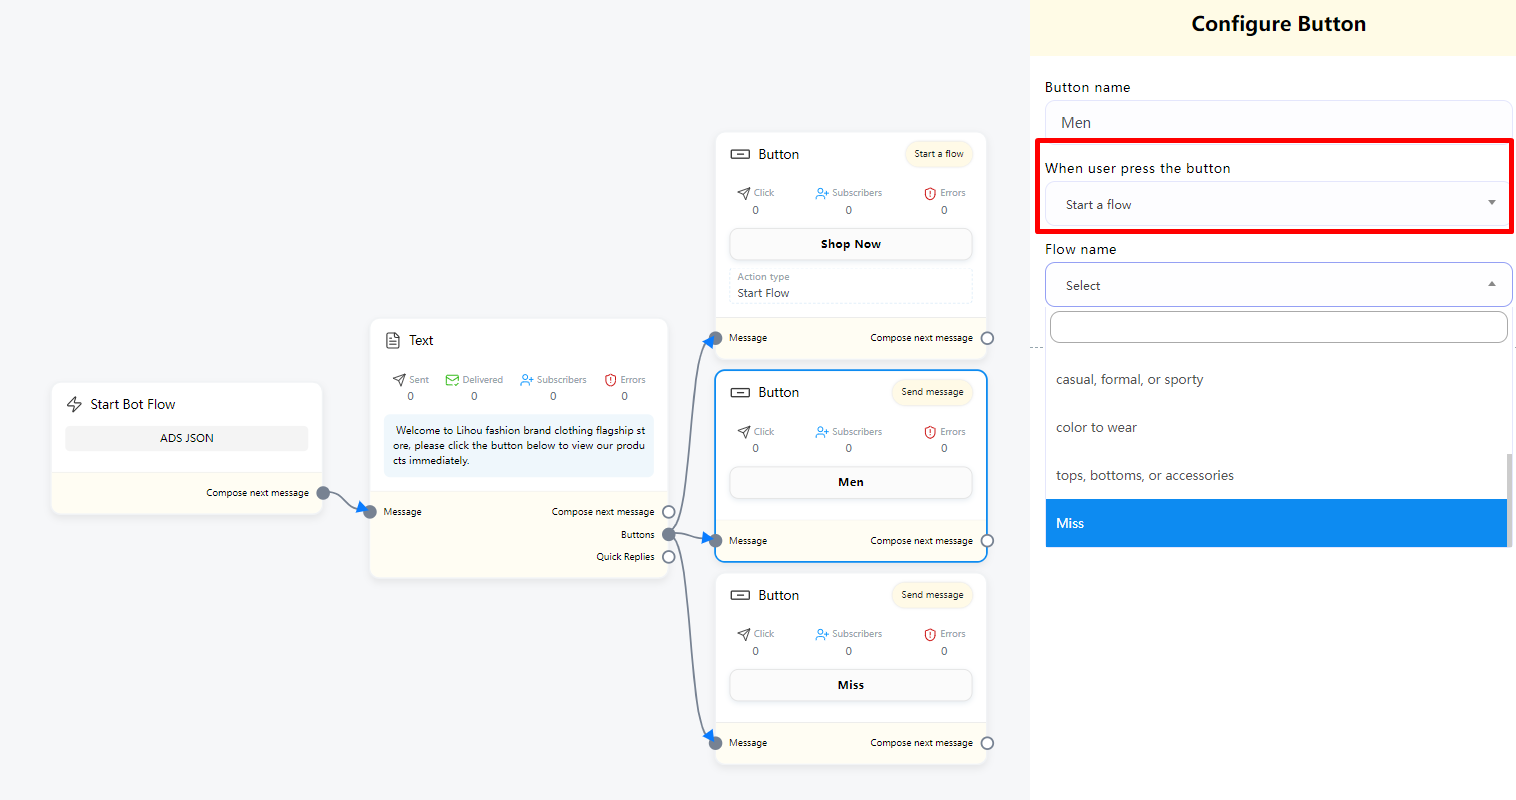
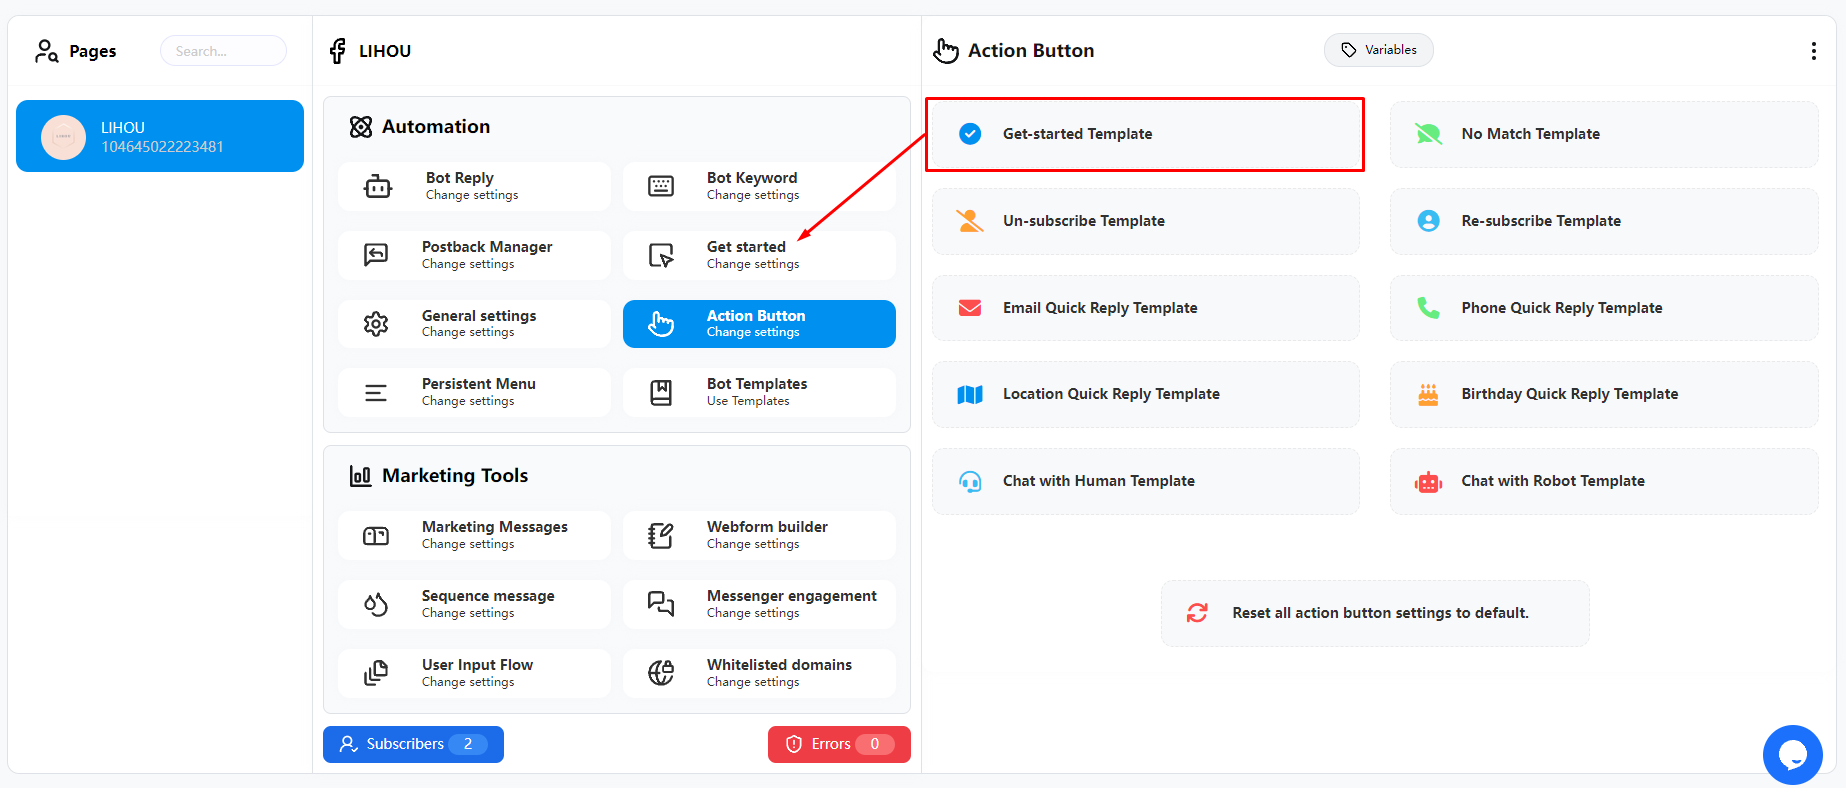
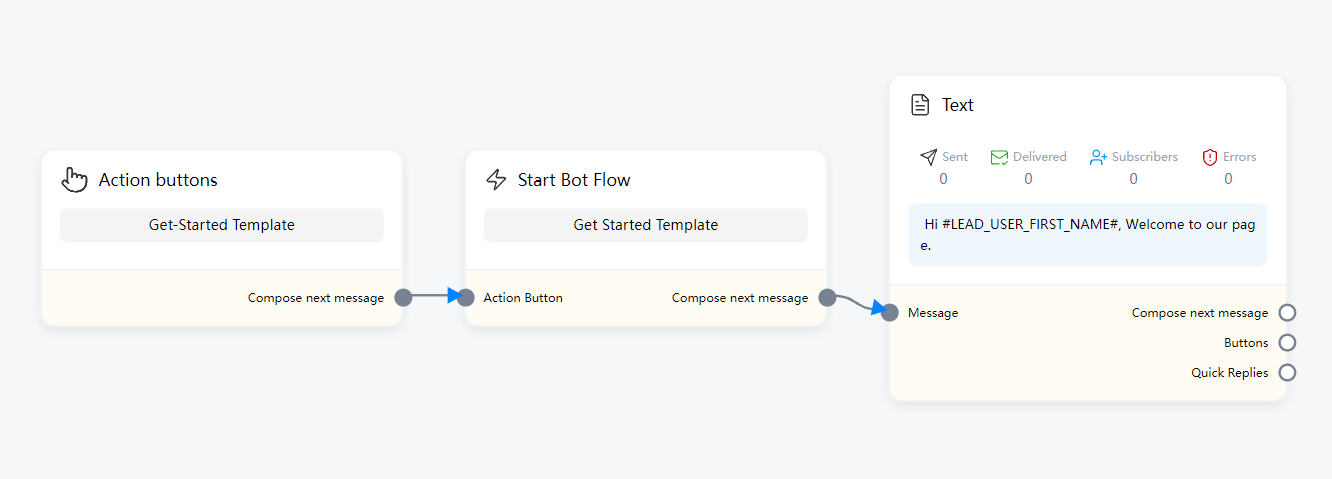
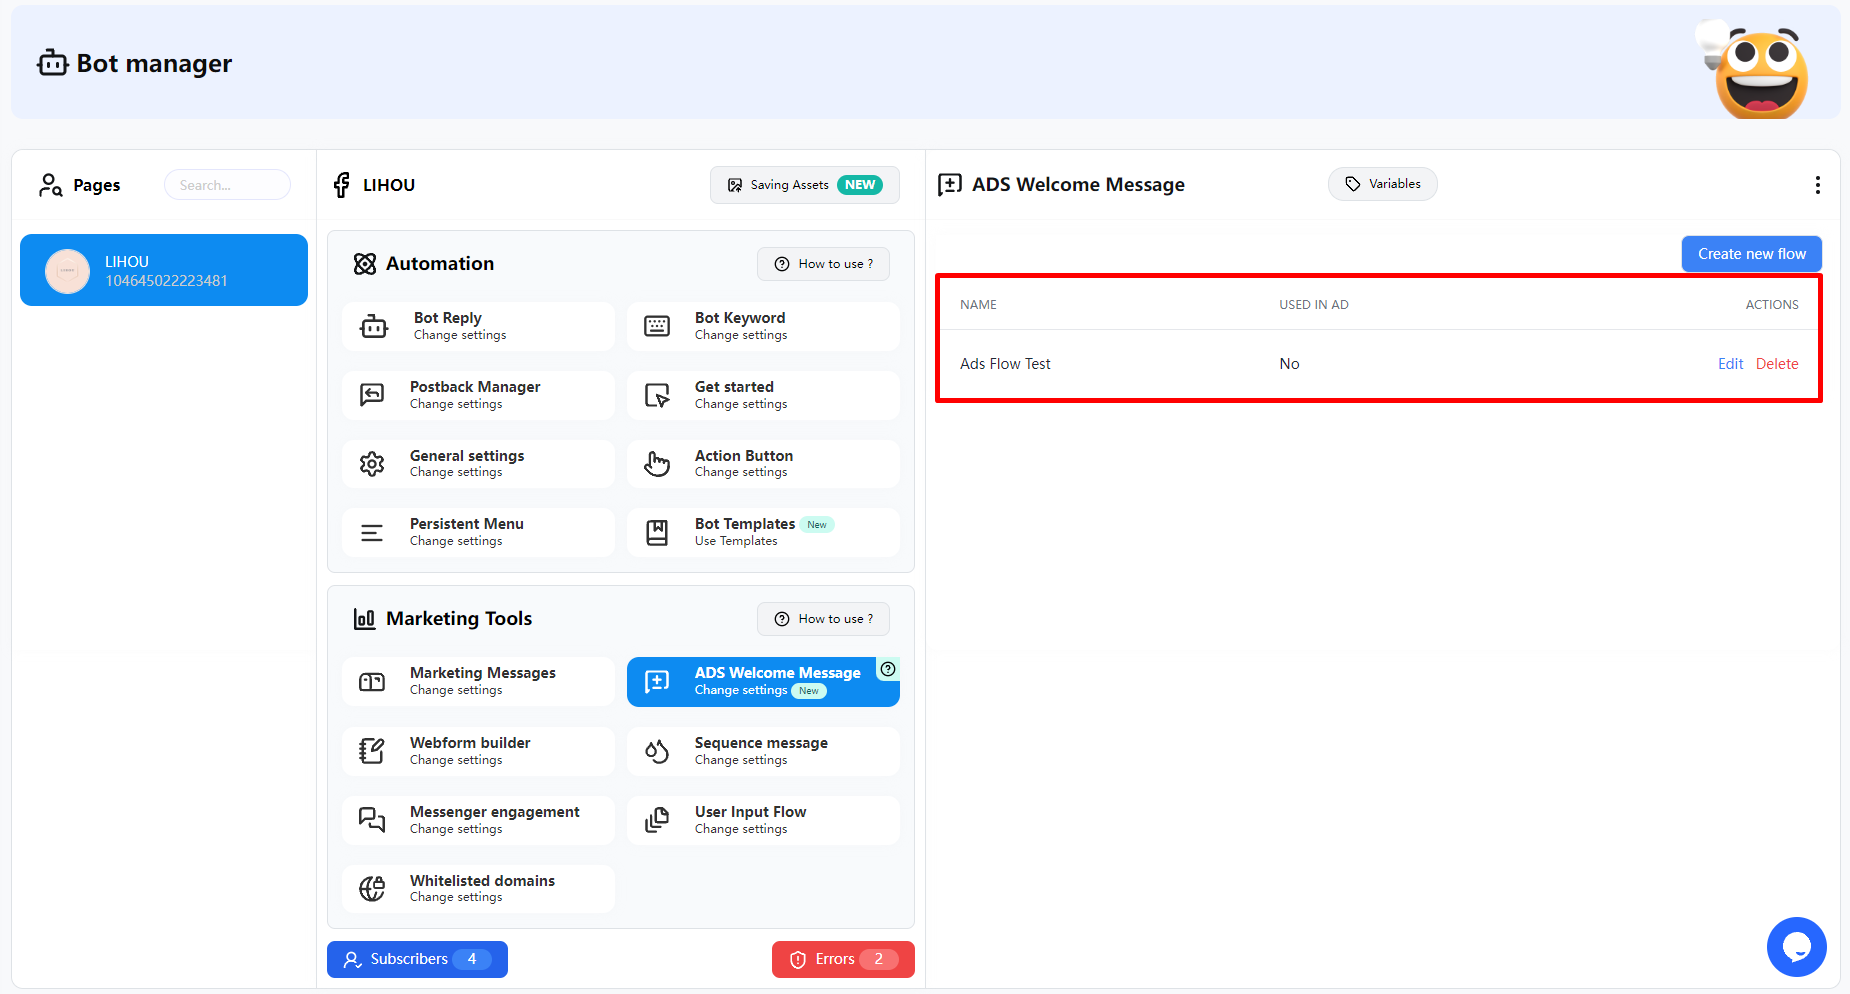
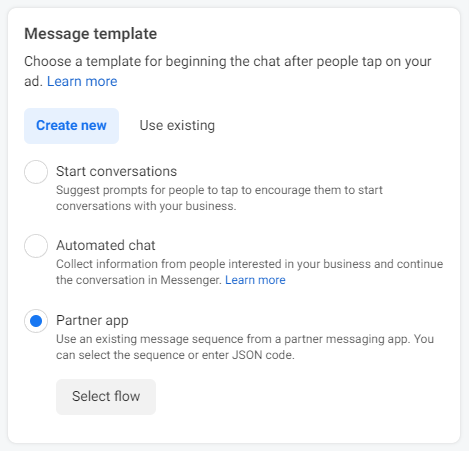
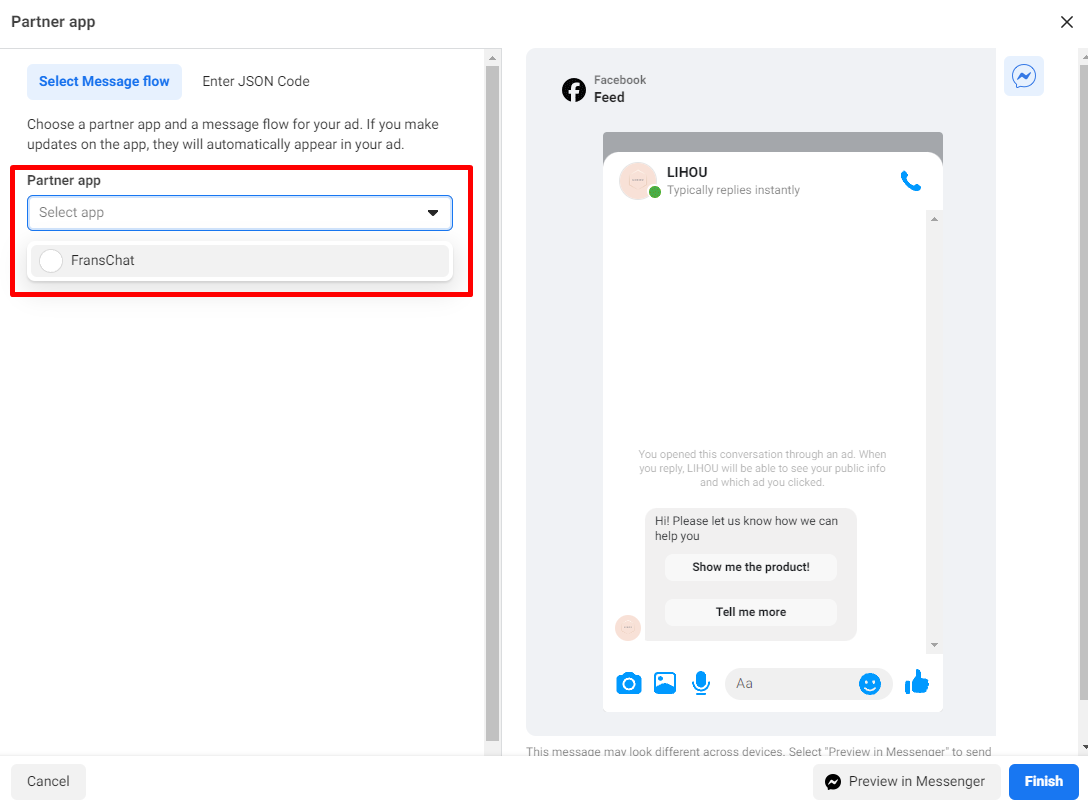
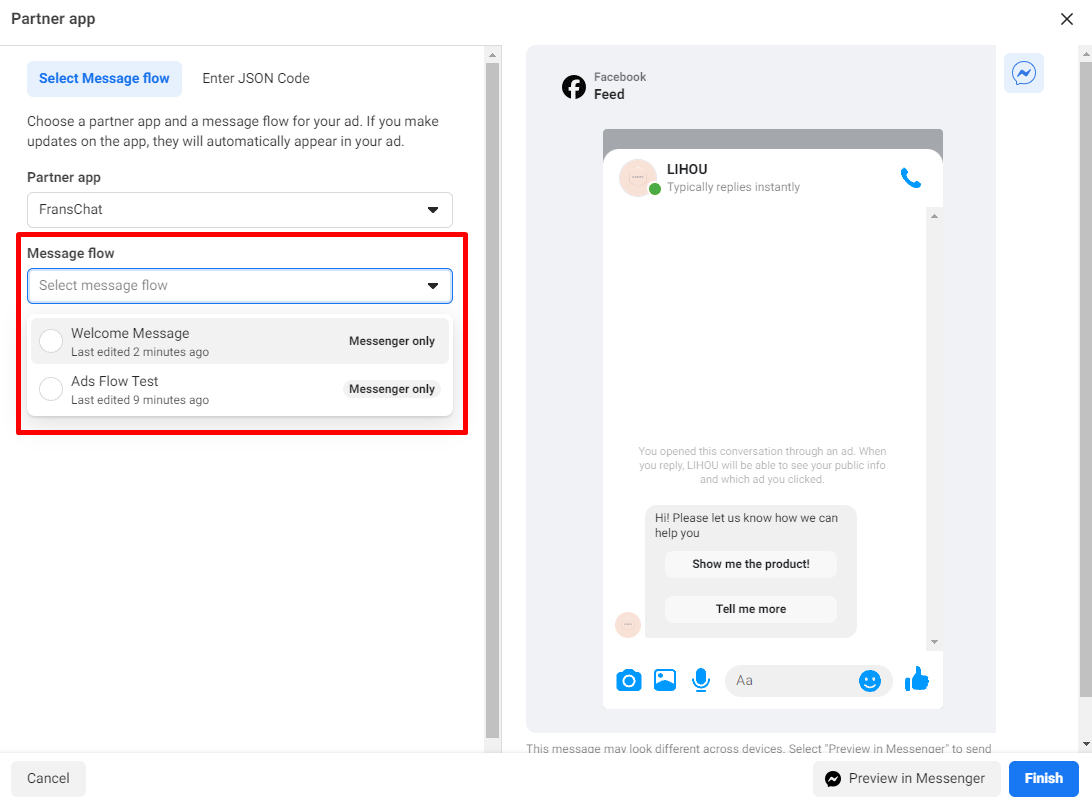
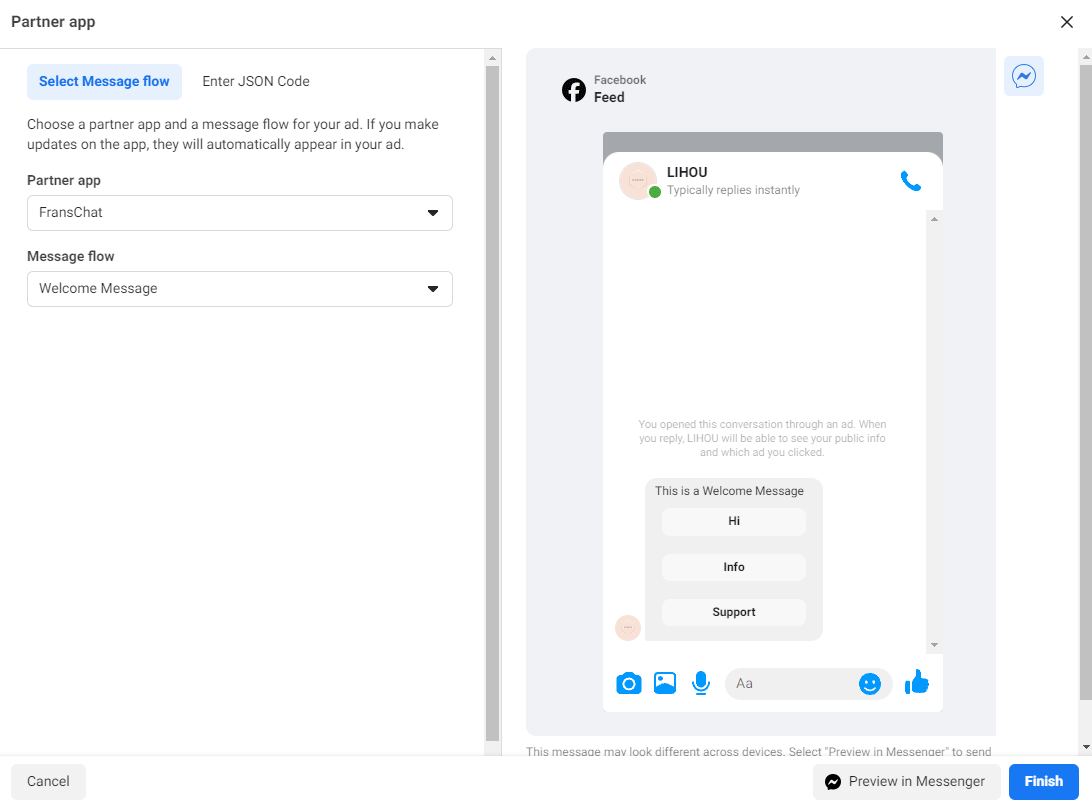
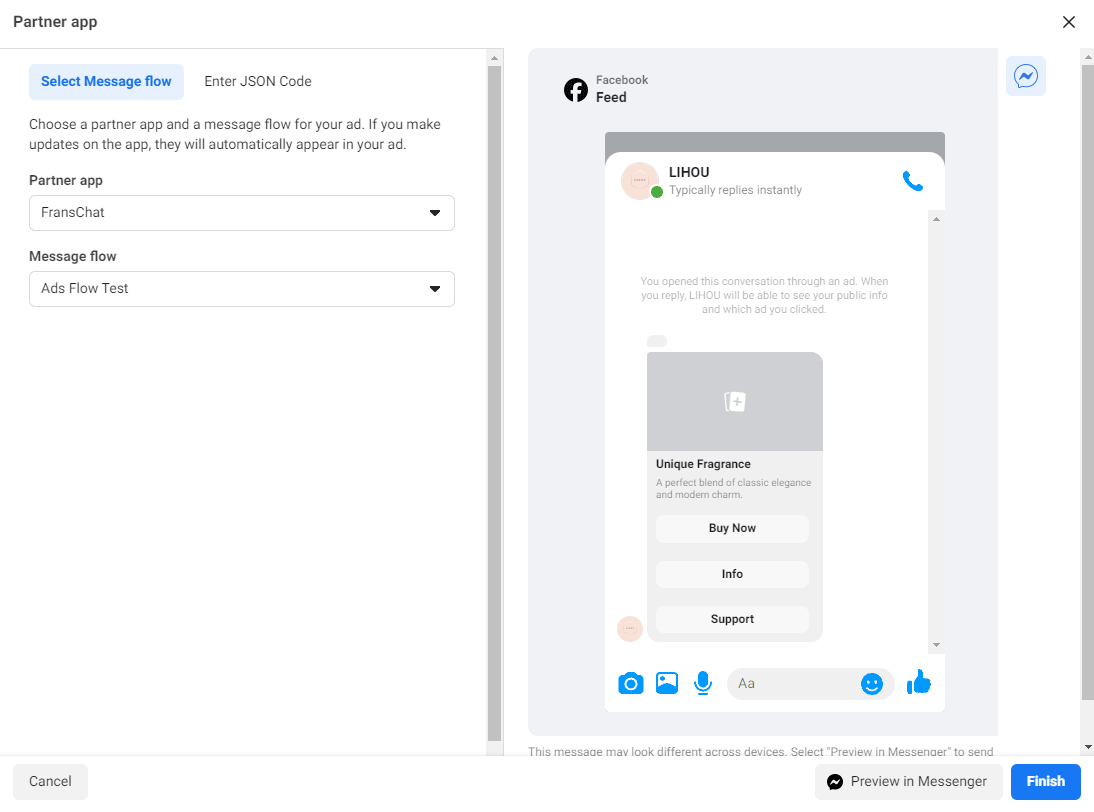
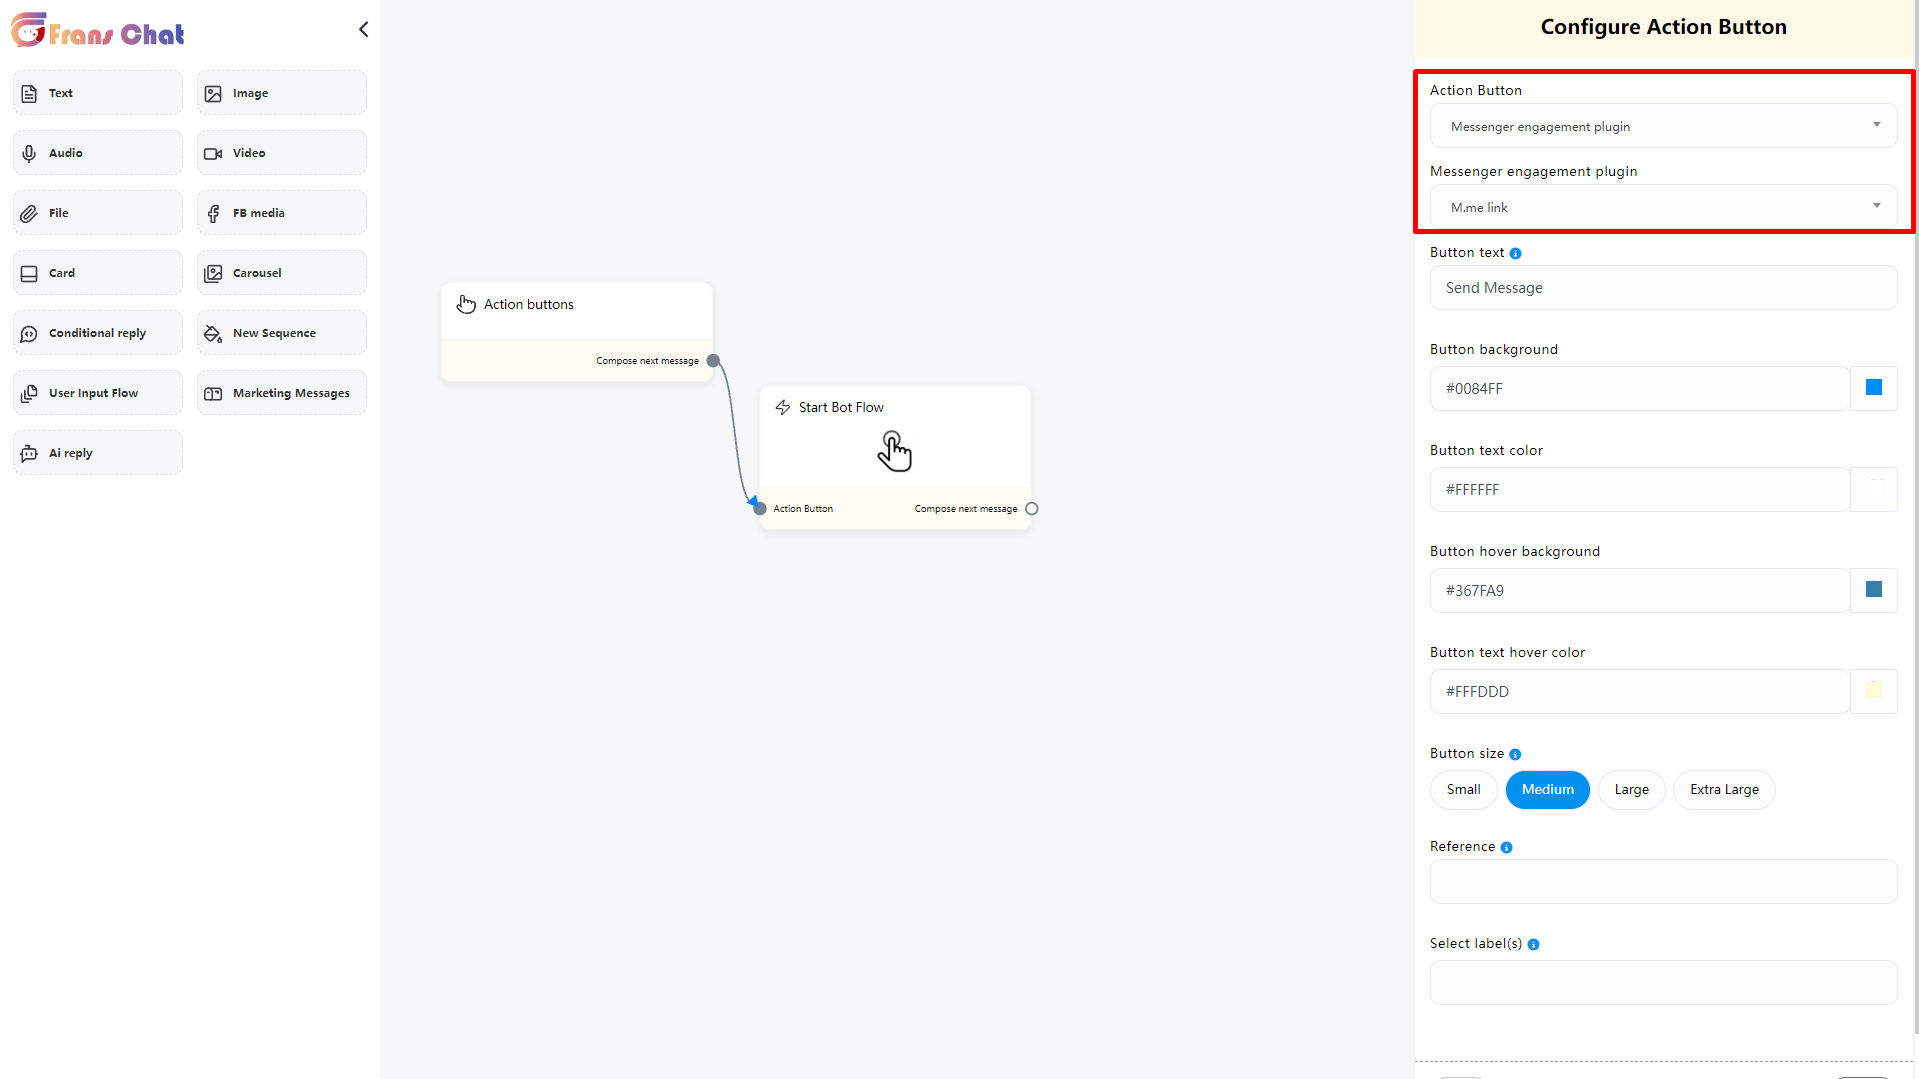
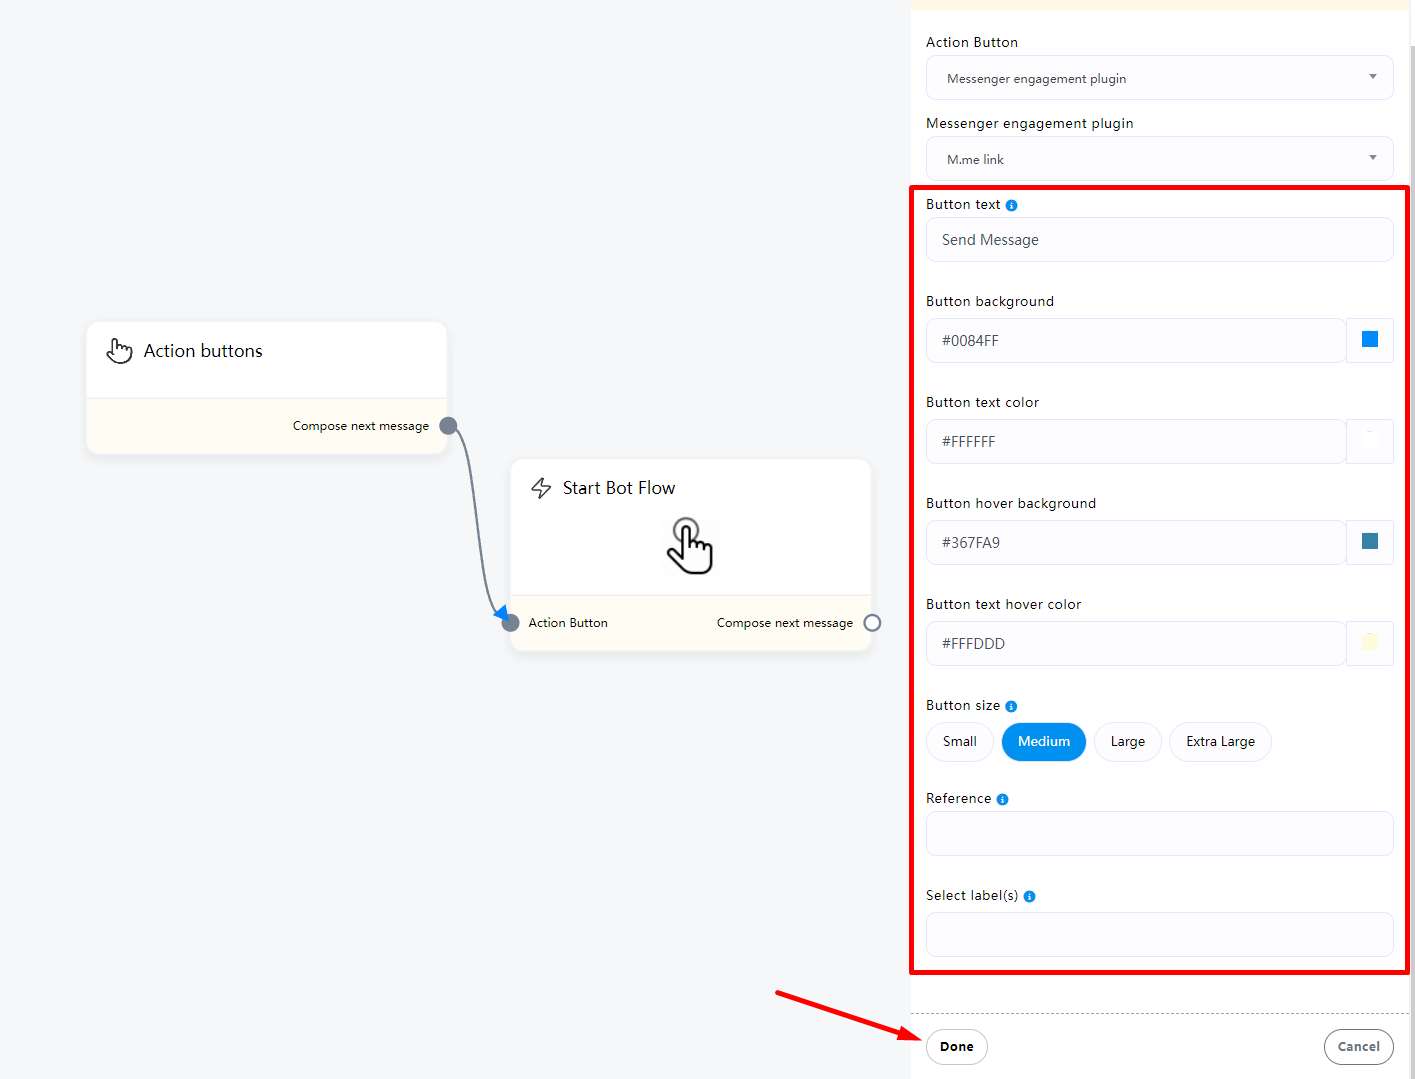
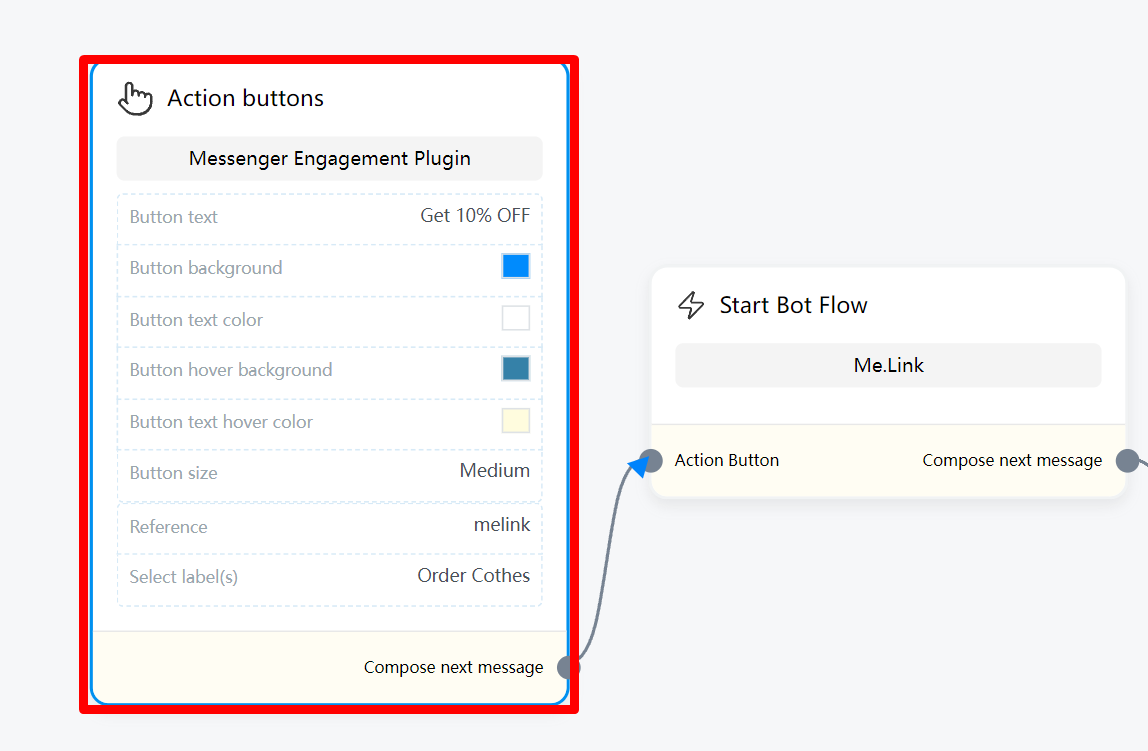
NEW Add Ads Welcome Message Flows
Update
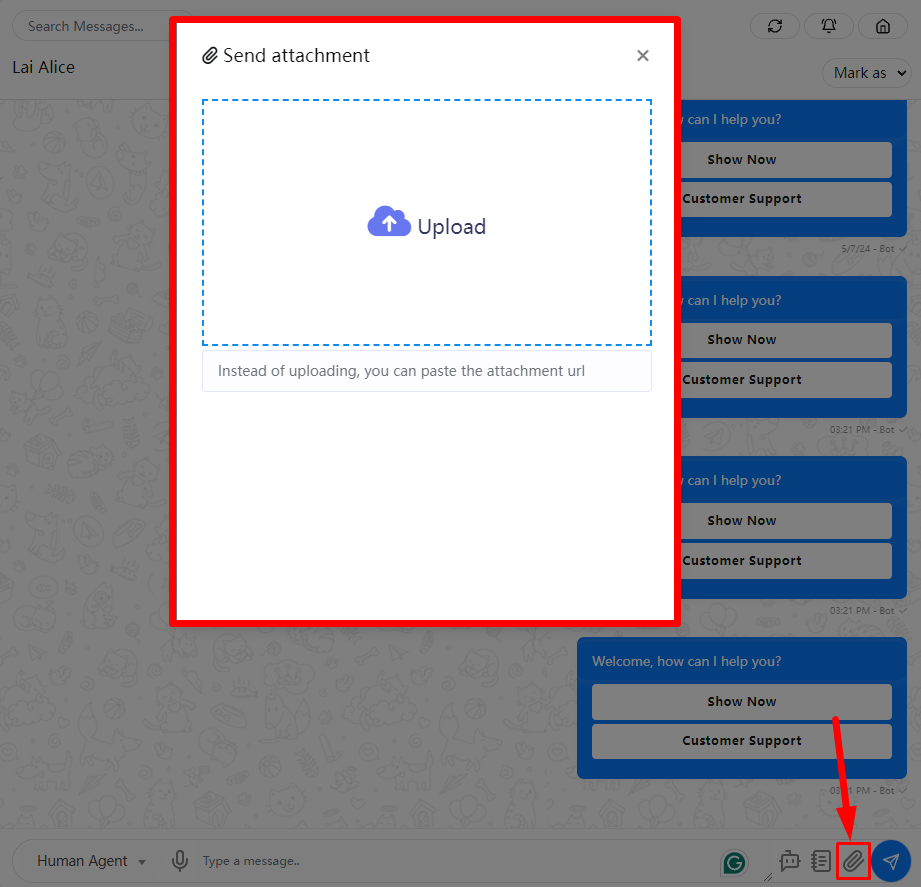
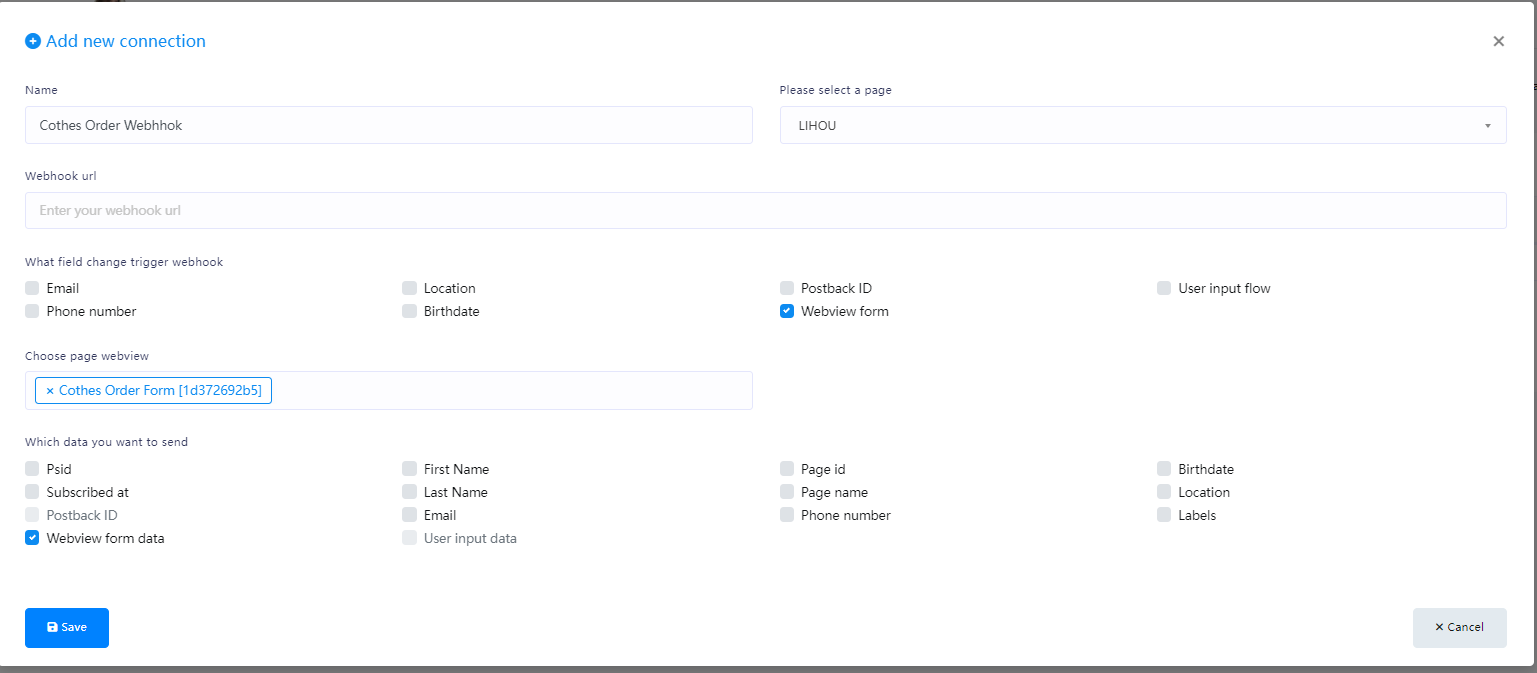
New Optimizing Asset Sending through the Messenger Platform
Updates
Updates Optimize automatic reply speed
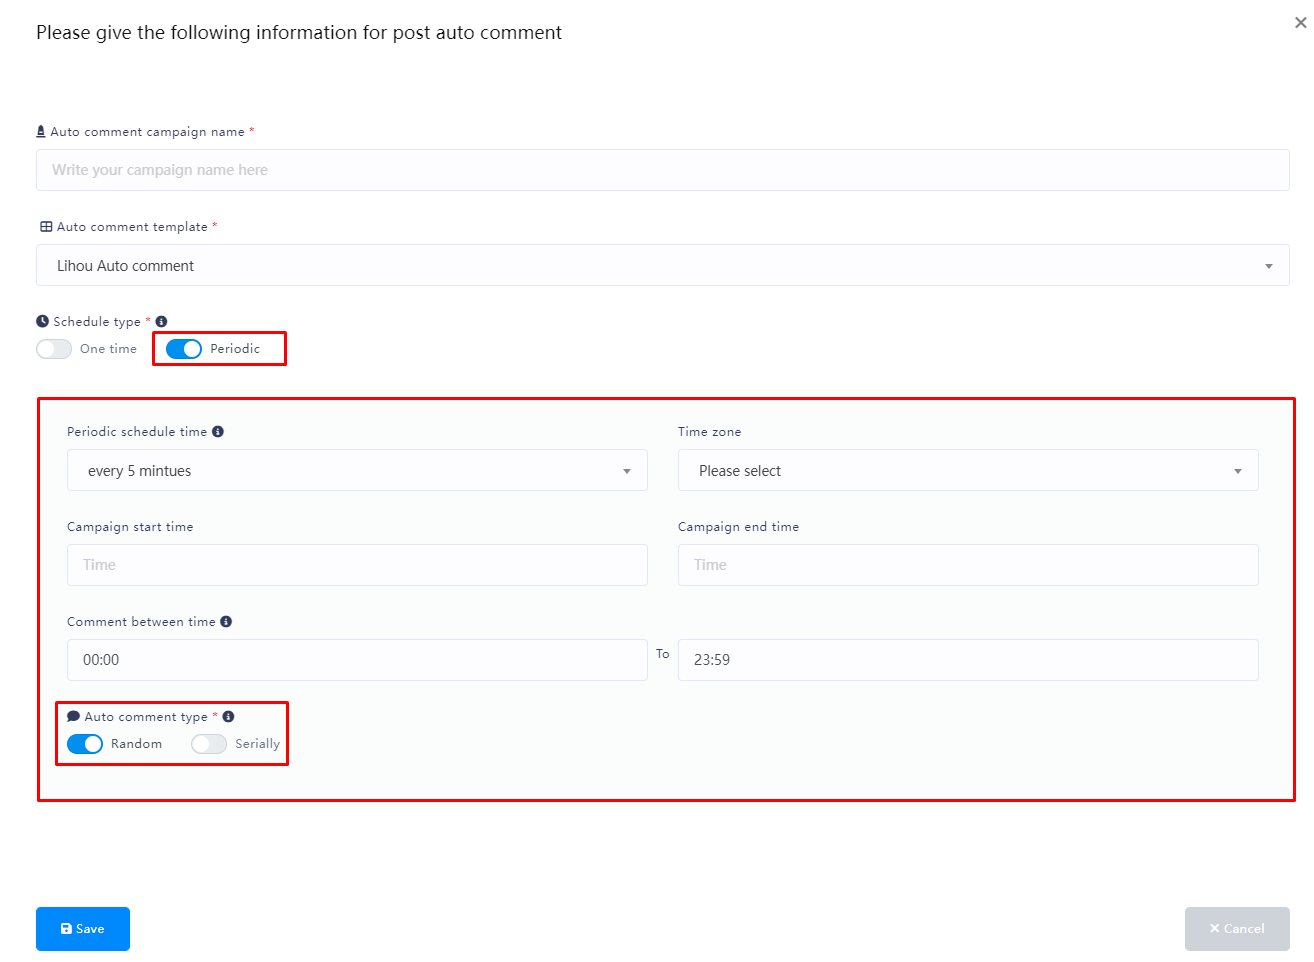
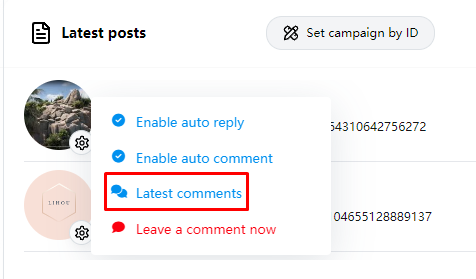
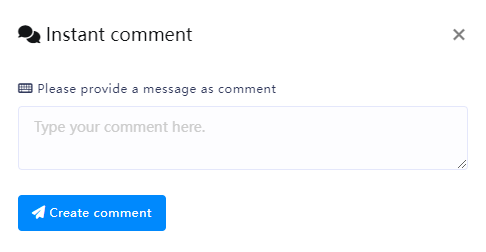
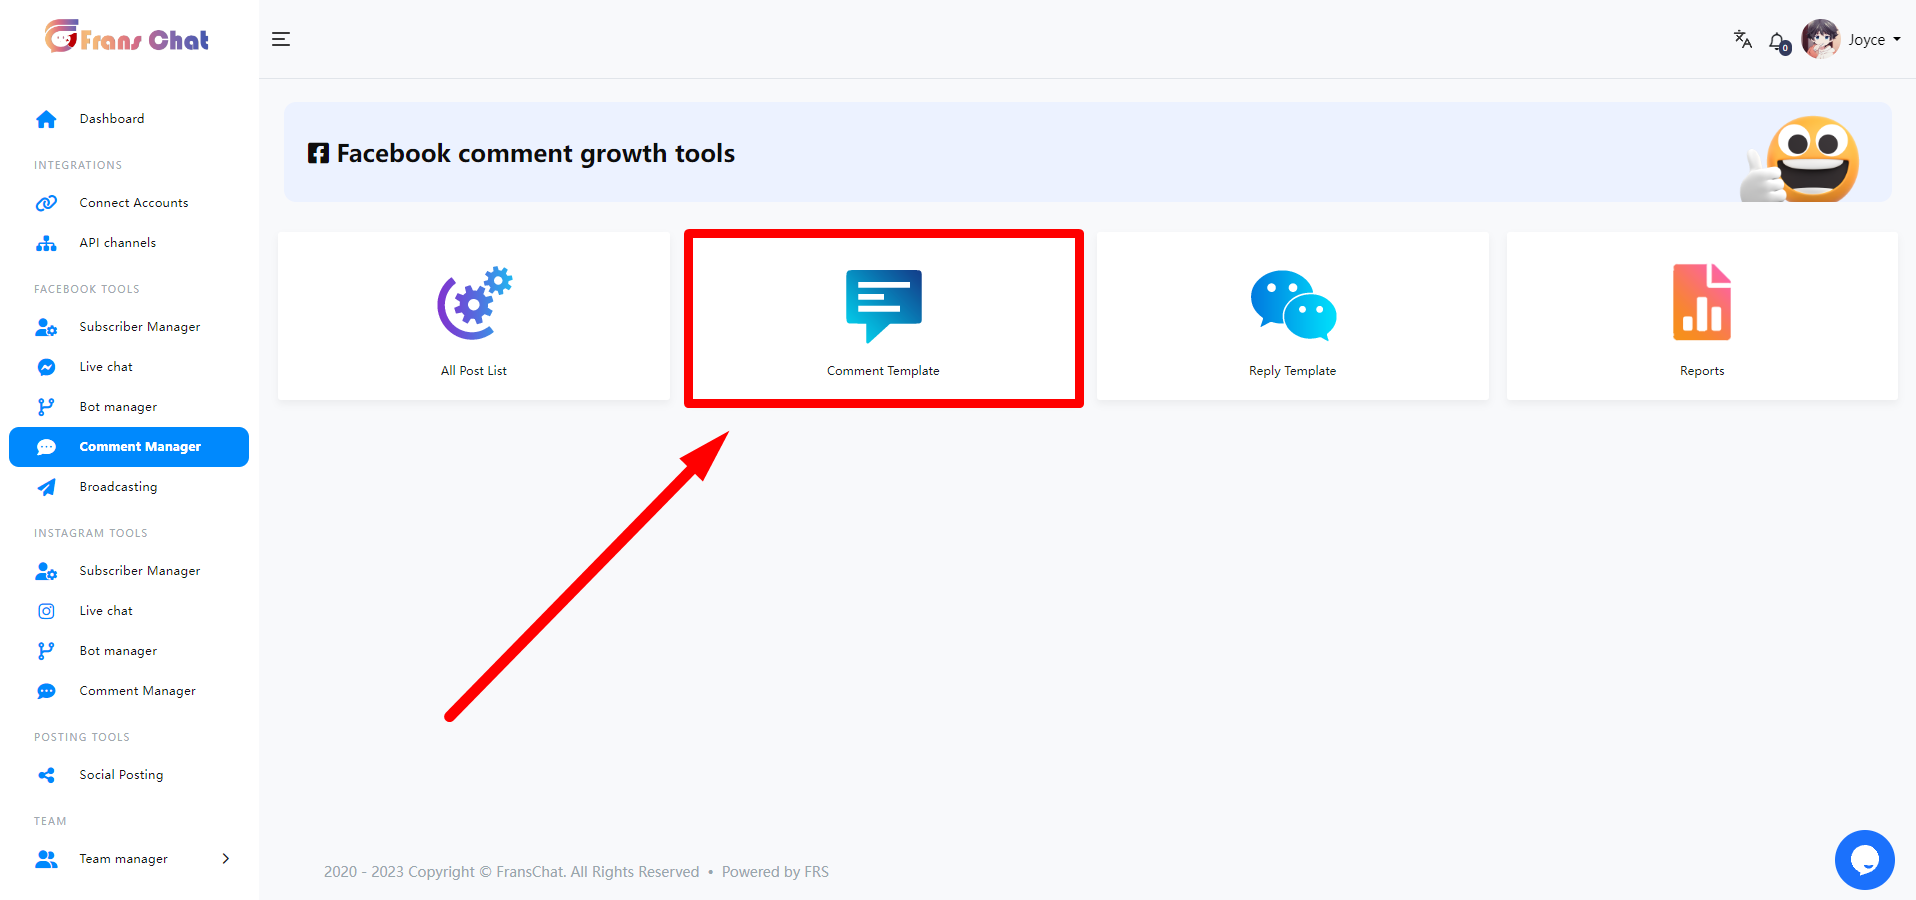
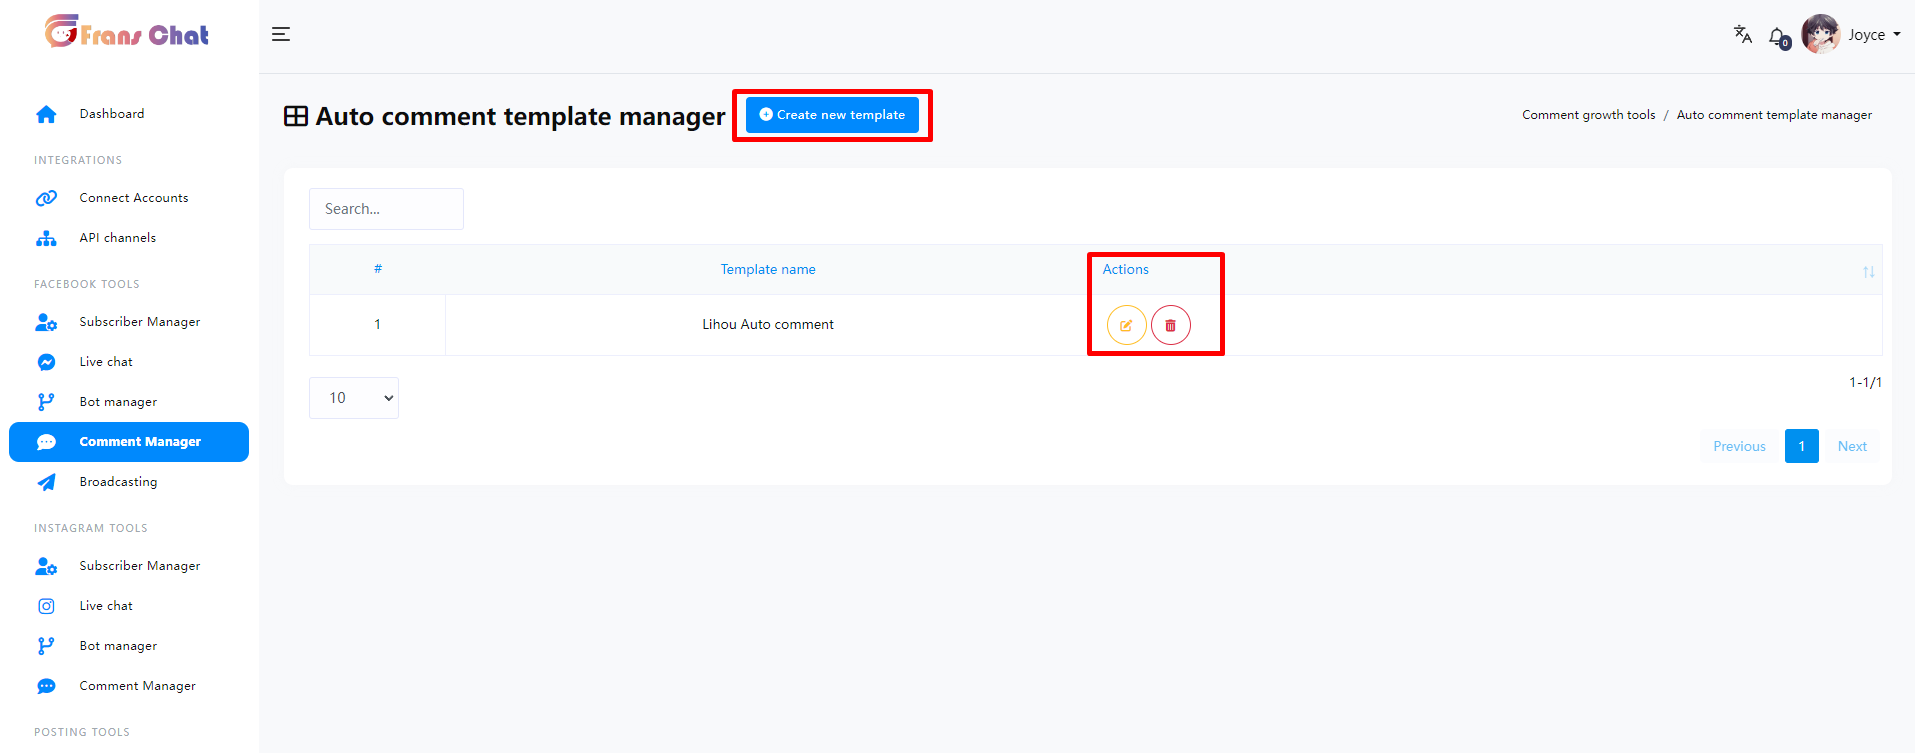
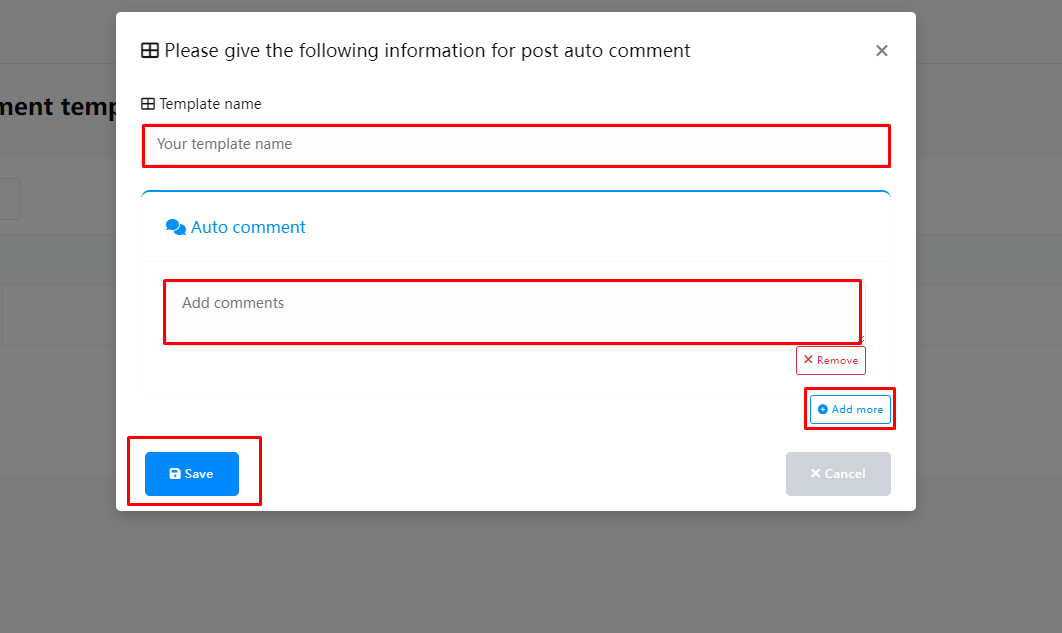
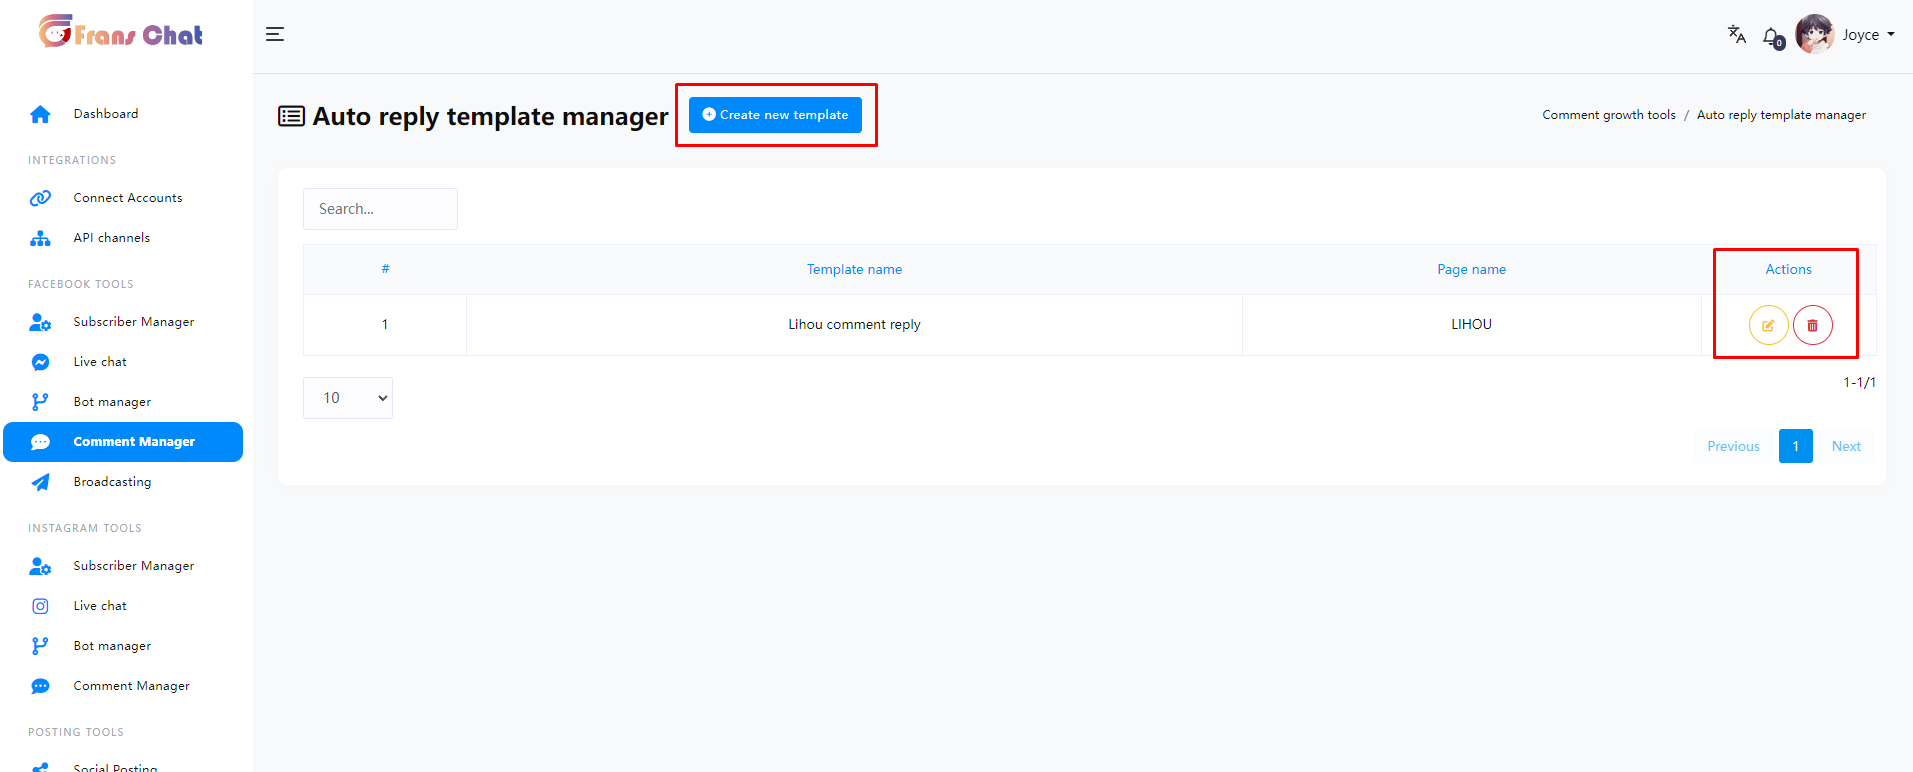
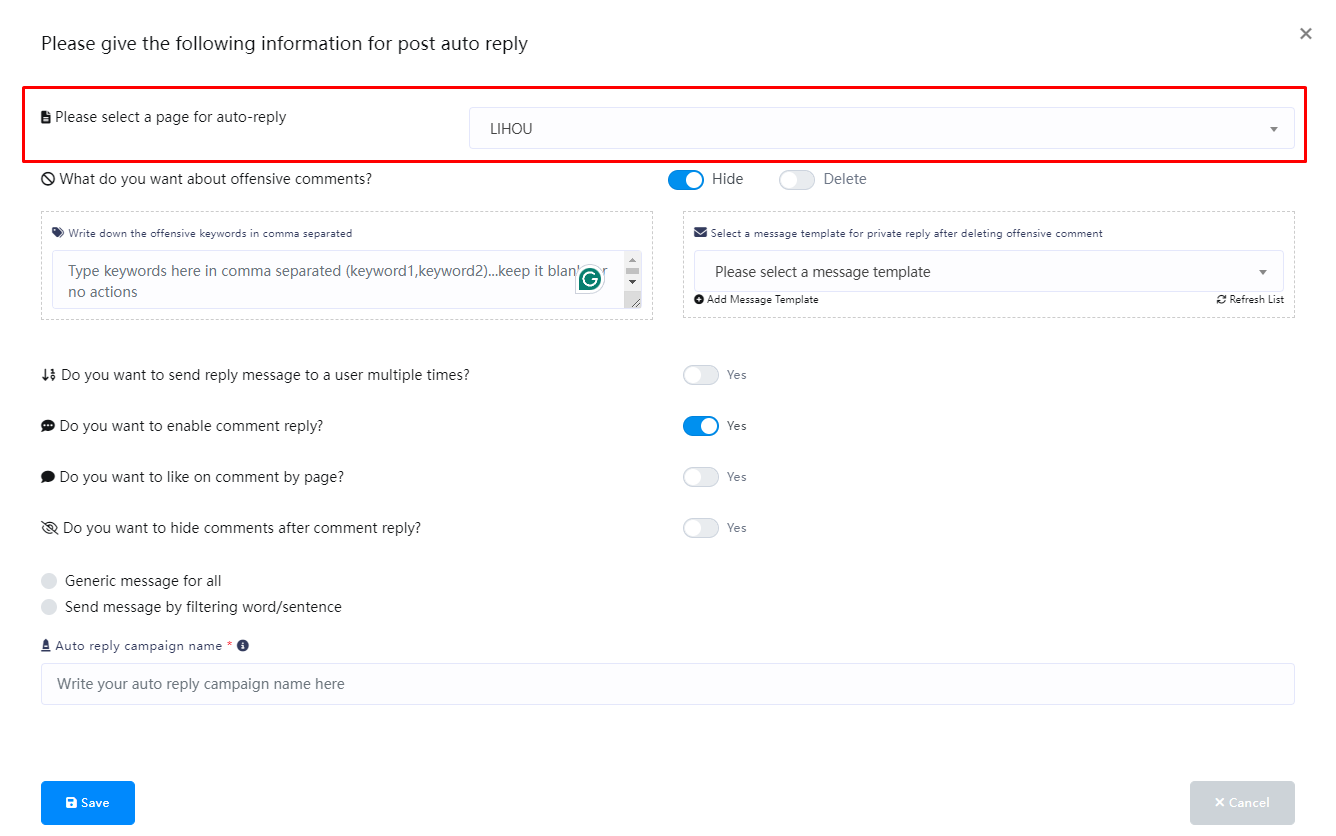
Updates Live Chat - Comment Private Reply Label
Updates
NEW Enhanced Livechat Experience
NEW User and Page Avatars in Chat Bubbles
FIXED Notification Click Issue
TWEAKED Image Preview in Chatroom
TWEAKED Message Display Optimization
Updates
Updates Ads Welcome Message Support postback on both platforms
Updates
NEW Add Flow Templates
NEW Invoice Access After Subscription Plan
NEW Add Ads Welcome Message Flows
Update
New Optimizing Asset Sending through the Messenger Platform